4 Ways To Put Your Site In Maintenance Mode
by
7-layers of Security for Your WordPress Site
Your website needs the most comprehensive security to protect it from the constant attacks it faces everyday.

Putting your site in maintenance mode is like putting an “Out Of Service” sign outside an elevator. It makes sure clients and customers know that there is the site is undergoing changes and to not interact with it.
Without maintenance mode, you risk losing data like comments, new posts, new registrations, new orders, etc. This is because there is nothing stopping a reader or customer from making those changes to your site.
But, when it comes to putting your site in maintenance mode, some concerns might arise. You may be worried about the impact on your site’s SEO, or whether maintenance mode can be disabled if needed.
In this article, we will explore four ways to put your WordPress site in maintenance mode. Moreover, we will show you how to do it with the least impact on your live site.
TL;DR: The best way is to use a maintenance mode plugin like LightStart. It makes it easy for you to enable or disable maintenance mode.
Website admins have to update the core files, plugins, and themes regularly. During these updates, WordPress places your site into maintenance mode automatically. But, this feature doesn’t come into play when making rebranding changes or server upgrades. This is when you have to put your site into maintenance mode yourself.
But, keep in mind that you’re about to make some massive changes. So, take a backup of your site and test the updates on a staging environment. We recommend using MalCare because backups are automated and staging sites are created in one click.
Now, let’s talk about how to put your WordPress site into maintenance mode.
1. Using a maintenance mode plugin
Maintenance mode plugins enable you to inform your visitors that your site is not currently accessible. You can also let them know how long your site will be under maintenance with a countdown. It can also help you let search engines know that your site is under maintenance and for the bots to come back later. Even disabling maintenance mode is made easy.
Our favourite maintenance mode plugin is LightStart – Maintenance Mode, Coming Soon, and Landing Page Builder. This plugin offers a user-friendly way to put your site into maintenance mode and comes with customizable templates and features.
- Install and activate: Like with any WordPress plugin, your first step is to install LightStart and then activate it from the WordPress dashboard.
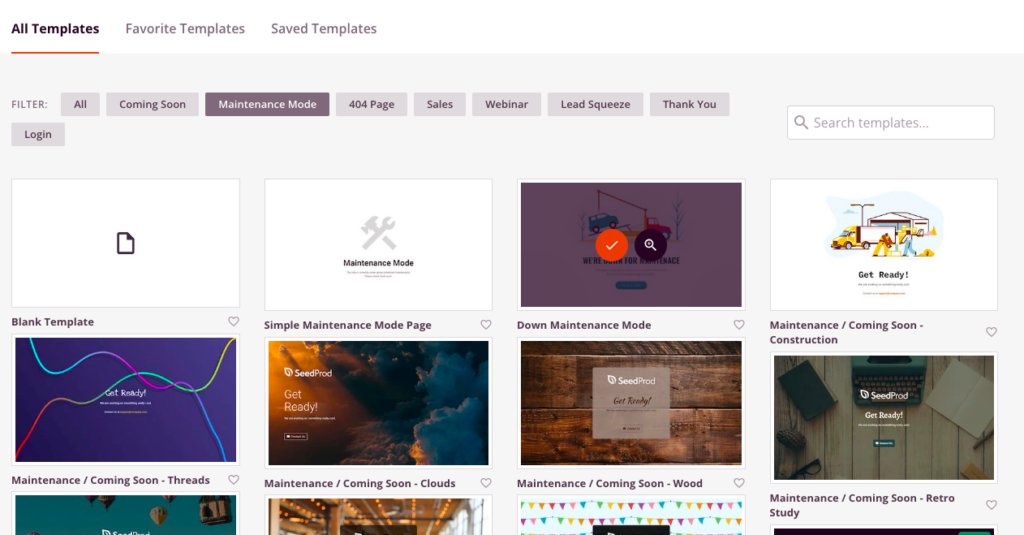
- Choose template: LightStart provides a selection of templates to serve as the foundation of your maintenance page. Pick one that aligns with the impression you want to convey to your visitors.
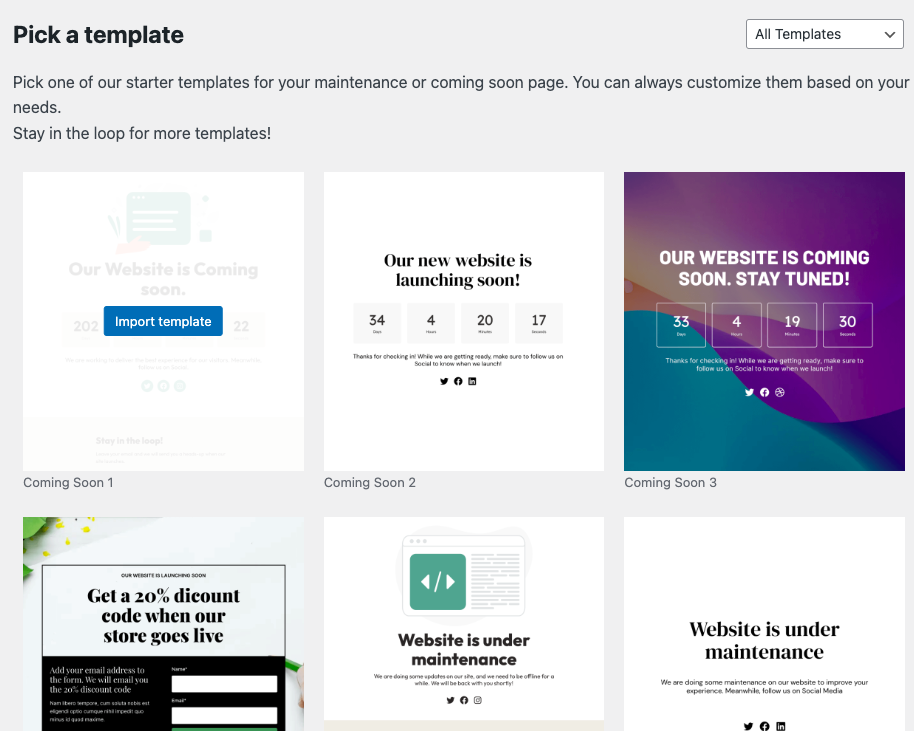
- Navigate to plugin settings: Once you’ve chosen a template, click on Go To Settings to access the customization options provided by the plugin.
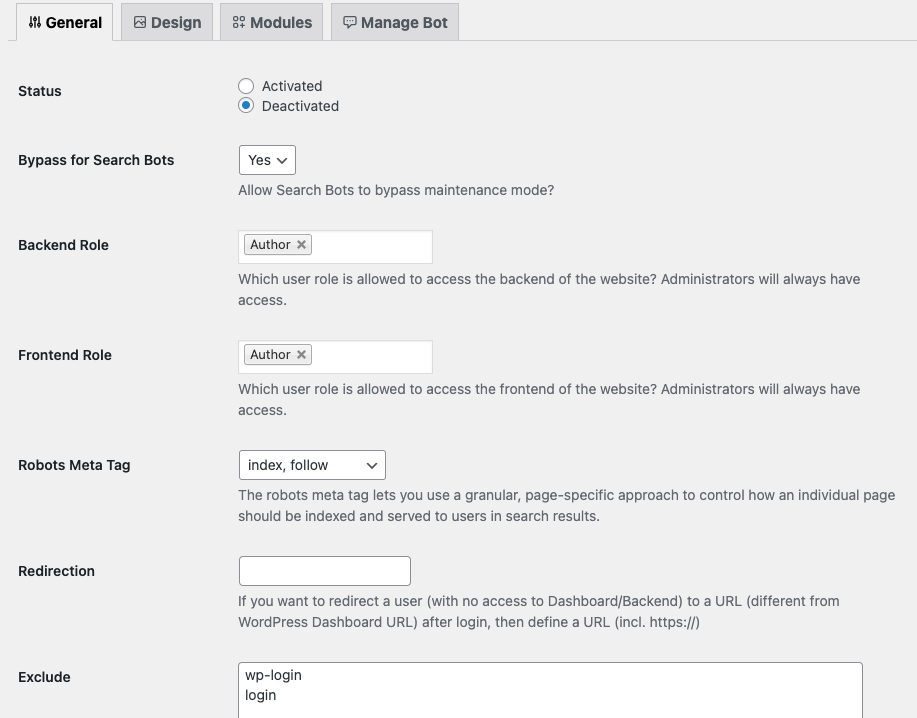
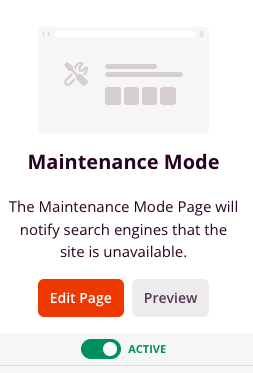
- Enable maintenance mode: On the settings page, you will see an option labeled Status. Toggle this setting to Activated to initiate maintenance mode on your site.
- Allow search bots to bypass: It is important for your SEO that search engines can still crawl your website. Activate the Bypass for Search Bots feature within the plugin to facilitate this.
- Exclude specific pages: If there are pages you wish to remain accessible during maintenance—for example, your contact page—LightStart allows you to exclude these from being hidden.
- Customize with modules: Add extra functionality and visual interest, such as a countdown timer, by visiting the Modules tab and selecting the components you wish to include on your maintenance page.
- Save your settings: Make sure all your changes are saved by clicking on the Save Settings option.
- Review the page: Before you’re finished, it’s a good idea to review your maintenance page to ensure it looks as you intend it to. Open an incognito tab in your web browser and navigate to your website to see the maintenance page live in action.
- Disable the maintenance mode: Once your site maintenance is complete, or when you’re ready to go live again, simply returning to the settings page and selecting Deactivated will disable the maintenance mode and re-open your website to visitors.
2. Using a landing page builder
A well-crafted landing page can be of great benefit when you’re revamping your site.
A landing page can be customised a lot more than a simple notice. So in addition to signaling to visitors that your site is unavailable, you can put in other elements that can engage visitors temporarily.
For instance, you can collect email addresses to keep users informed about the progress. This can help build anticipation for the launch or re-launch. Alternatively, you can redirect people to social media accounts for updates. A landing page becomes an opportunity during prolonged downtime.
A popular tool for landing pages is the SeedProd plugin. It is famous for its user-friendly interface and powerful customization features. Whether you want to create a basic “Coming Soon” page or a more elaborate “Under Construction” one, SeedProd can handle it with ease.
- Install and activate: First, add the SeedProd plugin to your WordPress site by installing and then activating it from within the plugins section of your dashboard.
- Create an account: The plugin will prompt you to input your email address to create a SeedProd account. Completing this step will unlock various features and give you access to template selection.
- Choose a maintenance mode template: SeedProd offers an assortment of templates specifically designed for maintenance mode. These templates can be customized to fit the look and feel of your brand or the specific message you want to convey.
- Toggle activation: Once you have your template selected and customized to your liking, you can make your maintenance mode landing page live by toggling the activation switch within SeedProd’s settings.
- Review the maintenance mode: After your maintenance mode page is active, you’ll want to see exactly what your visitors will encounter when they visit your site. Open an incognito window in your browser and go to your site’s URL to ensure everything appears as you planned.
3. Using the functions.php file
If you prefer a hands-on approach, directly editing the functions.php file can enable maintenance mode.
However, it’s important to note that making direct edits to your theme’s files should be done with caution. Incorrect code or a syntax error could potentially break your site. Always make sure to back up your website before making any changes.
- Access the functions.php file: Navigate to the Appearance tab in the sidebar. Then, click Theme Editor from the dropdown. Locate the functions.php file for the theme you are currently using.
- Insert maintenance mode code: Copy the following PHP code and paste it at the end of your functions.php file:
PHP
// Activate WordPress Maintenance Mode
function wp_maintenance_mode() {
if (!current_user_can('edit_themes') || !is_user_logged_in()) {
wp_die('<h1>Under Maintenance</h1><br />Website under planned maintenance. Please check back later.');
}
}
add_action('get_header', 'wp_maintenance_mode');
Replace “Under Maintenance” and “Website under planned maintenance. Please check back later.” with the actual message you’d like to add. This code checks if the current user is not logged in or doesn’t have the necessary permissions to edit themes and if so, replaces the page content with a maintenance message. The wp_die function is utilized to display the message and halt further page load.
- Save changes: After you have pasted the code, save the changes. Note that from this point, users who aren’t logged in or who don’t have permission to edit themes, like subscribers, will all see the maintenance mode message.
- Test the maintenance mode: It’s crucial to ensure the code is working as intended. Open an incognito window (to simulate a non-logged-in user) and navigate to your website. You should see the maintenance mode message displayed.
- Disabling maintenance mode: When you are ready to go live again, remove the code snippet you added from the functions.php file. Be very careful to remove only the code you added, as deleting extra code could lead to errors. Upon removing the code and saving the file, the maintenance mode will be disabled, and your site will return to its normal state.
4. Using .htaccess
You can also use the .htaccess file to trigger maintenance mode. This approach involves redirecting visitors to a dedicated maintenance page. Before proceeding, be aware that any mistake in the .htaccess file can render your website inaccessible. So, back up your website before making any changes.
- Create a maintenance page: Begin by creating a simple HTML file named maintenance.html. This file should contain the message you want to show your visitors when your site is under maintenance. Upload this file to the root directory of your WordPress installation.
- Edit the .htaccess file: Access the .htaccess file in the root of your WordPress site’s directory. You can do this via FTP or cPanel.
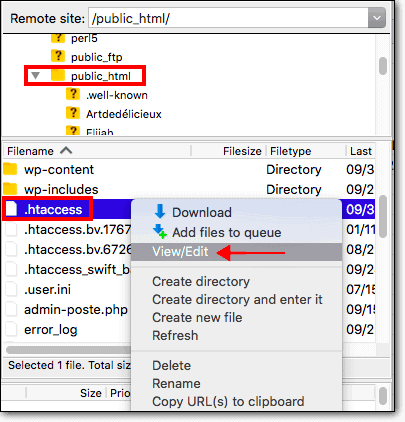
- Insert redirection code: Add the following code to the top of your .htaccess file, replacing `example.com` with your own domain:
RewriteEngine On
RewriteBase /
RewriteCond %{REQUEST_URI} !^/maintenance\.html$
RewriteRule ^(.*)$ https://example.com/maintenance.html [R=307,L]
This set of directives tells the server to redirect all traffic to the maintenance.html file unless the visitor is already viewing maintenance.html. The [R=307] flag uses a temporary redirect to inform browsers and search engines that this is a temporary condition.
- Test maintenance mode: It’s important to check that the maintenance mode is functioning correctly. Open a new incognito browser window and visit your site.
- Disabling maintenance mode: Once you’ve completed your maintenance tasks and are ready to bring your site back online, you must remove the temporary redirection from your .htaccess file. Simply delete the code you previously added and save the changes to the file. You may also wish to delete or retain the maintenance.html file depending on whether you anticipate future use.
Troubleshooting
Putting your site into maintenance mode is a great feature, but equally comes with its own risks. Here are various issues you might encounter and how to resolve them:
- Site stuck in maintenance mode: This might happen if the .maintenance file wasn’t deleted after an update or if a plugin fails to properly deactivate maintenance mode. Access your site’s root directory via FTP or your hosting file manager and delete the .maintenance file.
- White screen of death or broken site: These symptoms can occur if there’s a conflict between the maintenance mode plugin or code and the active WordPress theme. Switch to a default WordPress theme to see if the issue persists. If the problem is resolved, the issue is likely theme-related. If that doesn’t work, disable all your plugins using an FTP client. Go to wp-content>plugins and rename the plugins folder. If your site is back, you will need to reactivate each plugin one by one to see which plugin was causing the conflict.
- Maintenance mode page still displayed after disabling: Persistent caching might be the issue if visitors still see the maintenance mode page despite it being turned off in WordPress. Clear all types of cache, including browser cache, WordPress cache (via your caching plugin), server-side cache, and any CDN cache. Refresh your browser to check if the site is restored.
- Continuous page redirection: Incorrectly configured .htaccess rules can lead to a symptom where the site enters a redirection loop, preventing access to the maintenance mode page or normal site pages. Check your site’s .htaccess file for incorrect rules. Correct or remove the rules related to maintenance mode, ensuring standard WordPress rules are intact.
- Permission denied errors: If you attempt to enable or disable maintenance mode and encounter “Permission Denied” messages, this can be a sign of file permission troubles. Use FTP or a file manager to check the file permissions of .htaccess, functions.php, and any maintenance mode-related files.
- Database connection errors: Making changes to the site’s database during maintenance could lead to connectivity issues, which may show up as maintenance mode being stuck or site errors. Verify your database credentials in wp-config.php. If you recently changed your database, ensure the new details are accurate. Use WordPress’s built-in repair function if you suspect database corruption by adding `define(‘WP_ALLOW_REPAIR’, true);` to your wp-config.php file.
- Lost access to WordPress dashboard: If you are unable to reach your WordPress admin area to disable maintenance mode, it can signal a plugin conflict or errors in manual code additions. Deactivate all plugins through FTP by renaming the /wp-content/plugins/ directory. Once you’ve regained access, rename the folder, and activate plugins one by one.
- Problem with deactivating maintenance plugins: You might notice an issue if the maintenance mode plugin continues to keep the site in maintenance despite attempts to deactivate it from the WordPress admin. Navigate to the /wp-content/plugins/ directory via FTP and manually deactivate the suspected plugin by renaming its folder.
What else can you do while your site is in maintenance mode?
Enhancing the maintenance page with information can improve the experience for your visitors. It also helps maintain engagement even while your site is temporarily inaccessible. Here are some maintenance mode tips that we suggest:
- Add your contact details: Your maintenance page should include contact information to allow visitors to reach out if they need immediate assistance or have questions. Providing an email address, contact form, or phone number shows that you value customer service and are available despite the website being temporarily down.
- Add a subscribe option: Including a subscription option, such as an email signup form, helps visitors receive updates about the status of the maintenance or launch. This not only helps in building your email list but also keeps interested users in the loop, fostering a sense of community and anticipation.
- Add a countdown: A countdown timer is an effective visual aid that indicates when visitors can expect the site to be back online. It creates a sense of urgency and expectation and helps manage the visitors’ patience by giving them a clear timeline for when normal service will resume.
When should you put your site on maintenance mode?
Putting your website in maintenance mode can cause issues with your SEO. This is why we recommend you only enable it for big changes like the following:
- Design changes: When implementing new design elements or adjusting the layout, you may need to test functionality to ensure everything displays correctly across different devices and browsers, which is best done without visitor traffic.
- Server upgrades or migration: Moving to a new hosting provider or upgrading your server can cause downtime. Maintenance mode notifies visitors of these temporary changes and helps prevent data loss during the migration process.
- Database maintenance: Optimizing or repairing the database, or making structural changes, often requires disabling access to the site to prevent data corruption or loss.
- Security measures: If you’re addressing security issues, such as applying patches or cleaning up after a hack, it’s essential to restrict public access to protect user data and your site’s integrity.
- Emergency troubleshooting: Unforeseen issues can sometimes cause features to break, and you might need maintenance mode to buy time while you diagnose and fix the critical problems.
To minimize the length of time your site is in maintenance mode, we recommend using a staging site. MalCare provides a full-fledged staging environment, where you can test and make necessary changes without affecting the live site. Once you’re ready, you can put the site in maintenance mode and then push the updates.
Will it affect your SEO?
Putting your site in maintenance mode can have implications for SEO depending on how you implement it. More importantly, it depends on how long your site remains in this state.
Search engines recognize that websites occasionally go down for maintenance. They are designed to account for this by not immediately penalizing a site’s ranking for short periods of downtime.
However, if the maintenance mode is extended for a longer period, search engines may interpret this as a signal that the site is no longer active. This can negatively affect your site’s rankings over time.
If you use a maintenance mode plugin, ensure it has the option to set up a bypass for search engine bots so that they can continue to crawl and index your site if needed. LightStart, for example, helps you do this in the plugin settings.
What to consider when you put your site in maintenance mode?
Putting your site into maintenance mode is a necessary step to making major changes to it. However, you must remember several important considerations.
- User experience: When visitors encounter a maintenance page, it may lead to a negative user experience. If users repeatedly encounter maintenance mode pages, they may become frustrated and choose to abandon your website. This can result in a temporary dip in traffic and user engagement.
- Communication: To mitigate the impact of maintenance mode on both SEO and traffic, it’s crucial to communicate clearly with your users. Provide an estimated timeframe for when your site will be back online and explain why the maintenance is necessary.
- Redirects: If your maintenance period is expected to be lengthy, you may consider setting up a temporary redirect to a landing page or a different website. This can help retain user engagement and provide alternate resources
- Analytics and tracking: Consider disabling analytics and tracking codes during maintenance mode to avoid skewed data or inaccurate metrics.
Final thoughts
Maintenance mode is an invaluable tool when undertaking major website changes. It significantly reduces the chance of losing important data like new orders or new registrations. However, extended periods of downtime can be detrimental.
This is where taking measures such as creating backups and utilizing a staging environment truly shines. By using a comprehensive solution like MalCare, you can take complete backups of your WordPress site and set up a staging site with ease. The staging site allows you to test and troubleshoot changes before going live. Additionally, a comprehensive backup gives you a fallback plan if something goes wrong.
FAQs
Does WordPress have a maintenance mode?
Yes, WordPress has a built-in feature that activates maintenance mode automatically when you perform updates, such as core updates, plugin installations or updates, and theme updates. During this process, a .maintenance file is temporarily created in the root directory, and visitors see a default notification that the site is undergoing maintenance. However, for more user-friendly and customizable maintenance pages, WordPress site administrators often use plugins or manual coding methods.
How do I fix WordPress stuck in maintenance mode?
To fix a WordPress site that’s stuck in maintenance mode, follow these steps:
- Delete the .maintenance file: Connect to your website using an FTP client or the file manager in your hosting control panel and look for the .maintenance file in the WordPress root directory. If this file exists, delete it.
- Clear all caches: Clear your site’s cache from any caching plugin you may be using and also clear the cache on your web hosting server if it provides such options. You should also clear your browser cache.
- Check for issues: If the problem persists, it might be due to a plugin or update that was not completed properly. In such a case, you might need to manually update WordPress or the troubling plugin/theme.
- Ask for assistance: If you are unsure or feel uncomfortable performing these actions, consider reaching out to your hosting provider’s support team for help.
How do I enable maintenance mode in WordPress without a plugin?
To enable maintenance mode in WordPress without using a plugin, you can either:
1. Use the .htaccess method where you redirect visitors to a custom maintenance.html page
2. Add custom PHP code to your theme’s functions.php file that checks if the user is logged in and has proper permissions; if they don’t, a maintenance message is displayed.
What is the maintenance mode on a site?
Maintenance mode on a site refers to a state where public access to the live content of the website is restricted or temporarily unavailable, and a notification is displayed to visitors. This mode is typically used while the site is undergoing updates, maintenance, or troubleshooting. This is to avoid any loss of data like new comments or new posts being created.
Category:
Share it:
You may also like

MalCare Ensures Unmatched Protection Against User Registration Privilege Escalation Vulnerability
Imagine discovering that your WordPress site, which should be secure and under strict control, has suddenly become accessible to unauthorized users who have the same administrative powers as you. This…
MalCare Ensures Proactive Protection Against WP-Members XSS Vulnerability
MalCare continues to protect its customer sites from all kinds of attacks, even the ones exploiting zero-day vulnerabilities. The recent stored cross-site scripting (XSS) vulnerability found in the WP-Members Membership…
Top 9 ManageWP Alternatives To Manage Multiple Sites Easily [Reviewed]
ManageWP is a popular name in the WordPress maintenance plugins market. People love how much you get for a free plan, how easy it is to set up, and how…
How can we help you?
If you’re worried that your website has been hacked, MalCare can help you quickly fix the issue and secure your site to prevent future hacks.

My site is hacked – Help me clean it
Clean your site with MalCare’s AntiVirus solution within minutes. It will remove all malware from your complete site. Guaranteed.

Secure my WordPress Site from hackers
MalCare’s 7-Layer Security Offers Complete Protection for Your Website. 300,000+ Websites Trust MalCare for Total Defence from Attacks.


