BlogVault backup and restore: A complete guide
by
7-layers of Security for Your WordPress Site
Your website needs the most comprehensive security to protect it from the constant attacks it faces everyday.
A backup is a copy of your website that you may want to restore if your live site goes down. A ‘good’ backup is much more than that!
In this article, we talk about what makes for a good backup, why web host backups are not enough, and how to choose the right plugin for your peace of mind.
TL;DR: Create bulletproof backups for your WordPress site with BlogVault. You don’t have to pay for unreliable backups provided by your host or for extra cloud storage to save manual backups. BlogVault offers a backup solution that is reliable and makes restores easy and quick.
Why choose a backup plugin?
When we created our websites, we knew that WordPress backups were necessary. The easiest and most obvious route was to use the backup solutions offered by our web hosts: WP Engine, Bluehost and GoDaddy.
However, as we went through backing up and restoring our websites, some clear issues emerged. It was a time-consuming process that was unreliable and therefore, ultimately pointless.
So, we decided to test out backup plugins. Along with our criteria listed below, BlogVault came with a few additional bells and whistles: staging, test restores, migration, and website management.
In the next sections, we will show you how to use BlogVault for backups and restoration, and talk about our experience in detail.
How to backup your website using BlogVault
BlogVault backups are reliable because they have all the hallmarks of a good backup. They are backups of your full site, stored offsite in encrypted form, that you can quickly restore completely or partially as and when required.
As our experience below will demonstrate, there was a ton of efficiency with this plugin. There was barely any overhead in terms of time, and the stress of manual backups and restores was completely absent.
A quick word on our testing process
For the purposes of this article, we tested BlogVault out with three sites – small, medium, and large. We used BlogVault, to create backups and do restorations for each one of them. Our largest site was 10 GB with a database of 174 MB.
In our experience, a site of this size is not easy to restore manually. When we created backups using cPanel, for instance, we weren’t able to restore them again because of size limitations and technical difficulties.
Getting started
Before going in, we took backups for all three of our sites. Then, we created a BlogVault account and that’s when things really took off.
In a matter of minutes, the site are connected. And that was literally all we had to do. Complete site backups are automatically created on a daily basis. We didn’t even have to switch these backups on.
No configuration was required and there was no need to connect a cloud storage account, unlike in Managed WordPress Services or other backup tools that we used. BlogVault is truly automatic!
Complete site backups with BlogVault
With our tests with web host backups, we had to back up the files and the database separately. We used 2 different tools, and we had to make sure that we knew which file backup corresponded to which database backup.
With BlogVault, it was seamless. The backup created had both components in one. So much easier to deal with.
Quick backups
Another factor we noticed was that usually the smaller sites take a fraction of time of what a larger site such as ours (10 GB) takes. With the other tools or manual cPanel backups, time was a major issue, as the size of the website increased the amount of time needed for the backup.
Blogvault took just a few minutes to back up our sites. Even our largest site (10 GB) was synced in just two minutes.

We also checked to see if the backup process is slowing down our website. Most backup solutions we used before had affected our website speed and performance while the backup was being created.
However, BlogVault backed up the sites quickly regardless of the size of the website. So, the process did not affect the site’s speed at all. It was impressive!
On-demand backups
We ran on-demand backups for each of our sites. As the plugin works in the background, we could start the backup process for all our sites and sit back for it to notify us.
The next test on our list is to try out the on-demand backups. We wanted to make sure that when we want to make changes to the website, we can take a fresh backup.
Keeping in mind that the backup is a failsafe, we want on-demand backups to be quick and painless. There were other things we needed to get done!
With web hosts, we had to go through the process manually, and use the tools off of cPanel. The process was time-consuming and tedious, and often left us frustrated. However, with BlogVault, we were able to take on-demand with a single click.
The difference between cPanel manual backups and BlogVault on demand backups was huge. While cPanel one was prone to errors and took so much time and effort, BlogVault manual backups were effortless.
This helped us move on quickly to the tasks scheduled to be done once the backup is created.
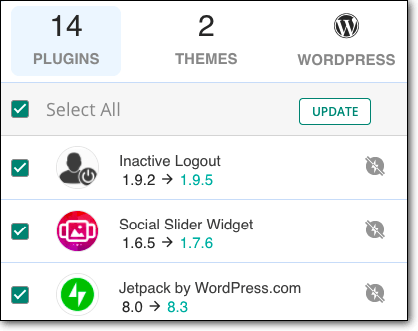
As an aside, since we wanted to update a plugin, we tried the update option on the BlogVault dashboard. The plugin itself prompted us to create additional backups before the update. That was a bonus!
Backups storage
Old backups are very important if you want to retrieve a file or database item from months ago. Ideally, we want to have 90 days of backups for our sites, and 365 days of backups for WooCommerce sites. This requires adequate storage space.
With other tools, we usually avoided creating on-demand backups because they have a storage limit of 30 backups or require us to pay for additional cloud storage. A few additional backups on days when your website is going through a lot of changes would mean losing a few older backups.
On the other hand, BlogVault offered us 90 days of backups, extendable to 365 days for WooCommerce sites, and stored them on its own server. So, firstly, we did not have to worry about storage space and additional costs.
Secondly, this did not affect the performance of our sites because the backups were not using web host space. And finally, older backups were not affected by on-demand backups.
Partial Backup
BlogVault doesn’t allow a partial backup. Even though that’s the case, we observed that it is with good reason.
- It is always better to have the whole backup, even if you want to create backups of a particular file or database table. In case anything goes wrong, you will have everything, including what you need.
- To create a partial backup, you must know what you will need to partially restore in the future. This is obviously impossible, and also not required. BlogVault allows you to download anything you want from a particular backup. So you can always have the full backup stored on BlogVault servers, and partially download only what you need from it.
- You can do a partial restore using the BlogVault plugin. All you have to do is select a backup version and select the files or database tables that you would like for selective restore. Restoration is that easy with BlogVault!
Restoration with BlogVault – Our findings
The health of your website should always be in your control. If it’s down, you should be able to restore it yourself, without the hassles of looking for a developer, or waiting to get answers on how to restore your website.
We found BlogVault dashboard to be intuitive. We needn’t tell you what to do and still you will have it all on your fingertips, literally. All we had to do was press the Restore button on the Site page. That’s it!
This was in stark contrast to web host restores. Truth be told, the restore process was painful, especially with large databases using FTP. The experience was so terrible that our standards were low to begin with. But BlogVault restore was a pleasant experience!
Complete restoration
We first checked out how to restore a complete site. We wanted to test all three – small, medium, and large – sites for the restoration process as well.
Again, the restoration did not require any configuration. All we had to do was select a backup version to restore from. This decision was also made easier, because we could see the differences in the various backup files on the dashboard itself. The file and database changes are clearly listed.
Quick restoration
The restoration process was really quick. We have had a few bad experiences during the restoration process with other tools and methods. We were, however, quite impressed with the one-click restore feature that BlogVault offered. Many tools that we have used provide only backups. But a backup is as good as how easily it can be restored.
We found many complaints on forums about manual restoration failing due to some or the other reason. This left website owners with a lost website despite having a backup solution. This was commensurate with our experience too. Restores were just awful, and were prone to failures.
So, we had to try to manually restore our sites to see the difference. Most issues arise with large sites, so we tested it out first. Our site was 10 GB in size with a database of 174 MB.
In order to restore manually, we had to upload the files and the database separately through two different tools on the cPanel.
We first tried to upload the files through File Manager. However, the File Manager had a limit of 500 MB, and so the upload failed. We found another method to do this manually via FTP. However, it was a tedious process.
Once our files were restored, we moved to phpMyAdmin. Here we tried to upload the database, but the tool crashed. The maximum size limit for database upload through phpMyAdmin is 50 MB.
We had already deleted our old database and so lost our site. Even if we had succeeded, the downtime caused due to the process was too much. For a business, it could incur loss in terms of customers, orders, and reputation.
The good thing was, we already had Blogvault installed! We restored our site with one of the backups we had created beforehand. The process was so smooth and fast that we wouldn’t choose any other way. Our large site was restored in under 8 minutes.
Partial restoration
Sometimes, you may need to restore just a part of the whole site. For example, when you are adding posts or pages, and an add-on update that was running in the background ends up breaking your site.
Restoring the whole site in this case would mean that you lose all the new content that you added after your last backup. However, if you could just replace the plugin file, everything would be okay.
So we wanted to test out how partial restore would work on BlogVault. The process was quite straightforward. In the restore settings, we had to expand selective restore and then, select the items which we wanted to restore.
This was by far the easiest partial restoration method we found. Partial restoration is not available with most tools.
We had even tried to do it manually, which required a lot of head scratching and no results. In order to do a manual partial restoration through cPanel, we needed to have partial backups.
No one has the future insight of what will go wrong and with which tool to create a partial backup in the first place. So the manual method failed us here as well, while BlogVault came through in spades.
Additional features
We found a few additional features with BlogVault that were quite useful. A few of these are described below:
Test restore: There can be times when you are not sure which version to restore. With test restore, you can basically load a backup onto a staging site and then to confirm if it works as expected, before moving restoring on to the live site.
Staging: You may at times need to test out a few things, such as a plugin update or a new theme. You don’t always do it on your live site and then restore it if things don’t work out. With BlogVault, you can simply create a staging area to test out things.
Migration: There may be times when you want to restore a site on a new domain. Migration is the way to go. You can also use this feature to migrate your current site as it is to another host or server.
Troubleshooting BlogVault backups and restores
Restoring a crashed website: In order to restore a crashed website, you may need your site’s FTP details. You can find FTP details through the cPanel of your web host. Good news is, BlogVault has launched a new feature which will help restore a crashed site without FTP.
Restoring from staging: To push the changes from staging to live site, you just have to go to the staging section and click on the Merge button. You can choose to merge all changes or selected ones only.
Selective restore: Click on restore button under your site. In the restore settings, select the backup version from which you need to choose the files or tables. Then, expand selective restore and select the items from files and/or the database for restore.
Choosing the correct backup version: Click on the number of backups that your backup section shows. A ‘History’ page for your backups will open. You will see details for each of the backups. You can check the files and database to see what they contain. Furthermore, you can also give a unique name to your backups to help identify them easily in the future.
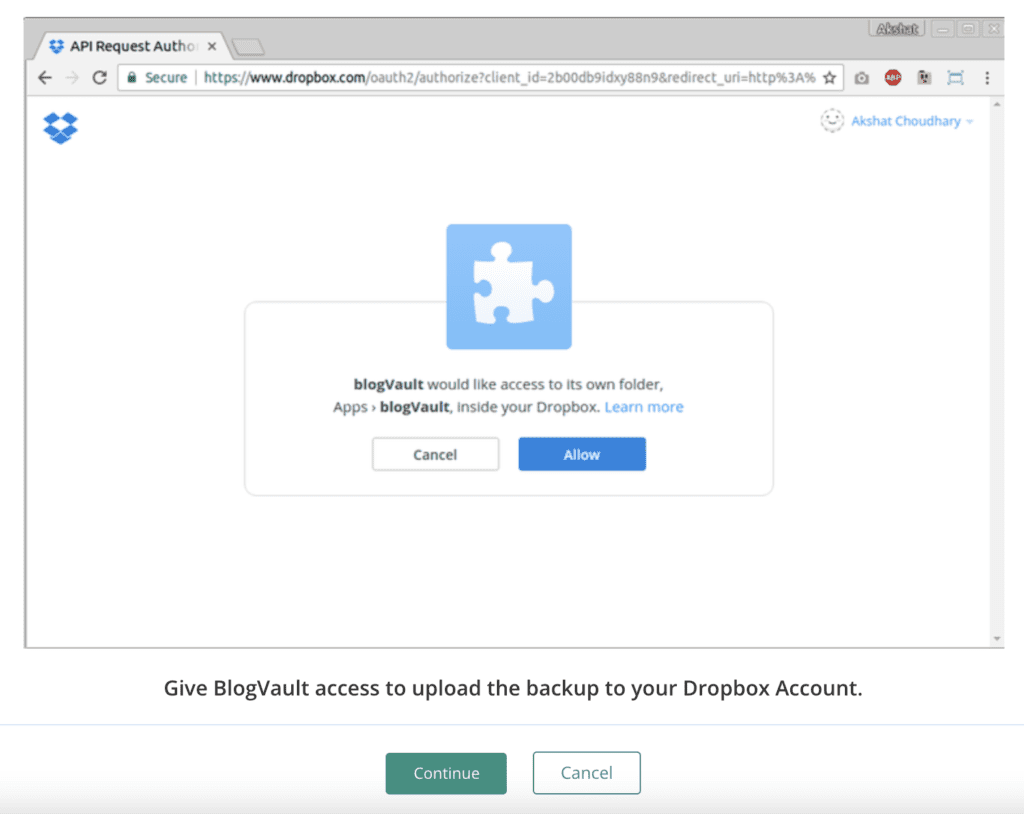
Uploading backup to cloud: You can upload your backup to Dropbox if you would like. To do so, click on backups count. On the History page, click on upload. Here you can sync your Dropbox account. Once authenticated, your backup will be saved on the cloud.
Other issues: You can reach out to the customer support of BlogVault 24/7 for any issue. We read quite a few great things site owners and agencies said on forums about the BlogVault support team. They will help you resolve your queries in such a way that doesn’t let you or your site down.
How to choose a reliable backup solution?
When choosing a plugin, we want to make sure that the backups fulfill certain criteria. Your sites are important and so your backup solution should be one which never lets it down. While choosing a backup solution, you need to keep a few things in mind. :
Complete backup – A WordPress site consists of two components – files and database. Your files contain your source code for your site and add-ons (plugins and themes). Your database contains all the content (posts, pages, comments, tags etc.) in the form of tables. In order for your site to work properly, you must have both of these components. That’s why it is important to back up both of them.
When trying out web host backups, we needed to back up the files and databases separately for each site. We then named each of them semantically to understand what was in them, plus which file backup went with which database backup. The margin for error was too high for comfort, not to mention how tedious it was.
Secure storage – Your backups need to be stored securely, encrypted, and at an offsite location, i.e. not with your host. Most solutions store backups on your site server or with one of the popular cloud storage services. Both of these solutions are not secure.
With web host backups, if anything goes wrong with your server, you will end up losing both your site and your backup. Some web hosts do store backups offsite, but as per our testing, this is largely the exception, not the rule.
On the other hand, storing backups on the cloud entails manual work most of the time. Unless you are able to encrypt your backups, they are not secure. In the event of a hack, your entire website could be laid bare through your backups.
Easily restorable – Backups are only one half of the process, when something goes wrong. Too often, we’ve seen customers forget to test restores till they need them and then realise to their horror that they don’t work.
It is vital that backups are easy and fast to restore. If they are not, then your backup solution doesn’t serve its purpose.
Again, during web host backup restores, we faced numerous hassles: files and databases needed to be restored separately; databases needed to be deleted before restores were possible; large databases usually failed to restore via cPanel; and much more besides. Some restores took half a day to complete, and all the while the site was down.
Automated backups – Any solution that doesn’t provide automatic backups is not a good backup solution. Creating manual backups is not only a tedious task, but also not feasible all the time.
Conclusion
BlogVault provided us with a 360° solution for backups and restores. The tool works fast for sites of all sizes up to 100 GB. Besides the automatic daily backups that it offers in all its plans, WooCommerce website can opt for real-time backups. The backups are stored for 90 days. You can easily restore any of these backups anytime you want.
Category:
Share it:
You may also like

MalCare Ensures Unmatched Protection Against User Registration Privilege Escalation Vulnerability
Imagine discovering that your WordPress site, which should be secure and under strict control, has suddenly become accessible to unauthorized users who have the same administrative powers as you. This…
MalCare Ensures Proactive Protection Against WP-Members XSS Vulnerability
MalCare continues to protect its customer sites from all kinds of attacks, even the ones exploiting zero-day vulnerabilities. The recent stored cross-site scripting (XSS) vulnerability found in the WP-Members Membership…
![Top 9 ManageWP Alternatives To Manage Multiple Sites Easily [Reviewed]](https://www.malcare.com/wp-content/uploads/2022/12/malcare-default-image.jpeg)
Top 9 ManageWP Alternatives To Manage Multiple Sites Easily [Reviewed]
ManageWP is a popular name in the WordPress maintenance plugins market. People love how much you get for a free plan, how easy it is to set up, and how…
How can we help you?
If you’re worried that your website has been hacked, MalCare can help you quickly fix the issue and secure your site to prevent future hacks.

My site is hacked – Help me clean it
Clean your site with MalCare’s AntiVirus solution within minutes. It will remove all malware from your complete site. Guaranteed.

Secure my WordPress Site from hackers
MalCare’s 7-Layer Security Offers Complete Protection for Your Website. 300,000+ Websites Trust MalCare for Total Defence from Attacks.


