How to Clear WordPress Cache Properly
by
7-layers of Security for Your WordPress Site
Your website needs the most comprehensive security to protect it from the constant attacks it faces everyday.
Studies have shown that a fast-loading website will improve a user’s browsing experience, increase conversions and improve user retention. As website speed is a critical metric in Google’s Core Web Vitals, a fast website will also improve your website’s traffic and search engine ranking.
The most effective way of improving the speed of a WordPress website is to activate page caching using a WordPress caching plugin such as WP Rocket or WP Super Cache.
Page caching creates a copy of every page on your WordPress website so that content is delivered quicker. By doing this, you can instantly reduce page loading times for a WordPress website by three to five seconds. WordPress caching plugins will do all the hard work for you, but it is important to clear WordPress cache regularly so that visitors are served the latest version of each page.
In this article, I will explain why the WordPress page cache needs to be cleared. I will also show you how to clear cache in popular WordPress caching plugins and WordPress hosting services.
Why Clear WordPress cache?
When someone visits a WordPress website, the server needs to load all core files, retrieve the content from the website’s database and then deliver the content to the visitor. This is an intensive process that has to be repeated every time someone visits a page on the website.
A faster and more efficient way of delivering content is to create a static copy of each website page and deliver that to visitors instead.
To create a cached copy of a page, the server has to load important WordPress core files and retrieve the page’s content from the WordPress database. Once each page on your WordPress website has been cached, however, it will be considerably faster to deliver cached pages to users than to request information dynamically from the server every time.
| Initial Page Cache | When someone visits a page for the first time, a cached version of the page is created and stored. |
| Preloading Pages | Preloading cache allows you to cache all website pages at once. This ensures all pages load quickly, but it can temporarily strain your server and slow down your website. |
| Clearing Page Cache | Cached pages can become out of date if they are not recreated after website updates. It is therefore important to regenerate the cached version of a page once you have updated your website. This is known as “Clearing the Cache“. |
WordPress caching plugins can automatically clear cache in WordPress once it has been updated. For example, if you update one of your blog posts, the caching plugin can create a new static cached copy of your page.
If you make a significant change to your website, such as changing your website design, you should manually clear all page cache on your WordPress site so that all pages are up to date.
To learn more about page caching, check out my article “How WordPress Caching Works“.
What is Browser Cache and How Can it Be Cleared?
When you visit a website online, your browser will store static assets locally such as HTML, images, CSS and Javascript. This is known as “Browser Caching“. When you return to the website, your browser can retrieve static files directly from your computer instead of downloading them again.
Browser caching is something that greatly speeds up internet browsing, but older cached files that have expired can cause problems so it is important for websites to define an expiry date for different types of static files.
If you find that a website is still not loading correctly, it is recommended that you clear your browser’s cache to ensure all content is pulled from the server.
- Clearing Cache & Cookies in Google Chrome
- Clearing Cookies and Site Data in Firefox
- View and Delete Browser History in Microsoft Edge
Many WordPress optimisation plugins let you enable browser caching for visitors at the click of a button. In solutions such as W3 Total Cache, you can define the expiry date of assets too.
Whilst browser caching is featured in many WordPress caching plugins, please remember that page caching and browser caching are completely different techniques.
How to Clear WordPress Cache Using WP Rocket
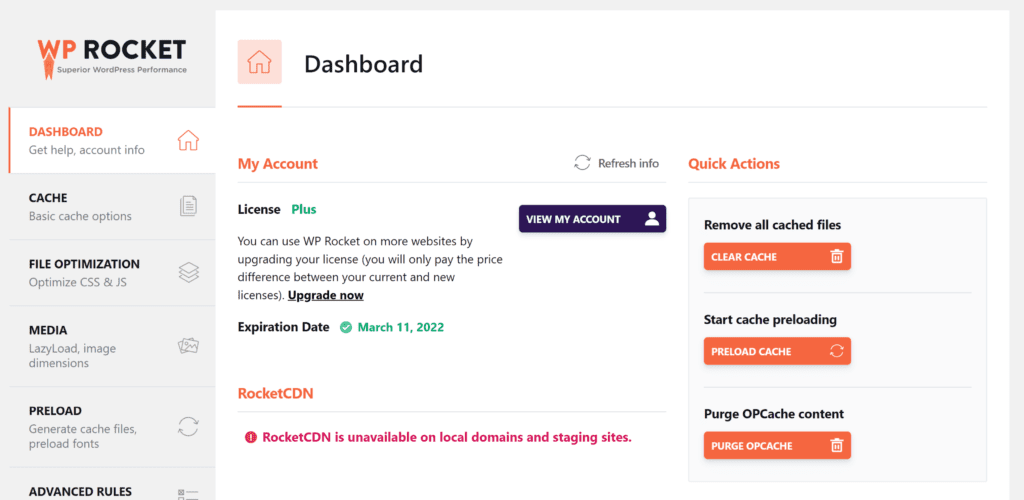
WP Rocket is a user-friendly WordPress optimisation plugin that simplifies the process of caching files and clearing WP cache. In the main dashboard, there are quick action buttons to clear all cached files and to start preloading page cache.
WP Rocket also has support for OPcache, which is a caching engine that can be used to increase the speed of PHP websites. A quick action button is available for purging all OPcache.
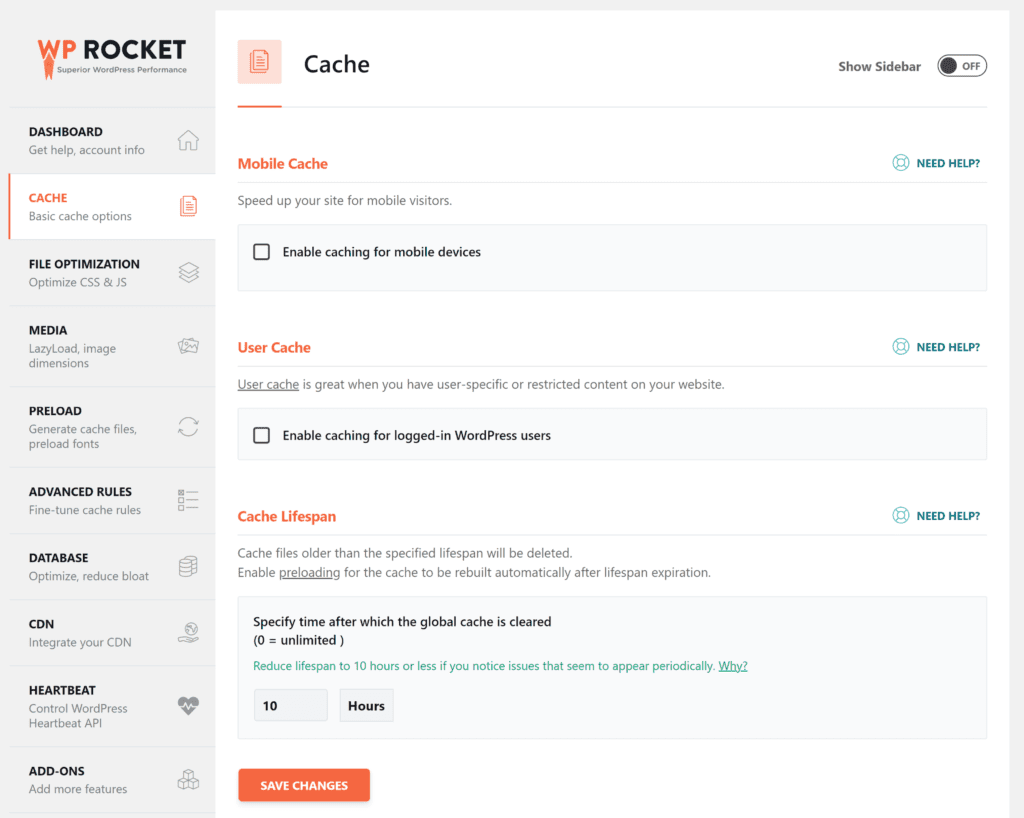
The WP Rocket cache settings page lets you create dedicated cache files for mobile users and logged-in users. You can also set cached pages to be cleared after a defined number of hours.
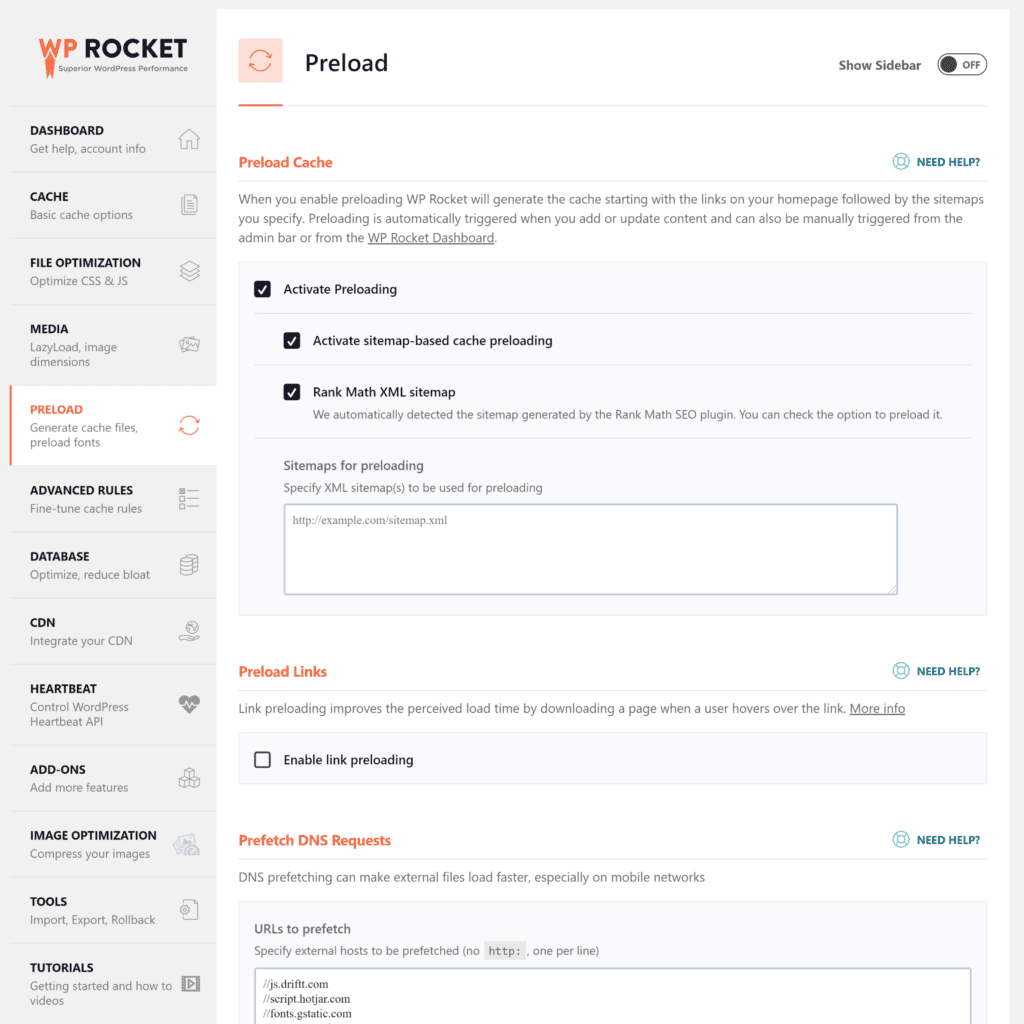
In the Preload settings page, you can activate cache preloading and preload fonts and sitemaps. Further options are available on the Advanced Rules settings page for specifying URLs and user-agents that should never be cached. This page also lets you purge specific URLs when posts and pages are updated.
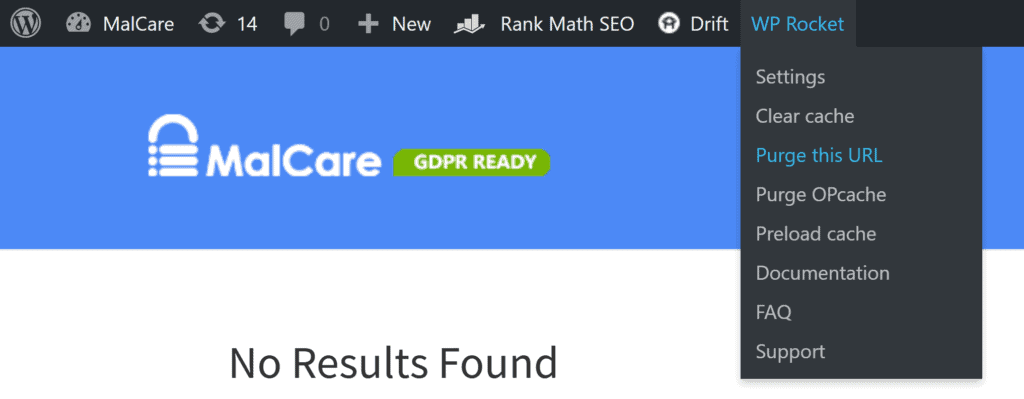
The WP Rocket dropdown menu can be accessed from the back-end and front-end of your WordPress website. You can use the menu to clear all cache, preload cache and purge OPcache.
If you’re accessing the menu from the front-end of your website, you can use the “Purge This URL” option to clear cache for a specific page.
How to Empty WordPress Cache Using W3 Total Cache
W3 Total Cache is an advanced WordPress caching plugin that has hundreds of configuration options. An option to empty all cache is available from the plugin dashboard.
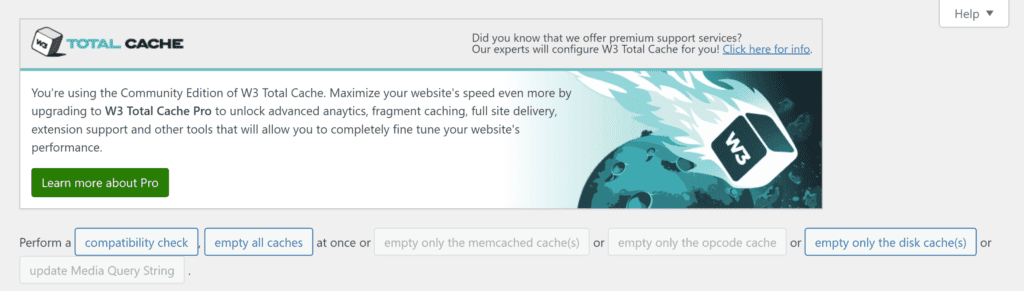
Whenever you change settings in W3 Total Cache, the plugin will purge all page cache once you click the save button.
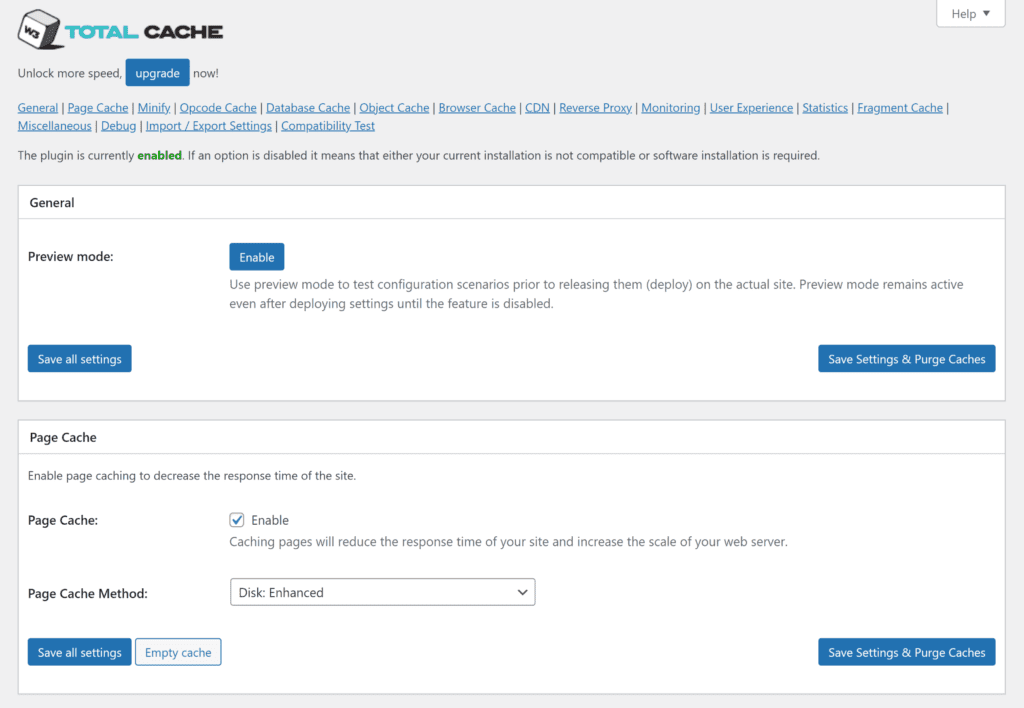
Dedicated settings pages are available for page cache, database cache, object cache and browser cache.
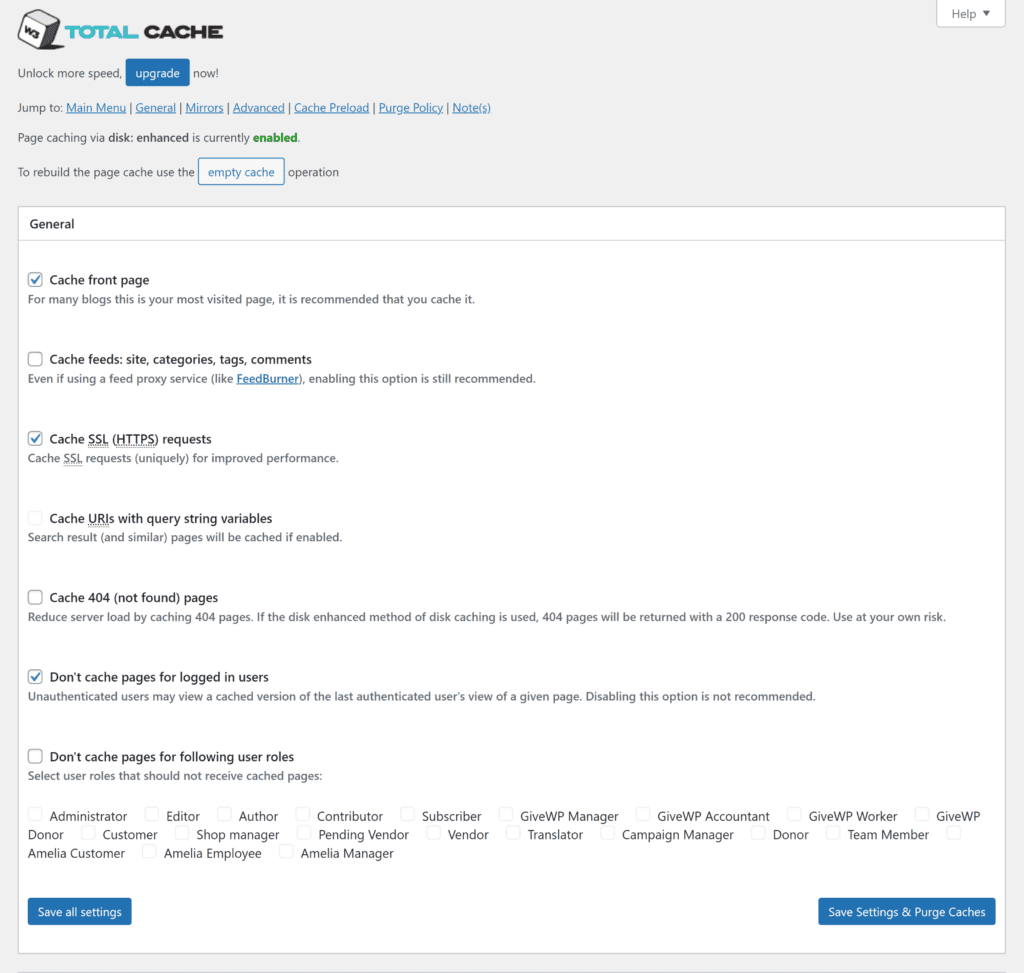
In the page cache settings page, you can define which areas of your WordPress website are cached and which are not. You can also configure cache preloading settings and select the pages and feeds that should be purged when content is created or updated.
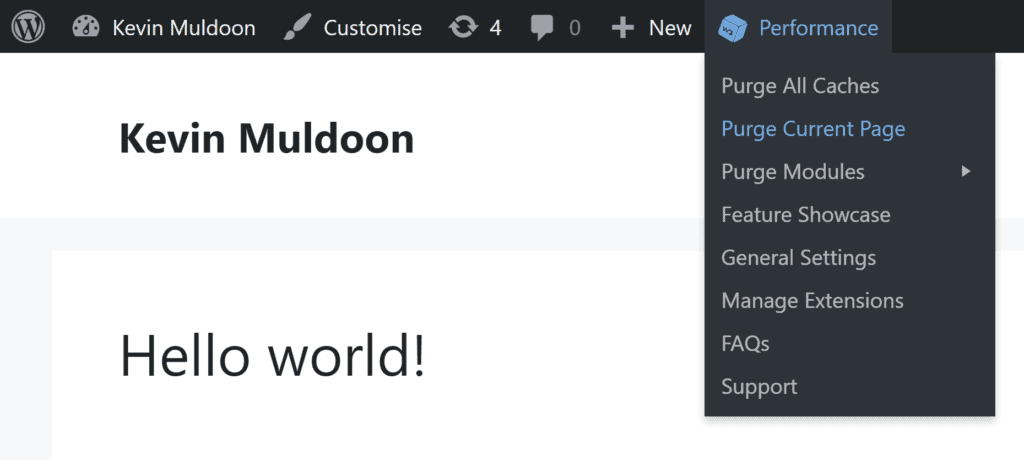
The W3 Total Cache dropdown menu lets you clear all cache. When accessed from the front-end of your website, it can be used to clear cache for specific pages.
How to Delete WordPress Cache Using WP Super Cache
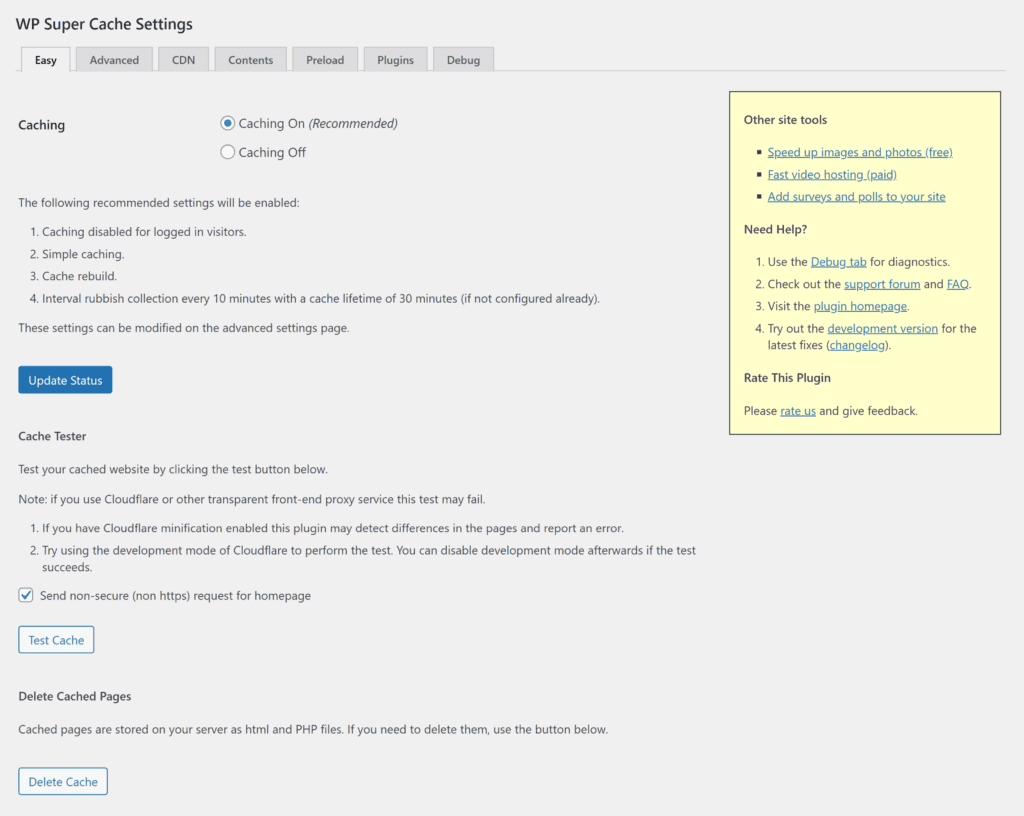
WP Super Cache is a popular caching WordPress plugin that is simple to set up. In the easy settings page, you can enable caching, test caching and delete all existing cached pages.
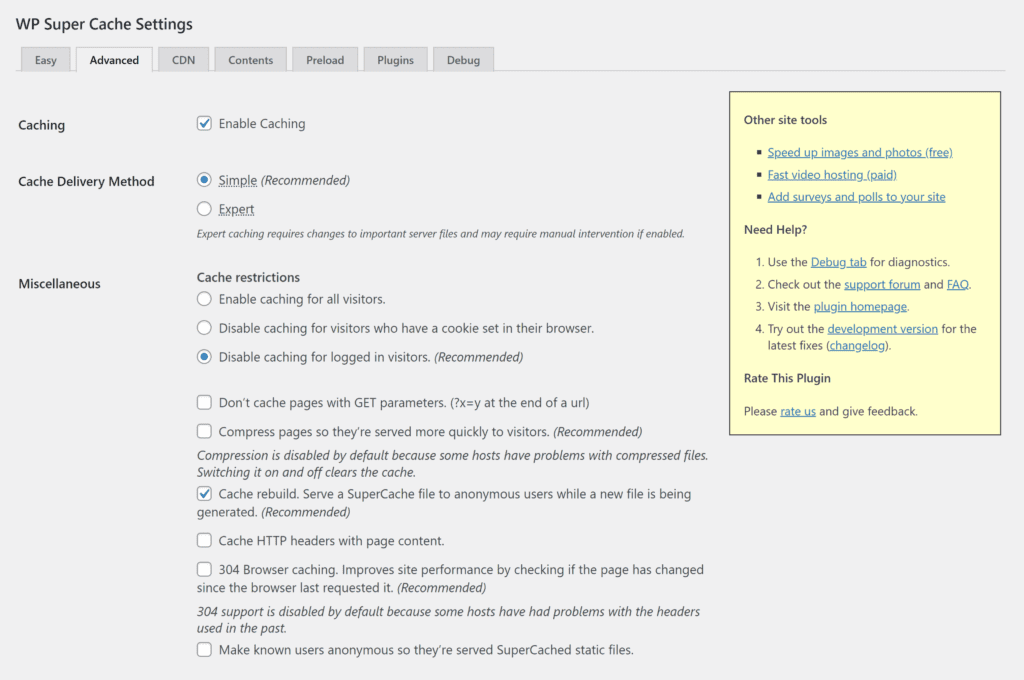
The advanced settings page gives you more control over what pages are cached and how page cache is delivered to users. There are options to exclude page types from caching and to clear all cache files when a post or page is published or updated.
In the garbage collection section, you can set cached files to be deleted at certain intervals. A separate settings page is available for specifying when page cache is preloaded.
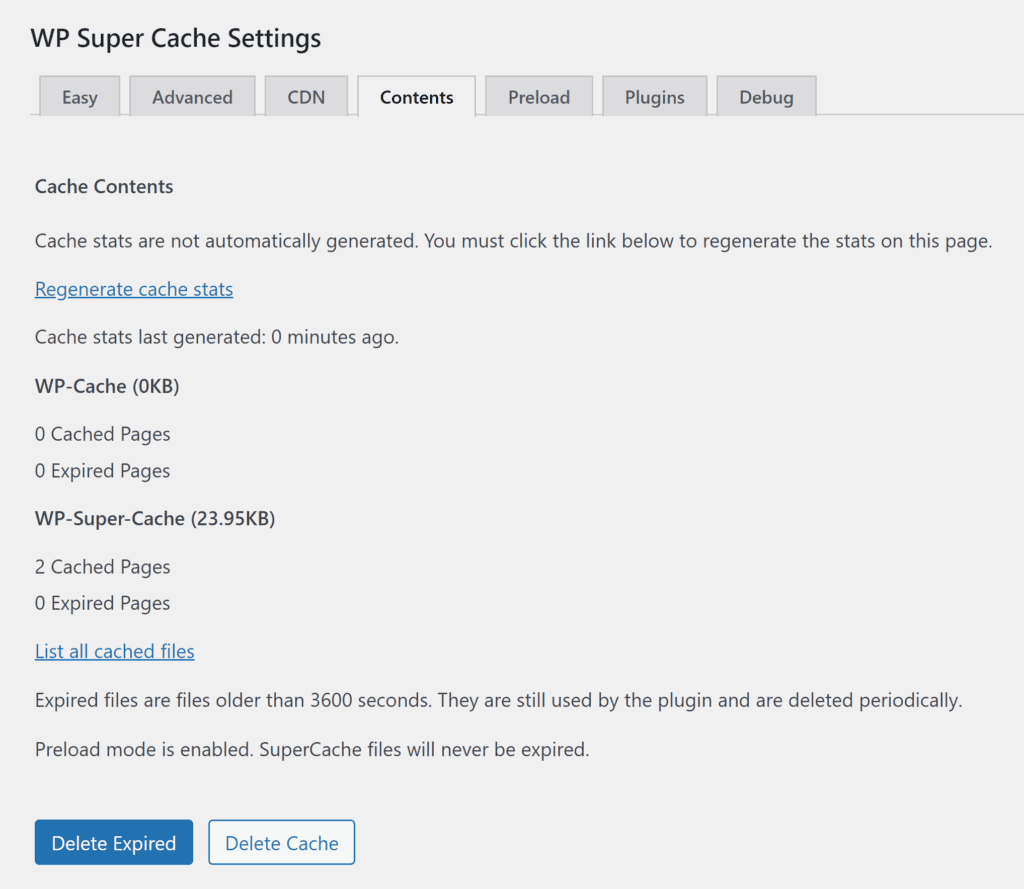
A detailed list of the pages that have been cached can be viewed from the contents page. Buttons are available here to delete cache and delete expired cache files.
The Delete Cache button in the WordPress admin bar lets you quickly clear page cache from the back-end or front-end of your website. Unfortunately, there is no option in WP Super Cache to delete the cache of a specific URL.

How to Clear Page Cache Using WP Fastest Cache
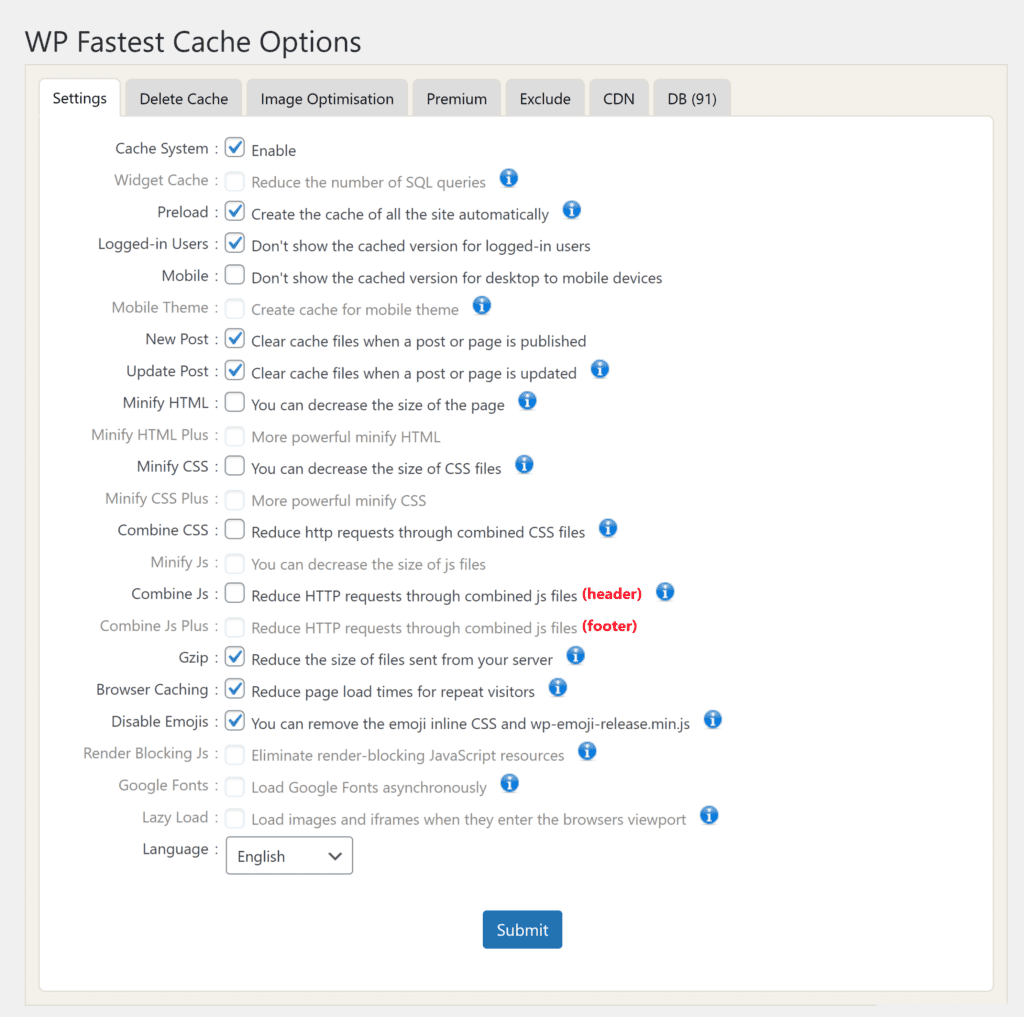
WP Fastest Cache is an effective WordPress caching plugin that has many useful caching options.
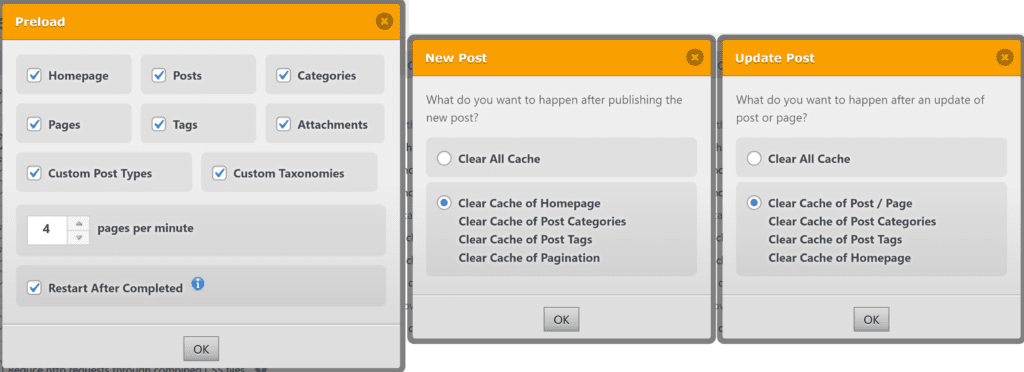
In the main settings page, you can enable cache preloading and set page cache to be cleared when a post has been added or updated. You can also disable caching for logged-in users and mobile users.
When you enable a caching feature from the main settings page, a box will pop up showing additional options. This gives you complete control over what cache is preloaded and what cache is cleared.
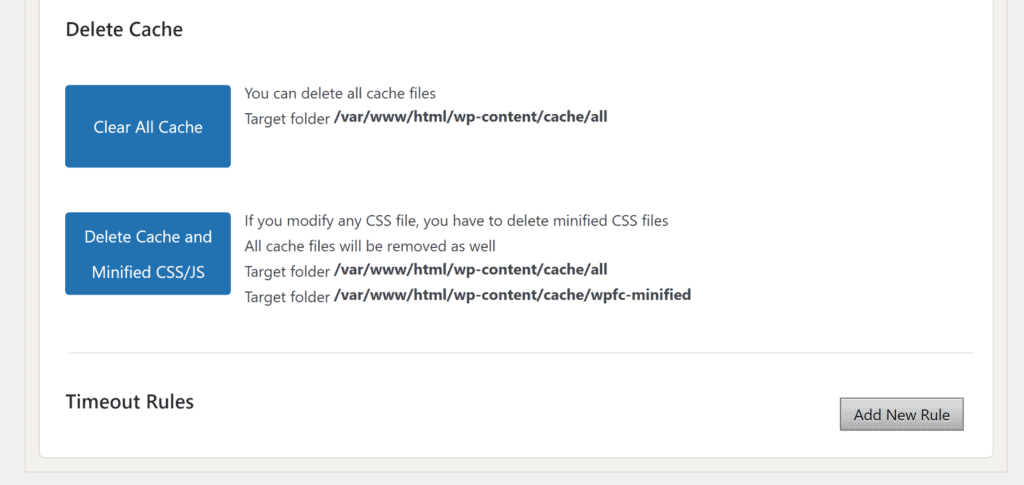
All cache can be cleared from the Delete Cache settings page. Minified CSS and Javascript can be cleared at the same time if these features have been enabled and timeout rules allow you to automatically clear cache using any time interval.
A separate settings page is available for exclusions. This can be used to exclude pages and user-agents from page caching.
The WP Fastest Cache dropdown menu lets you clear all cache and delete cache and minified CSS and Javascript. You can use this menu from the front-end of your website to clear cache for a specific page.

How to Purge Page Cache in Cloudways Using Breeze
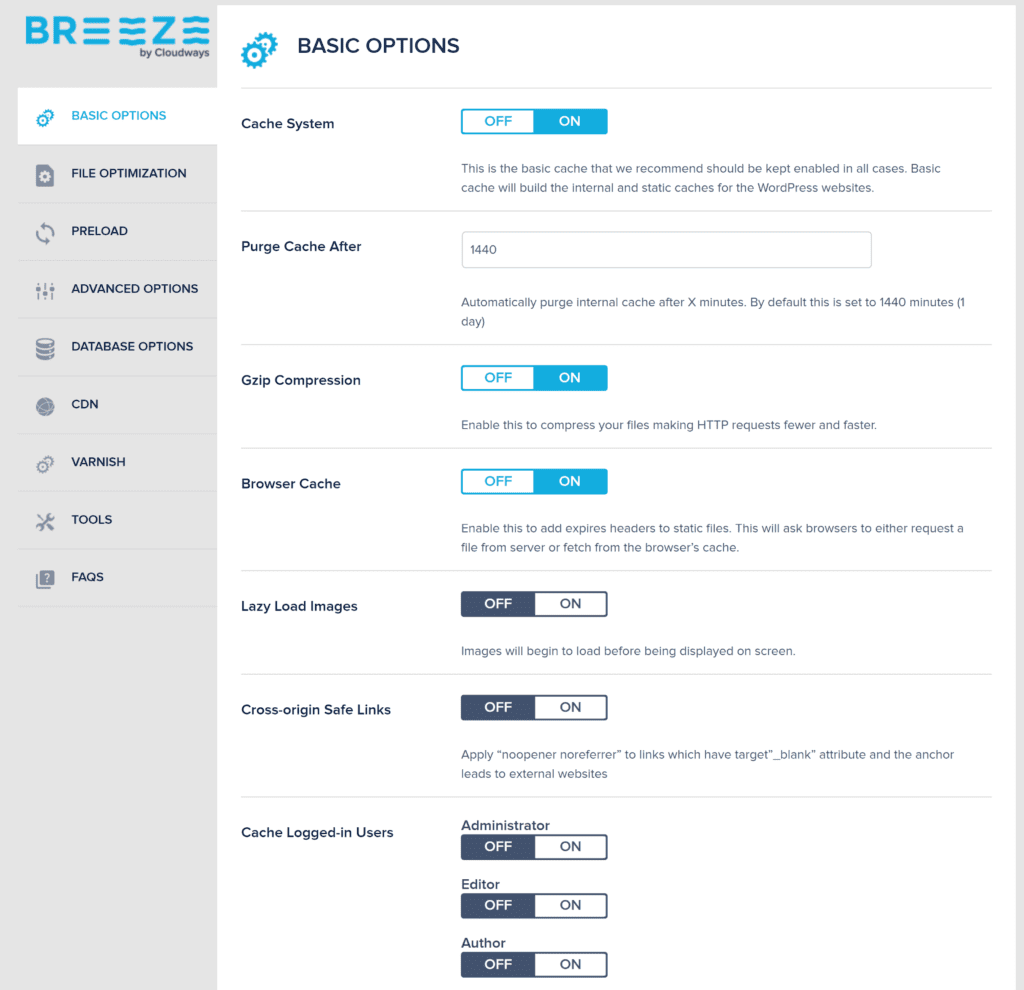
The managed cloud hosting platform Cloudways optimises website delivery by using advanced caching technologies such as Memcached, Varnish, Nginx and Redis. For WordPress websites, Cloudways recommends using their WordPress caching plugin Breeze.
In the basic options page, you can enable caching and set page cache to be cleared after a defined number of minutes. Caching can also be enabled and disabled for WordPress user groups such as administrators, authors and contributors.
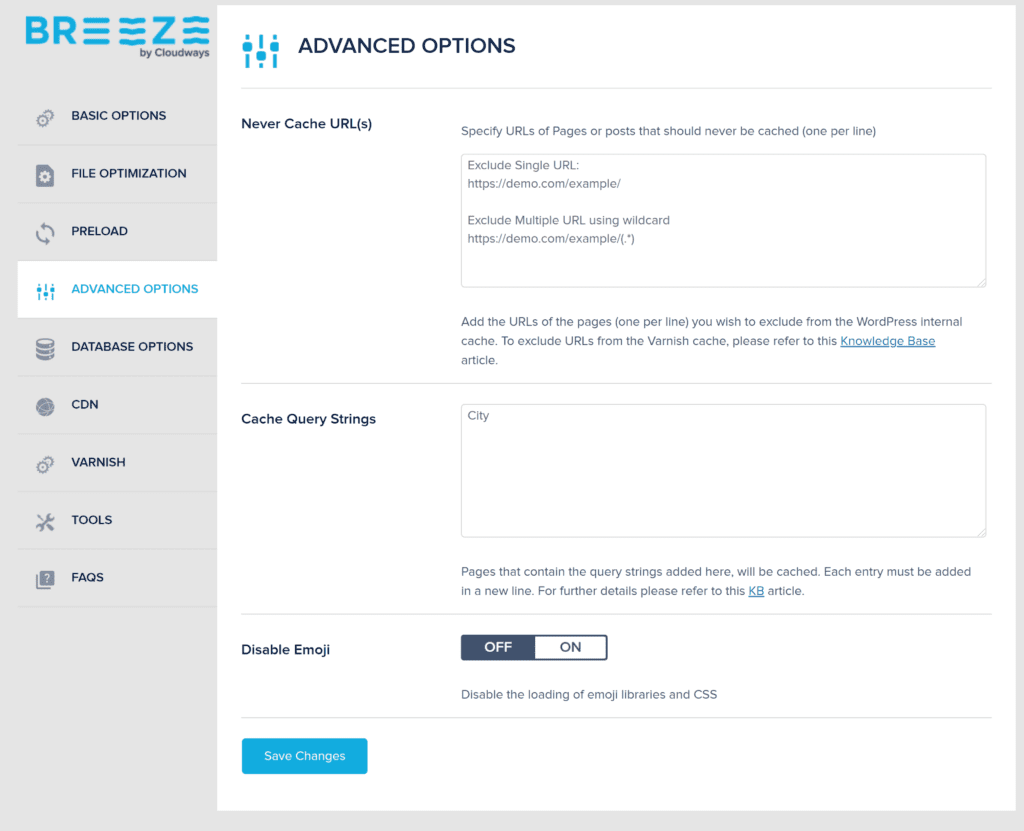
URLs and pages that include specified strings can be excluded from caching. This can be done on the advanced options page.
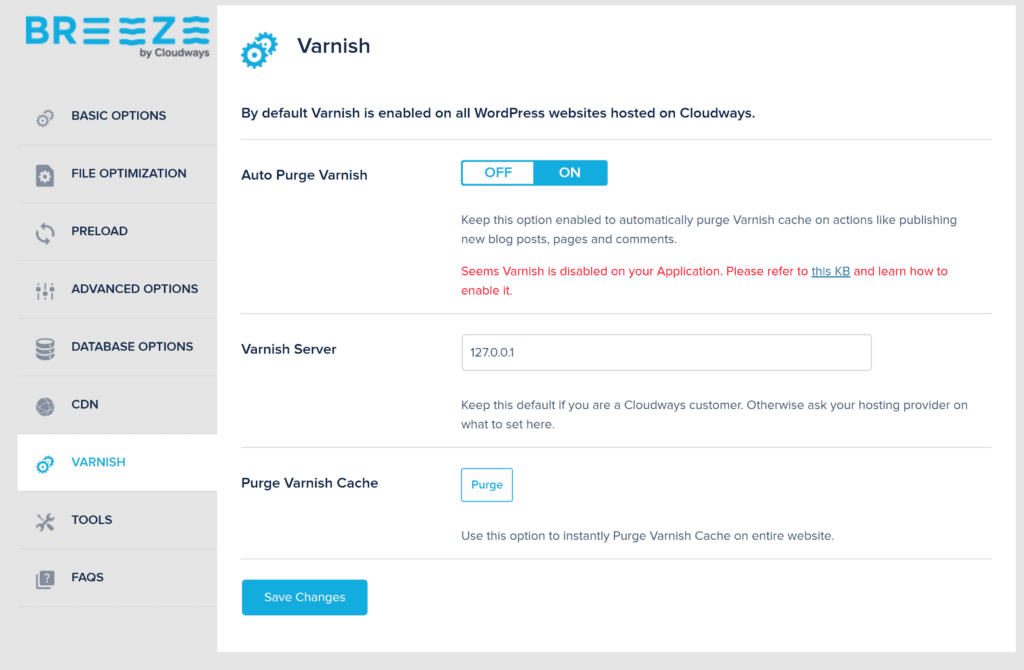
From the Varnish settings page, you set Varnish to automatically clear Varnish cache when new content is added or existing content is updated. If you prefer, you can manually purge all Varnish cache.
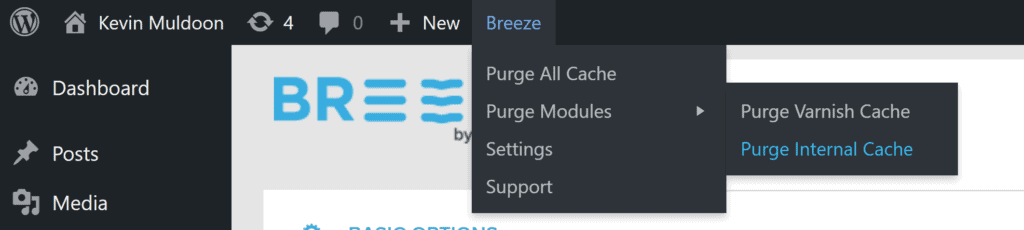
Unlike other WordPress caching plugins, the Breeze dropdown menu is only available in the admin area and cannot be accessed from the front-end of your website.
From the menu, you can clear page cache, clear Varnish cache or clear both caches.
How to Clear Page Cache in WP Engine
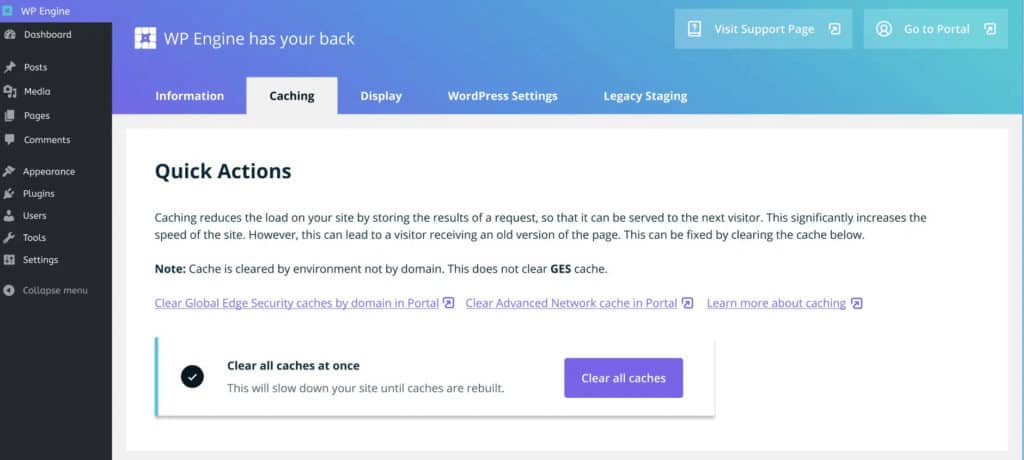
The managed WordPress hosting company WP Engine use their own proprietary caching system called EverCache.
Once the WP Engine WordPress plugin has been activated on your website, you can clear all cache from the caching settings page.
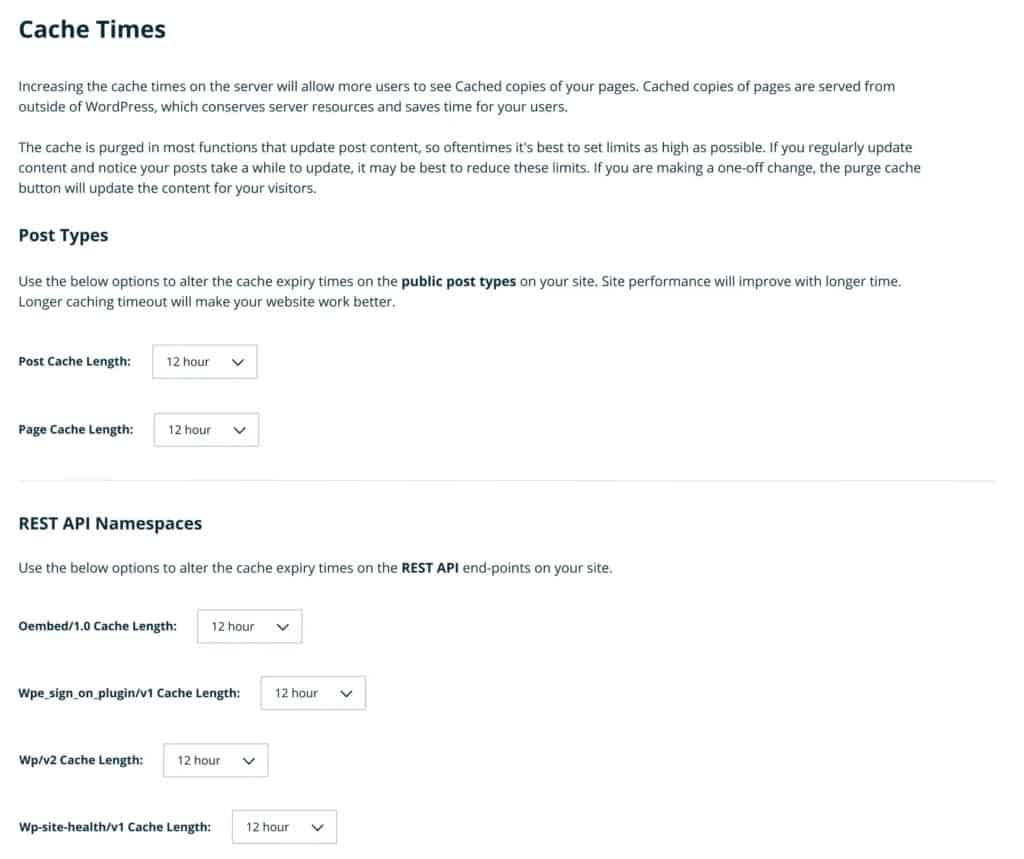
WP Engine lets you set how long posts and pages are cached. Cache expiry times can also be configured for the WordPress Rest API.
You can read more about clearing cache on WP Engine in the article “Clear Your Caches With Confidence“.
How to Clear WordPress Cache in GoDaddy
GoDaddy’s managed hosting plans allow you to cache website pages and distribute them worldwide using a Content Delivery Network (CDN).
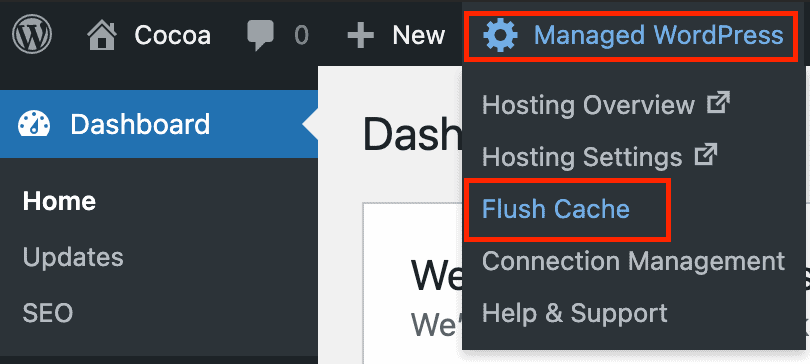
To clear your website’s CDN cache, you need to sign in to your managed WordPress plan and then hover over Managed WordPress at the top of the page. You can then clear the cache using the “Flush Cache” tool.
You can read more about this on GoDaddy’s Clear Your Cache information page.
How to Clear Page Cache in BlueHost
BlueHost’s managed WordPress hosting plans use a custom multi-layer caching solution that optimises your website pages.
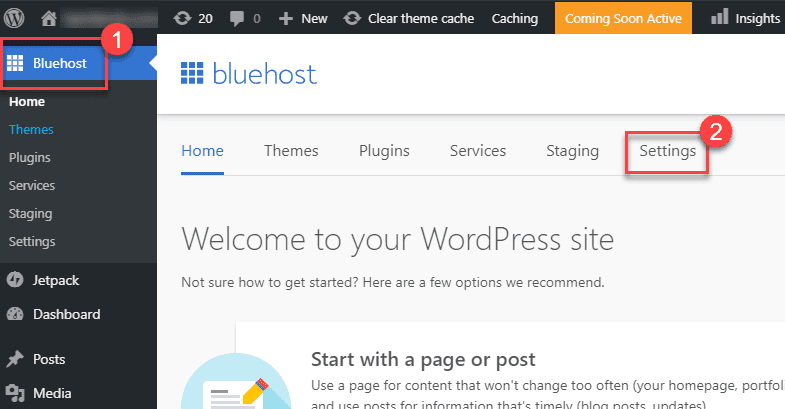
The BlueHost WordPress plugin integrates WordPress with the Bluehost control panel. Once the plugin has been activated, you can manage caching by navigating to the performance section of the main settings page.
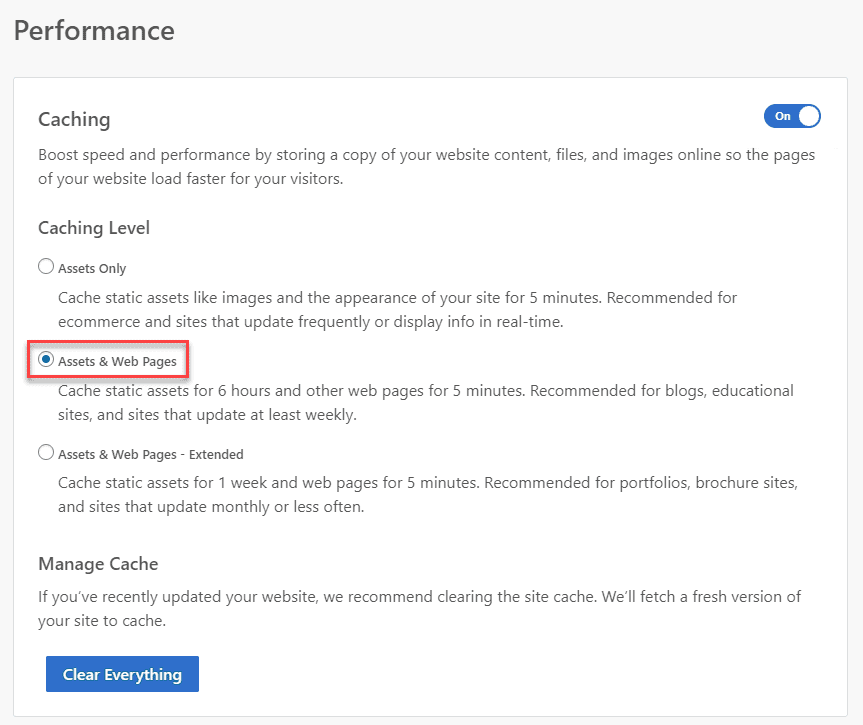
The plugin lets you choose between only caching static files or caching static files and web pages. An extended caching level is available for websites that do not update frequently.
All cache can be cleared by using the “Clear Everything” button.
Caching can also be managed directly from the BlueHost control panel by selecting your website and clicking on the performance tab. The frequency of caching can be defined using “Single-Server Caching Control” and there is an option to clear specific URLs. All cache can be cleared from this page too.
To learn more about clearing cache with BlueHost, please read “How to Use Our Page Caching Feature“.

Final Thoughts
Page caching is the most effective way to optimise a WordPress website. It is therefore important to understand how to clear WordPress cache, preload cache and configure cache correctly for your site. Every caching solution uses a similar process for clearing WordPress cache, but the level of caching control available does vary.
Be sure to check important pages of your website regularly to ensure they are up to date and functioning correctly. For the most part, you should not encounter any major issues with page caching, though you may have to exclude pages with dynamic elements from caching to avoid problems. Pages with contact forms, for example, may need to be excluded from caching for the forms to work correctly.
Whilst page caching is effective, it does not guarantee you a fast website. It is therefore important to use page caching alongside other optimisation techniques such as cleaning the WordPress database, reducing the file size of images and deferring parsing of Javascript.
To learn more about page caching, please read my article “How WordPress Caching Works“. You can also read about my recommended WordPress caching plugins in my article “The Best WordPress Caching Plugins For Improving Website Speed“.
Good luck.
Kevin
Category:
Share it:
You may also like

MalCare Ensures Proactive Protection Against WP-Members XSS Vulnerability
MalCare continues to protect its customer sites from all kinds of attacks, even the ones exploiting zero-day vulnerabilities. The recent stored cross-site scripting (XSS) vulnerability found in the WP-Members Membership…
![Top 9 ManageWP Alternatives To Manage Multiple Sites Easily [Reviewed]](https://www.malcare.com/wp-content/uploads/2022/12/malcare-default-image.jpeg)
Top 9 ManageWP Alternatives To Manage Multiple Sites Easily [Reviewed]
ManageWP is a popular name in the WordPress maintenance plugins market. People love how much you get for a free plan, how easy it is to set up, and how…
MalCare Proactively Defends Against Icegram Express SQL Injection Vulnerability
MalCare’s recent data has revealed numerous attempts to exploit a newly found SQL injection vulnerability in the Icegram Express plugin. Attackers commonly use this sophisticated SQL injection technique to extract…
How can we help you?
If you’re worried that your website has been hacked, MalCare can help you quickly fix the issue and secure your site to prevent future hacks.

My site is hacked – Help me clean it
Clean your site with MalCare’s AntiVirus solution within minutes. It will remove all malware from your complete site. Guaranteed.

Secure my WordPress Site from hackers
MalCare’s 7-Layer Security Offers Complete Protection for Your Website. 300,000+ Websites Trust MalCare for Total Defence from Attacks.


