Complete Guide To WordPress Account Management
by
7-layers of Security for Your WordPress Site
Your website needs the most comprehensive security to protect it from the constant attacks it faces everyday.

Managing multiple user accounts on your WordPress site can seem daunting. It includes several tasks that range from managing user roles to monitoring user activity.
Unmanaged user accounts are not just an administrative oversight, but they significantly heighten the risk of security breaches on your website. For example, allowing anyone to register without verification can let spammers create accounts that publish malicious links or content.
In this article, we present six essential tips to help with user account management. Whether you’re a novice or an experienced site administrator, these strategies are a few of the tools you need to maintain a secure WordPress site.
TL;DR: Manage your WordPress site’s user roles using the inbuilt WordPress features. Then, install MalCare so you can limit logins and have a comprehensive overview of users.
When managing user accounts on your WordPress website, utilizing the right tools is essential for maintaining order and security. From assigning appropriate roles to each user to restricting content access, a variety of plugins can streamline these processes. But with the many options available, choosing the right ones can be overwhelming.
We’ve curated a concise list of account management tips that can help you out.
Best plugins for effective WordPress account management
- Best way to protect your users: MalCare
- Best way to manage user activity: MalCare
- Best way to manage user roles: User Role Editor
- Best way to restrict access to content: MemberPress
1. Add users correctly
Proper management of user accounts starts from the very moment they are created. Depending on the number of users you would like to give access to, you can choose one of the following methods.
Adding a limited number of users
If your website requires a limited and controlled user environment, you can use the built-in user role capabilities in the WordPress admin panel. This is ideal for sites that do not require public registration, like private blogs or corporate websites.
- Access the Settings menu: On the left sidebar of your dashboard, find and click on the Settings tab. Then, choose General to open the general settings page for your site.
- Enable membership registration: Look for the Membership section on this page. Uncheck the checkbox labeled Anyone can register. Scroll down to the bottom of the page and click the Save Changes button to implement the new setting.
- Open the users menu: On the left sidebar of your dashboard, click on Users to open the user management options. Click on Add New at the top of the Users section.
- Fill in user details: Provide the required details for the new user account. This includes a username, email address, first and last name, website (optional), and password. Make sure to use a strong password for security purposes.
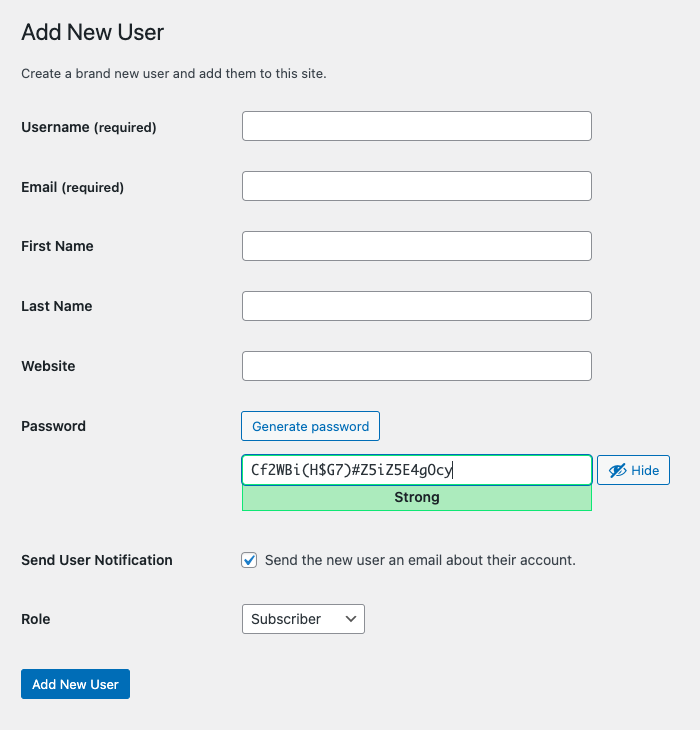
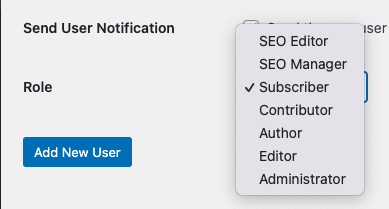
- Set role: Select the appropriate role for the new user from the dropdown menu. Roles include Administrator, Editor, Author, Contributor, or Subscriber, each with different access levels and capabilities.
- Send user notification: If you want the new user to receive an email about their account details, leave the checkbox Send the new user an email about their account selected.
- Add new user: Once all the information is filled in and you have chosen the correct role, click the Add New User button at the bottom of the screen.
The user will now be created and will receive their login details via email if you opted to send them. This method allows you to have complete control over who can access your WordPress site.
Allow users to register themselves
If you wish to open up registration to the public, there are two ways to do it.
WordPress allows you to do this on the dashboard using the following steps:
- Navigate to settings: On the left-hand sidebar of your dashboard, click on Settings to expand the options, then select General.
- Modify membership settings: Within the General settings page, you will find the ‘Membership’ section. Here, check the box next to Anyone can register to allow visitors to create an account.
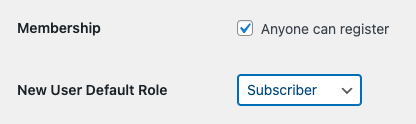
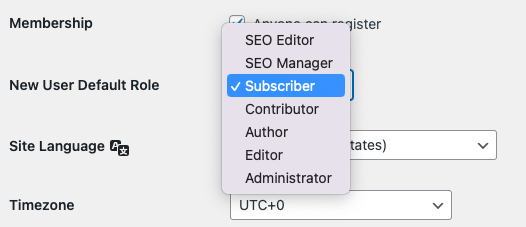
- Set the default user role: Directly below the Membership checkbox, there is a dropdown menu labeled New User Default Role. This setting allows you to assign a default role to all new users who register. Choose a role that best suits the majority of your new users (Subscriber is the most restrictive role, making it a safe default).
- Save changes: After adjusting the settings to your liking, scroll to the bottom of the page and click the Save Changes button to apply your updates.
- Review registration page: With registrations enabled, WordPress automatically uses a built-in user registration form accessible at yoursite.com/wp-login.php?action=register. Visit this URL to review what your new users will see when registering.
Alternatively, you can set up a custom registration form
The default WordPress form is pretty basic.It might not match your website’s look or feel, nor collect all the information you need. This is why we recommend a forms plugin like WPForms.
WPForms lets you design a form that feels like a part of your site with the exact fields you want. Plus, it protects against spam and integrates with marketing tools like MailChimp, making it easy to stay connected with users after they sign up.
While WPForms is a solid choice, it’s not the only one. Elementor is another powerful alternative that offers a wide range of design and functionality features.
2. Manage user roles
User roles in WordPress define what actions each user can perform on your site. In a well-managed WordPress environment, assigning the correct roles helps maintain site security and workflow efficiency. For example, a contributor with excessive privileges might unintentionally install a compromised plugin, opening the door for malware to infiltrate the site.
Modifying user roles on the dashboard
Through wp-admin, you can create, delete, or modify user profiles and customize user roles to fit the needs of your website.
To assign or change user roles, navigate to Users in your WordPress dashboard. Here you can add new users and set their roles during the creation process. To modify an existing user’s role, click on their username, choose a different role from the dropdown menu in the user editor, and save your changes. The following is a quick guide to the default user roles:
- Super Admin: (only in a WordPress Multisite Network): A Super Admin has the highest level of control and can manage network-wide settings, themes, plugins, and all sites within the network.
- Administrator: An Administrator has access to all administrative features within a single site, including managing other users, changing themes, configuring plugins, and creating content.
- Editor: Editors can manage and publish content, including posts written by other users. They cannot change website settings or install new themes or plugins.
- Author: Authors can publish and manage their own posts. They cannot edit content from other users or modify the site’s settings.
- Contributor: Contributors can write and manage their own posts but cannot publish them. They also cannot upload media files.
- Subscriber: Subscribers can only manage their own profile and read content. They cannot create content or access administrative features.
Setting up custom user roles
For finer control over what each user can access, you can use the User Role Editor plugin.
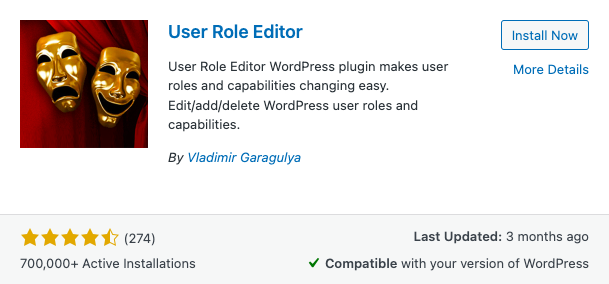
This powerful tool provides advanced capabilities, including:
- Customize the admin menu for each role
- Customize navigation menus for roles
- Customize widgets for each user role
- Limit access to certain meta boxes
- Grant different roles access to certain plugins
Alternatively, WPFront User Editor is a great free option too.
3. Manage content access
Offering memberships on your WordPress site is a powerful way to create a community and maintain an income stream through premium content or services. Managing such a community, however, can be complex without the right tools. Enter MemberPress, a premier membership plugin designed to streamline the way you control access to your content and manage user subscriptions.
MemberPress brings simplicity and control to your digital hands, allowing you to:
- Create exclusive content areas
- Manage member profiles
- Handle subscriptions
- Integrate payment gateways
The plans start at $179.50 per year for a single site. If you’re looking for an alternate membership plugin, WooCommerce Memberships is our second choice
4. Log user activity
WordPress activity logs play a crucial role in account management as they provide a detailed record of user actions within a WordPress site. Whether it’s spotting a potential security breach or simply tracking changes for auditing purposes, activity logs offer a transparent overview of your site’s operational activity.
We tested a bunch of WordPress activity log plugins and we recommend using MalCare
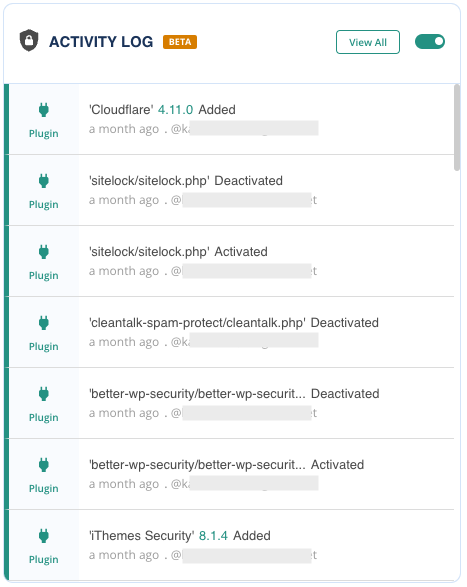
MalCare tracks the following things:
- Changes to user profiles
- Login attempts
- Modifications to plugins and themes
- Changes to WordPress core
- Changes to WordPress files
- Failed login attempts
- New user registrations
While MalCare has a free subscription, the activity log is a premium feature and plans start at $149 a year. The next best plugin is WP Activity Log.
5. Manage spam registrations
When you allow registrations to the public, spam registrations can be a persistent issue. They can clutter your site with unwanted users and potentially compromise your site’s integrity. CleanTalk, an anti-spam plugin, serves as a dedicated sentry against these unwelcome intruders.
Here’s how CleanTalk provides a robust defense against spam registrations:
- IP and Email verification
- Automatic blacklist update
- Real-time alerts
- Mobile friendly
The plans start at $12 a year. Cleantalk is our pick of anti-spam plugins but Akismet is a popular free alternative.
6. Implement good login security
Good login security is an underrated security measure that can help protect sensitive user information from unauthorized access and potential breaches. We have a complete guide on login security, but here is a quick look at a couple of very important security measures:
- Limit logins: Limiting logins is a security practice that restricts the number of times a user can attempt to log into an account within a certain period of time. This precaution is designed to thwart brute force attacks, where an attacker tries to guess a user’s password by making many login attempts in rapid succession.
MalCare is our best recommendation for limiting logins. It reduces the chances of locking out genuine users and has a great bot protection feature that fights off brute-force attacks.
- Implement two-factor authentication (2FA): Two-factor authentication (2FA) adds an extra layer of security to your WordPress login process. You can use a plugin like miniOrange Google Authenticator or WP2FA to ensure users verify their logins via email, SMS or authenticator apps.
Best practices for WordPress site management
WordPress site management requires more than just publishing content and choosing the right themes. It’s about adopting thorough strategies to ensure the site runs smoothly and securely. In this section, we’ve put together a series of additional tips tailored to refine the way you manage your WordPress site.
- Install a security plugin: Installing a security plugin like MalCare on your WordPress site is crucial for proactive protection and peace of mind. It constantly scans your website for malware, monitors your site for suspicious activities, and implements a robust firewall. It simplifies complex security measures into user-friendly interfaces, making web security accessible to site owners of all technical levels.
- Stay updated: Keeping your WordPress core, plugins, and themes updated is vital for the security, performance, and stability of your site. Regular updates patch critical security vulnerabilities, warding off hackers and protecting your site from breaches. They also introduce optimizations that enhance site speed and user experience, essential factors for favorable search engine rankings.
- Keep everything backed up: Use services like BlogVault to regularly back up your WordPress site. This safeguards against data loss in the event of a mishap and ensures that you have a recent restore point in case of a security breach.
- Update user information regularly: Regularly remind users to update their personal information and purge inactive accounts to keep your user base current and engaged.
- Simplify password recovery: Provide straightforward password recovery options to minimize the need for admin intervention and to help users regain access to their accounts quickly.
- Educate users on security: Foster a security-conscious community by providing education and resources on best practices. Informed users are less likely to fall prey to common threats.
- Utilize spam prevention tools: Protect your site from spam and ensure a better experience for your users with plugins like CleanTalk, which filter out unwanted content and registrations.
Final thoughts
Building and managing a WordPress site with a lot of users can be painstaking. It involves a lot of daily tasks such as monitoring user activity and managing inputs. Thankfully there are plugins like MalCare that can help take the load off of your shoulders.
FAQs
What is user management in WordPress?
User management in WordPress refers to the various tasks associated with managing the accounts of visitors and users on a WordPress website. This includes creating user accounts, assigning roles and permissions, editing user profiles, and overseeing user activity. User management is essential for maintaining the security and order of a WordPress website, especially when different users have different levels of access and capabilities.
How do I manage users’ profiles in WordPress?
To manage users’ profiles in WordPress, you’ll need to:
- Log into your WordPress dashboard.
- Go to the Users section on the sidebar menu.
- Click All Users to see a list of every registered user on your site.
- Hover over a user’s name and click Edit to modify their profile.
- From the edit screen, you can change various details, such as the user’s role, password, and email address, as well as additional personal information.
- Once you’ve made the necessary changes, scroll down and click the Update User button to save the changes.
What is a WordPress account?
A WordPress account is an identity created for a user who can log into a WordPress website. It contains the user’s credentials, such as username and password, and essential information like email address, name, and role. The role determines the user’s level of access and the actions they are permitted to perform on the site. WordPress accounts ensure that the site can have multiple contributors and users while maintaining an organized and secure environment.
Category:
Share it:
You may also like

MalCare Ensures Unmatched Protection Against User Registration Privilege Escalation Vulnerability
Imagine discovering that your WordPress site, which should be secure and under strict control, has suddenly become accessible to unauthorized users who have the same administrative powers as you. This…
MalCare Ensures Proactive Protection Against WP-Members XSS Vulnerability
MalCare continues to protect its customer sites from all kinds of attacks, even the ones exploiting zero-day vulnerabilities. The recent stored cross-site scripting (XSS) vulnerability found in the WP-Members Membership…
Top 9 ManageWP Alternatives To Manage Multiple Sites Easily [Reviewed]
ManageWP is a popular name in the WordPress maintenance plugins market. People love how much you get for a free plan, how easy it is to set up, and how…
How can we help you?
If you’re worried that your website has been hacked, MalCare can help you quickly fix the issue and secure your site to prevent future hacks.

My site is hacked – Help me clean it
Clean your site with MalCare’s AntiVirus solution within minutes. It will remove all malware from your complete site. Guaranteed.

Secure my WordPress Site from hackers
MalCare’s 7-Layer Security Offers Complete Protection for Your Website. 300,000+ Websites Trust MalCare for Total Defence from Attacks.


