2 Ways To Restrict Page Access To Logged-In Users
by
7-layers of Security for Your WordPress Site
Your website needs the most comprehensive security to protect it from the constant attacks it faces everyday.

Restricting access to your content can be about establishing login security or crafting a curated user experience. It adds an extra layer of security by preventing unauthorized visitors from viewing sensitive content.
For example, you might want to restrict access to certain members of your site: blogs, resources, e-learning curricula, etc. It’s also possible that you want some pages to be restricted to the internal team, like company policies, pages to upload job-related documents or customer data.
In this article, we’ll talk about a few different ways to restrict access to your WordPress pages or blogs to logged in users, so you have fine-grained control on who can access what on your site.
TL;DR: There are a few ways to ensure that content on your site is only visible to certain users. The easiest way to restrict access is through tools like Simple Page Access Restriction or the built-in visibility features. If you are restricting access for login security reasons, you’re better off using a comprehensive WordPress security plugin like MalCare, which keeps hackers at bay.
Restrict page access to logged in users without plugin
WordPress offers built-in features that limit visibility solely to logged-in administrators and editors. This feature proves invaluable when content isn’t yet ready for public consumption or when a specific page is intended for an internal team. It is also a simple solution for maintaining confidentiality.
This setting is often used in distributed editorial teams, where there are multiple people working on publishing content. A writer can draft a post, which an editor can then finalize independently. Until the editor signs off on a post, it remains in review mode.
Here’s how to do it:
Step 1: Create or edit a post/page
Navigate to the Posts or Pages page in the WordPress dashboard.
Either click Add New or Edit an existing one.

Step 2: Edit visibility settings
In the post/page editor, look for the Publish box on the right-hand side. Within the Publish box in the sidebar, locate the Visibility option and click on Edit. A dropdown menu will appear. Choose Private from the options.
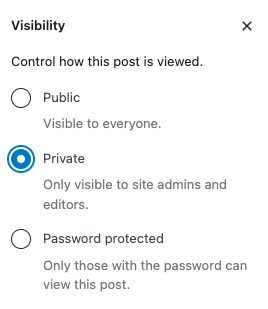
Step 3: Update or publish
If you’re editing an existing post/page, click Update to save the changes.
If it’s a new post/page, click Publish. Once you’re done, log out of your account and try to access the page.

Restrict page access to logged in users with plugin
If you’re looking for more customizability, restrict page access to logged-in users on WordPress with a good plugin. There are several membership plugins like Simple Membership or Ultimate Member. These plugins offer a world of features and are easy to use.
For example, in a quote management system, employees needed to upload spreadsheets whenever an update was available. Obviously, this kind of financial information needs to be kept confidential. Using a membership plugin allows you to have great control over the site and its content, while retaining usability for everyone.
a. Simple Membership
We tested the Simple Membership plugin and found that it was very helpful if you have a large audience and different pages need to be customized to different types of users. However, this is a more complex plugin and takes a bit longer to customize and set up.
Step 1: Install and activate
Go to your WordPress dashboard. Navigate to Plugins and click on Add New. Search for Simple Membership. Install and activate the plugin.
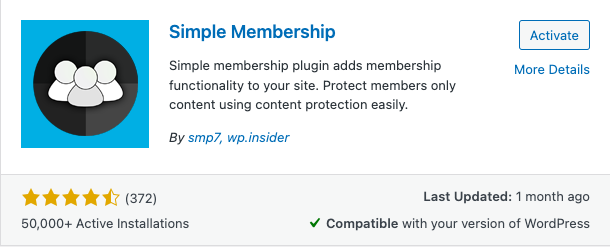
Step 2: Add new membership levels
In your WordPress dashboard, hover over WP Membership, and click on Membership Levels.
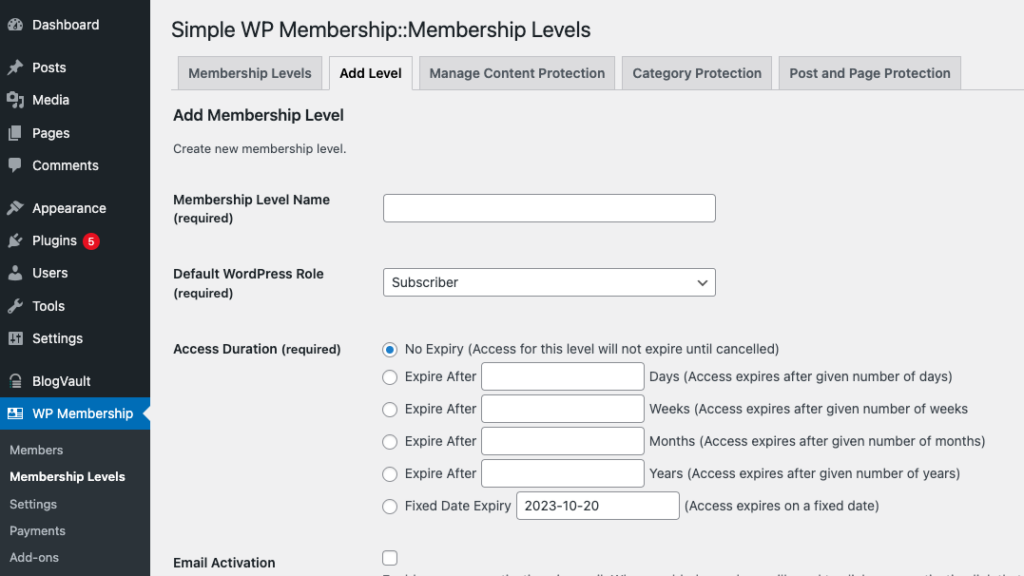
Add new membership levels based on your requirements. For example, if you have different types of memberships, you can add each of them in this section.
Step 3: Configure access in the page editor
When editing a page or post, scroll to the bottom of the editor. Find the Simple Membership section at the bottom of the page. Select which membership level(s) can access the content on this specific page or post.
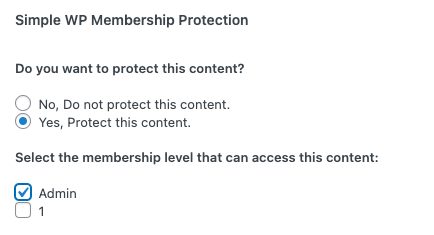
Step 4: Publish and test
Save your changes by clicking Update or Publish for the page or post. To test, log out of your WordPress account, visit the page or post, and verify that only users with the specified membership level can access the content. Do this by logging out and testing the process with accounts of different membership levels.

b. Simple Page Access Restriction
If you’re looking for a simpler plugin, we tested another plugin called Simple Page Access Restriction. Using its features, you can customize where your users are directed after login. This is perfect for unique user dashboards or custom membership landing pages.
We saw this put to great use in a community marketplace, where sellers needed to upload product images from internal, secure areas, but the photos needed to be publicly visible on product pages.
We also liked that you also can specify access restrictions before publishing each page. This way, some pages can be public and others can be restricted to users only. It was a great way to release presale drops to privileged customers in advance.
Overall, like the name implies, it’s a simple plugin with basic features, making its setup and usage quick and straightforward.
Step 1: Install and activate
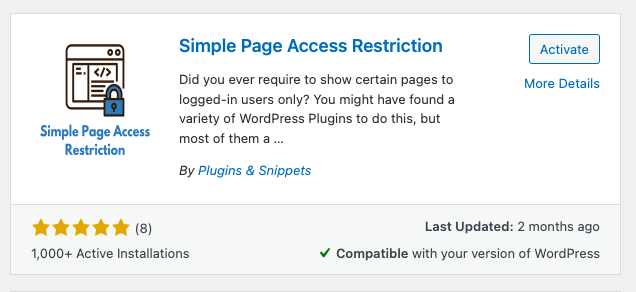
Navigate to your WordPress dashboard. Click the Plugins tab in the sidebar and click on Add New. Search for Simple Page Access Restriction. Install and activate the plugin.
Step 2: Configure settings
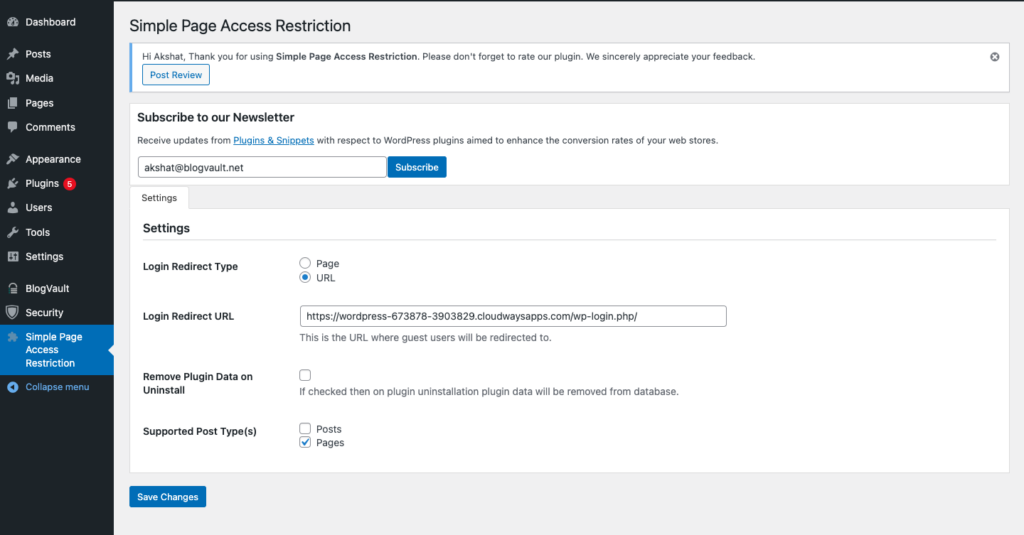
Find the plugin in the WordPress dashboard and click on Settings. Configure the following settings:
- Choose where you’d like to redirect users (page or URL)
- Specify the page or URL for redirection (e.g., pricing page or login URL)
- Determine whether the plugin should support pages, posts, or both
Step 3: Select the plugin on the page editor
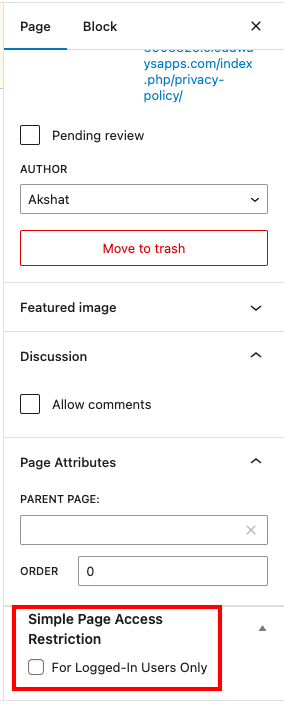
Now, when you edit a page or post, look for the Simple Page Access Restriction option in the sidebar. It’s at the bottom of the Page settings. Check the box to enable access restrictions for that specific page or post.
Step 4: Publish and test
After configuring the settings, save your changes and publish the page or post. To ensure that your access restrictions are working as intended, log out of your WordPress account first. Then visit the page or post you configured, from other accounts a and verify that the redirection and access restrictions are in place.

Additional security measures
Apart from the ability to restrict content to certain users, limiting access to logged-in users also has a security angle to it. Restricting user access can be a form of whitelisting, although it is certainly a roundabout way to go about it.
Besides, if a user’s account is compromised—either through poor password security or brute force attacks—it would give hackers a way to get unauthorized access anyway. So, in terms of site security, restricting access can leave much to be desired. Plus, it’s also important to note that a large chunk of hacks are caused by vulnerabilities in the WordPress core files. This makes it necessary to implement good security measures.
- Install a security plugin: Installing a security plugin like MalCare is a fundamental step in fortifying your WordPress site. MalCare offers a range of features, including malware scanning, vulnerability detection, and real-time monitoring. It also helps you remove malware in just one click, if it finds any.
- Install a firewall: A firewall acts as a virtual barrier against unauthorized access and malicious traffic. It filters incoming data and blocks potentially harmful requests. MalCare installs a firewall as soon as you install the plugin and has a history of blocking all types of hacks and attacks.
- Login security measures: Strengthen login security by implementing measures such as limiting login attempts to prevent brute-force attacks, enforcing strong password policies, and considering multi-factor authentication. These steps significantly enhance the resilience of your site against unauthorized access.
- Disable user registration: If your WordPress site doesn’t require mass user registration, disabling this feature eliminates a potential avenue for security threats. By doing so, you reduce the risk of unauthorized users gaining access and help maintain control over who can interact with your site. Any additional users can be added by admin, although you would need to balance out security and usability carefully.
- Monitor users: Regularly monitoring user activity on your WordPress site is crucial for early detection of suspicious behavior. Keep an eye on user logins, changes to user roles, and any unusual activity that might indicate a security breach. All of this is possible with MalCare’s activity log. All you have to do is install the plugin and an activity log records everything on the MalCare dashboard.
- Configure WordPress file permissions: Correct file permissions are essential for maintaining the security of your WordPress installation. Ensure that file and directory permissions are configured properly, restricting access to sensitive files. This helps prevent unauthorized users from modifying critical components of your site.
Final thoughts
You can restrict access to your content by using either the default WordPress visibility features or a plugin like Simple Membership. It’s a great way to only allow logged-in/verified users to access pages or posts. But, in the context of restricting authorized access across a site from a security perspective, this method is not enough. This is why we recommend a combination of login security measures and a security plugin like MalCare. Together, they cover all your bases.
FAQs
How do I restrict content to registered users in WordPress?
To restrict content to registered users in WordPress, you can use built-in features or plugins. One method is to edit the visibility settings for a post or page and choose Private. This will limit the content to only admins and editors.
Alternatively, plugins like Simple Page Access Restriction or membership plugins such as Simple Member offer more advanced options, allowing you to control access based on specific user roles or membership levels.
What is the purpose of restricting page access to logged-in users in WordPress?
Restricting page access to logged-in users in WordPress enhances privacy, security, and user engagement. It’s useful for creating member-only content, private communities, or providing exclusive access to certain information. This approach ensures that only authenticated users, such as administrators, editors, or registered members, can view specific pages, contributing to a more controlled and personalized user experience.
Are there any SEO considerations when restricting page access?
Yes, there are SEO considerations when restricting page access. Search engines may have limited access to content on restricted pages, affecting indexing and search visibility. It’s essential to use appropriate meta tags, such as noindex, and provide alternative content or summaries for public viewing. Striking a balance between protecting content and maintaining search visibility is crucial for SEO.
What happens if a user forgets their login credentials?
If a user forgets their login credentials in WordPress, they can use the Lost your password? link on the login page. By clicking this link, they can enter their email address to receive a password reset link. Following the link allows them to set a new password and regain access to their account.
Can I track user activity on restricted pages?
Yes, you can track user activity on restricted pages using plugins or analytics tools. Some security plugins like MalCare offer user activity logs that provide insights into logins, changes made to the site, and other actions. Additionally, Google Analytics or other analytics tools can track user behavior, even on restricted pages, as long as the tracking code is properly implemented and the user has permission to view the analytics data.
Share it:
You may also like
Fix Pharma Hack on WordPress and SEO
Pharma hack is a prolific malware that redirects visitors from your site to an online pharmacy that sells Viagra, Cialis, Levitra, Xanax, Tadalafil, and other drugs. It also shows up…
How To Protect Your WordPress Website From File Upload Vulnerability?
One of the core strengths of WordPress lies in its file upload functionality. The ability to seamlessly upload and integrate various types of files, from images and documents to multimedia…
MalCare Ensures Unmatched Protection Against User Registration Privilege Escalation Vulnerability
Imagine discovering that your WordPress site, which should be secure and under strict control, has suddenly become accessible to unauthorized users who have the same administrative powers as you. This…
How can we help you?
If you’re worried that your website has been hacked, MalCare can help you quickly fix the issue and secure your site to prevent future hacks.

My site is hacked – Help me clean it
Clean your site with MalCare’s AntiVirus solution within minutes. It will remove all malware from your complete site. Guaranteed.

Secure my WordPress Site from hackers
MalCare’s 7-Layer Security Offers Complete Protection for Your Website. 300,000+ Websites Trust MalCare for Total Defence from Attacks.


