How to Use WPScan: A Step-by-Step Tutorial
by
7-layers of Security for Your WordPress Site
Your website needs the most comprehensive security to protect it from the constant attacks it faces everyday.

WPScan is a vulnerability scanner for your site, identifying critical vulnerabilities and helping you keep your site up-to-date and secure from cyber threats. Vulnerabilities in outdated WordPress plugins or themes can allow hackers access to your website.
The article serves as a step-by-step tutorial for beginner WordPress users to learn how to use WPScan to find security vulnerabilities.
As security experts, we understand the importance of keeping your website secure from cyber threats. That’s why we’ve tested WPScan ourselves and can provide you with reliable information and guidance on how to use it to scan and secure your WordPress site.
TL;DR: WPScan finds the hidden doors hackers use to enter your site. This guide teaches you how to use the largest vulnerability database in the world to identify risks before they become a crisis. While WPScan finds the problems, you still need a proactive firewall like MalCare Security to stop them.
How to use WPScan to find vulnerabilities
WPScan is a vulnerability scanner designed specifically for WordPress websites. As the name implies, it scans your site for vulnerabilities and offers some hardening features.
Using WPScan requires a bit of setup and knowledge of how it works. In this section, we’ll guide you through the process of installing, setting up, and using WPScan so that you can protect your website from potential attacks.
With one of the most comprehensive vulnerability databases available, WPScan can identify vulnerabilities in even the most obscure plugins and themes with fewer than 100 active installs.
🔥 All that being said, WPScan is not a complete security plugin and doesn’t include a firewall or malware removal feature, which is critical for comprehensive site security. For that, you’ll need MalCare.
Step 1: Create an account
When using WPScan, you’ll need to obtain an API token in order to access the service. This token is unique to each user and is required for the service to track usage and prevent abuse.
To obtain your API token, you’ll need to sign up for WPScan and create an account. Once you’ve created your account, you’ll be able to access your API token in your profile settings.

Step 2: Install WPScan
There are a few methods to choose from when it comes to installation.
The first method is beginner-friendly and involves using the WPScan plugin directly from the WordPress dashboard. The second and third methods are a bit more advanced. They involve installing WPScan from the command line, and need some understanding of WordPress file structure.
Let’s take a look at both methods in more detail.
Option 1: Install WPScan with a plugin
The quickest way to start using WPScan is by using a plugin. Except, the plugin isn’t WPScan, but Jetpack Protect.
Since the standalone WPScan plugin is now primarily for enterprise use, most users should use Jetpack Protect to figure out which security updates they need immediately. It uses the same WPScan vulnerability database but is actively supported for all WordPress users.
1. Install and activate the Jetpack or Jetpack Protect plugin from your dashboard.
2. Navigate to the Security or Vulnerability tab.
3. Jetpack will automatically cross-reference your site’s plugins against the WPScan database.
⚠️ If you still choose to use the original WPScan plugin, you must enter your API key in the settings, but be aware that it may not receive regular feature updates.
For enterprise users
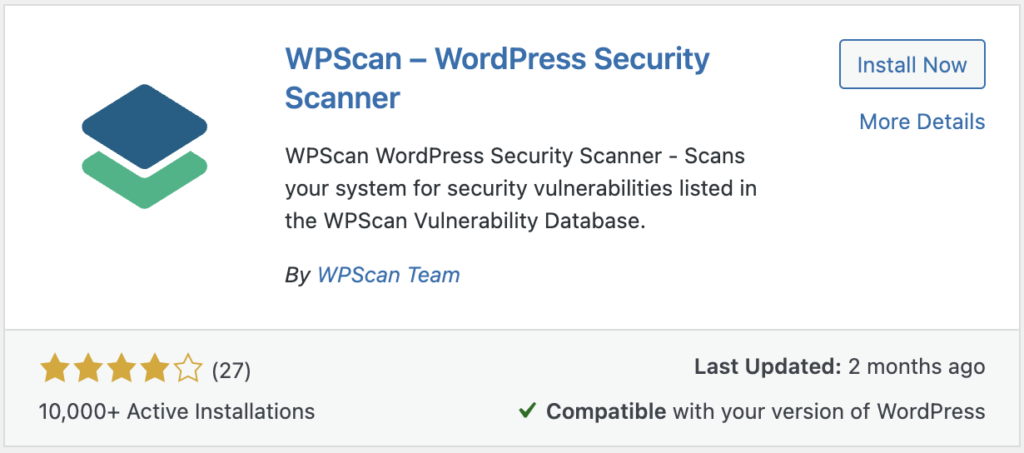
1. Install and activate the WPScan plugin from the plugins page on your WordPress dashboard.
2. Obtain your API key by signing up for a WPScan account and finding the key in your profile.
3. Enter the API key in the wp-admin dashboard to enable scanning functionality.
4. Deselect any plugins or themes you don’t want checked, as the free version of WPScan only allows for 25 API calls per day. Each plugin or theme takes 1 API call. For example, if you keep your WordPress version updated regularly, you can deselect that from the list of items to be checked.

Customise the scan settings to suit your site’s needs, but make sure to check all installed plugins and themes, especially if you don’t keep them regularly updated.
Option 2: Install with WP-CLI
To install WPScan via the command line, enter one of the following commands in the terminal:
If you’re using Windows: gem install wpscan
If you’re using a MacOS: brew install wpscanteam/tap/wpscan

Option 3: Install with Docker
You may choose to use Docker instead of a plugin installation to keep your WordPress database clean. Running scans from a separate container ensures that no additional code or tables are added to your live site.
Download the official image from Docker Hub. This image contains all the files needed to run the scanner. Use the following command in your terminal: docker pull wpscanteam/wpscan
Step 3: Scan your site with WPScan
If you installed WPScan as a plugin, you can access it through your WordPress dashboard. If you installed it using a command-line tool, you’ll need to use the terminal to run scans.
Use the plugin
After setting up WPScan, it will automatically run a daily scan at a fixed time.
To run a manual scan, click on “Run All” in the “Click the Run All button to run a full vulnerability scan against your WordPress website.” box.

Each plugin or theme will have a corresponding result and recommended action, usually to update if a vulnerability has been fixed in a subsequent update, with a link to more information.


You can click through to see the vulnerabilities discovered and reference links.

Additionally, you can configure email alerts for scan reports.
Use WP-CLI
The basic scanner can be used with the following command:
wpscan --url <your site URL here> This will check if your plugins and themes are up to date. There are several commands you can use from the command line. WPScan can also be used to test your site against brute force attacks. Bear in mind, some of the commands will require the use of the API token.
Use Docker
1. Start a scan by creating a temporary container. The --rm flag tells Docker to remove the container after the scan is finished. This helps save space on your computer: docker run -it --rm wpscanteam/wpscan --url https://your-site-url.com
2. To see specific vulnerability details, you must include your API token in the command: docker run -it --rm wpscanteam/wpscan --url https://your-site-url.com --api-token YOUR_TOKEN
3. Docker does not save files to your hard drive by default. To keep a record of your scan, you must mount a local folder to the container using the -v flag: docker run --rm -v /local/path:/output wpscanteam/wpscan --url https://your-site-url.com -o /output/report.txt
Understanding CVSS scores
WPScan uses the common vulnerability scoring system to rate security risks. These scores help you decide which issues to fix first. Each score is a number between 0.0 and 10.0. A higher number means the vulnerability is more dangerous.
CVSS severity levels
You can use this table to prioritise your security tasks.
| Severity | CVSS score | Risk level | Required action |
|---|---|---|---|
| Critical | 9.0 – 10.0 | Site takeover is possible | Fix immediately |
| High | 7.0 – 8.9 | Serious data theft risk | Patch within 24 hours |
| Medium | 4.0 – 6.9 | Specific conditions required | Update during the week |
| Low | 0.1 – 3.9 | Minimal impact on site | Update when convenient |
How to interpret the metrics
A score is calculated based on how a hacker reaches your site. You should look for specific labels in the WPScan output.
- Attack vector: This shows if a hacker can launch a WordPress attack over the internet. A value of
AV:Nmeans the risk is accessible to anyone online. - Privileges required: This shows if a hacker needs a login. A value of
PR:Nmeans no account is needed to exploit the site. - User interaction: This shows if an admin must click a link for the attack to work. A value of
UI:Nmeans the attack is automatic.
You must prioritise vulnerabilities that have AV:N and PR:N labels. These are the easiest for hackers to use to attack your WordPress site.
Examples of WordPress vulnerabilities
| Plugin name | Vulnerability type | CVSS score | Vector string |
|---|---|---|---|
| The events calendar | Unauthenticated SQL injection | 9.8 (Critical) | CVSS:3.1/AV:N/AC:L/PR:N/UI:N/S:U/C:H/I:H/A:H |
| Post sync | Reflected cross-site scripting | 7.1 (High) | CVSS:3.1/AV:N/AC:L/PR:N/UI:R/S:C/C:L/I:L/A:N |
| Popup box | Stored cross-site scripting | 6.4 (Medium) | CVSS:3.1/AV:N/AC:L/PR:L/UI:N/S:C/C:L/I:L/A:N |
CVE vs CVSS: what is the difference?
You will often see the terms CVE and CVSS appearing together in security reports. While they are related, they serve two different purposes.
- CVE (Common Vulnerabilities and Exposures): This is a unique name given to a specific security flaw. It acts as an ID tag so that researchers and developers can talk about the same issue without confusion. An example of a CVE name is CVE-2025-6325.
- CVSS (Common Vulnerability Scoring System): This is the numerical score that tells you how bad that specific flaw is. It measures the severity of the CVE on a scale from 0.0 to 10.0.
💡 In short, the CVE tells you what the problem is, and the CVSS tells you how much you should worry about it.
How to deal with vulnerabilities
Once your scanner has pinpointed a vulnerability, you must act to prevent a hack. However, there is often a gap between the discovery of a flaw and the release of an official update.
Our data shows that vulnerabilities exist in code for an average of 14 months before they are even discovered. This means your site can be at risk long before WPScan flags a problem. You must use a multi-layered approach to stay secure.
The role of firewalls
A WordPress firewall is your first line of defence. A good firewall protects your site while you wait for a developer to release a patch. It acts as a shield between the internet and your vulnerable code.
However, firewalls vary in effectiveness across a wide spectrum. It is important to choose the right one for your WordPress site.
Virtual patching and its limits
When a vulnerability is high-risk but no update is available, some security tools use virtual patching. This process involves adding a specific firewall rule to block attempts to exploit that one vulnerability.
While virtual patching is helpful, it is a reactive system. It only works after a vulnerability is known and a rule has been created. Because it is reactive, it is not an ideal solution. A proactive defence that monitors all site activity is necessary to catch threats that virtual patches might miss.
Apply updates (when available)
To remain fully secure, you should apply official security updates as soon as they are tested and released. This removes the vulnerable code entirely rather than just blocking the path to it. Responsible plugin developers will release security patches as soon as the vulnerability is announced.
If they don’t, consider moving to an alternative.
WPScan’s other hardening measures

Here are some extra things to look out for in a WPScan report, apart from a basic scan:
- Check for debug.log files: log files may contain sensitive information that can be used by attackers to exploit vulnerabilities.
- Check for wp-config.php backup files: wp-config.php contains sensitive data such as database credentials and password salts, and should be kept secure.
- Check if XML-RPC is enabled: XML-RPC presents a potential security risk as it provides an alternative way to log into a site. It is recommended to disable it if not needed.
- Check for exported database files: backups stored in publicly accessible folders can contain sensitive user data and should be kept secure.
- Check for weak passwords: use a password strength checker to ensure passwords are secure.
- Check if HTTPS enabled: make sure SSL is enabled on the site.

Pricing
WPScan is a great tool to have under your WordPress security belt. It’s easy to use and effective. With that out of the way, let’s talk pricing.
The free version of WPScan is available for personal and non-commercial use, but it is not actively supported. Many people choose to use Jetpack Protect instead.
The enterprise edition of WPScan offers a free version that allows for up to 25 API calls per day. You can check how many API calls you’ve used in the “Account Status” box on your dashboard.

Commercial users can opt for Jetpack Protect, which includes WPScan. For enterprise users, developers can integrate WPScan directly into their site.
Troubleshooting WPScan issues
Even with a correct setup, you may encounter errors when scanning your site. Below are the most frequent issues found in support forums and how to resolve them.
The target is responding with a 403
This 403 error usually means your web host or a security plugin is blocking the scanner. WPScan can look like a bot attack to many servers. To fix this, you should try using a random user agent string to make the scan look like a normal web browser.
wpscan --url https://your-site-url.com --random-user-agent
Note: If you are behind Cloudflare, you may need to temporarily allow your own IP address in the Cloudflare security settings.
Unable to get the WordPress version
WPScan tries to find your version number by looking at specific files and headers. If your site has this information is hidden through hardening, you can force the scanner to run anyway by adding the force flag.
wpscan --url https://your-site-url.com --force
API limit reached
The free version of WPScan allows 25 API calls per day. If you have many plugins, you will use these calls quickly. To save your limit, you should only scan for vulnerable plugins rather than all plugins.
wpscan --url https://your-site-url.com -e vp --api-token YOUR_TOKEN
The vp flag stands for vulnerable plugins. This only uses API calls for plugins that have a known security flaw in the database.
Server error, try reducing the number of threads
This happens when the scanner sends too many requests at once and overwhelms your server. You can slow down the scan by setting the threads to 1 and adding a throttle delay.
wpscan --url https://your-site-url.com --max-threads 1 --throttle 1000
The 1000 value adds a one-second delay between each request. This prevents your host from blocking you for suspicious activity.
Wrap up
While WPScan is a great tool for identifying vulnerabilities in your WordPress site, it is not a complete security solution. If the scanner reveals vulnerabilities, your site may have malware already. To be absolutely clear, WPScan cannot detect malware at all.
If you suspect your site has malware, you will need a malware cleaner to remove it. Additionally, to protect yourself from future attacks, you will need a firewall in place.
This is where the MalCare plugin comes in. It is the most comprehensive security plugin that not only includes a powerful malware cleaner but also a firewall to protect your site from future attacks.
FAQs
What is the use of WPScan?
WPScan is a security tool designed specifically for WordPress sites. It is used to identify vulnerabilities in WordPress plugins, themes, and the core WordPress installation itself. The tool scans for vulnerabilities using a database of known issues, and provides information on how to patch those vulnerabilities. WPScan can be used by website owners, developers, and security researchers to identify potential security weaknesses in their WordPress site and take necessary actions to prevent any potential attacks.
Where do I put the API token in WPScan?
The API token can be added to WPScan’s dashboard, or used with the appropriate command from CLI.
Some of the commands require an API token for WPScan’s advanced features, such as enumerating plugins and themes, test brute force attacks, and vulnerability testing. To use the API token with WPScan, you need to run the command with the –api-token option, followed by your API token.
For example, the command would look like this:
wpscan --url https://example.com --api-token ABCDEFGHIJKLMNOPQRSTUVWXYZ0123456789Replace https://example.com with the URL of your website and ABCDEFGHIJKLMNOPQRSTUVWXYZ0123456789 with your API token.
Category:
Share it:
You may also like
-
Uh-Oh! Your Connection Is Not Private? Here’s How To Fix This Issue
You do not usually see a browser warning at a convenient time. It appears when you are trying to log in, check out, open a client site, or get into…
-
WordPress Login Redirect Loop 101: How to Fix It Safely
You know that the strong password you created is right. WordPress accepts the form, pauses for a second, and sends you straight back to the login screen. A WordPress login…
-
Cookie Stealing: What It Is and How to Protect Your WordPress Site
Sometimes, a WordPress break-in does not start with a guessed password. It starts with a browser that was already logged in. That is why cookie stealing is so unsettling. You…


How can we help you?
If you’re worried that your website has been hacked, MalCare can help you quickly fix the issue and secure your site to prevent future hacks.

My site is hacked – Help me clean it
Clean your site with MalCare’s AntiVirus solution within minutes. It will remove all malware from your complete site. Guaranteed.

Secure my WordPress Site from hackers
MalCare’s 7-Layer Security Offers Complete Protection for Your Website. 300,000+ Websites Trust MalCare for Total Defence from Attacks.


