3 Ways to Automatically Log Out Idle Users
by
7-layers of Security for Your WordPress Site
Your website needs the most comprehensive security to protect it from the constant attacks it faces everyday.

These days, individuals use public computers or networks, employees share devices in the workplace, and remote users connect from personal devices or VPN. This has made it very important to automatically log out idle users.
Keeping idle users logged in is like leaving your house doors unlocked while you’re away: it invites trouble. This oversight can lead to unauthorized access and data breaches.
Let’s say you have a user with admin access who frequents a library. Maybe they use one of the public computers to publish a new page. If they walk away from their computer, without logging out, the next person at the computer can cause a lot of problems. This could mean injecting malware into a site, making unauthorized changes, or stealing crucial data. This is why we recommend that you log out all idle users.
There are a few different ways to put in place an automatic logout feature and this article will break down all the steps.
TL;DR: The easiest way to automatically log out idle users is by using the Inactive Logout plugin. However, logging out inactive users is only one piece of the security puzzle. For a more comprehensive approach to protecting your site, we recommend using MalCare. It offers the best malware scanner, one-click malware removal, and a reliable firewall.
Picture this. You have a travel blog, and one of your writers is backpacking and blogging from a cafe. Let’s say they forget to log out and move on to other things. No clicks. No mouse movements. No interaction with the website. They’re now what we would call an idle user.
Now, imagine an attacker lurking on the same public WiFi network as your writer. The attacker is using a packet sniffer, a tool used to get small bits of information on a network. If your site isn’t secure enough, the packet sniffer will be able to get your writer’s username and password. If your writer has admin access, that spells bad news for your site.
This is one of many reasons that WordPress security experts would recommend that you set up automatic logouts for idle users. An automatic logout feature would close their session after a predetermined period of inactivity. This limits the time frame in which an attacker exploits the user session.
By default, WordPress will keep you logged in for a generous 48 hours. If you’ve clicked the Remember me checkbox at login, this period extends even further to 14 days. It’s a convenient feature, but 48 hours is a significant time window for hackers to take advantage of. This is why we recommend you use one of the following methods to automatically log out users after a shorter period of inactivity.
1. Using a plugin
If you’re looking for a quick solution, a plugin is the best way to log out idle users. It removes the need for complex coding and offers a more accessible approach.
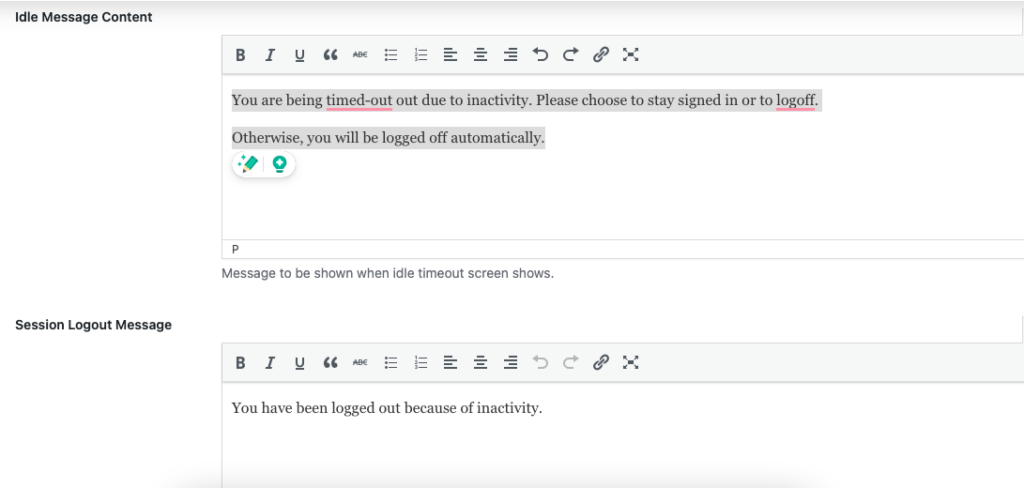
We are going to walk you through the steps of using the Inactive Logout plugin for this tutorial. We loved it because it was so simple to use. All you need to do is set the duration of inactivity before a user is logged out. It even offers the option to show a custom message to idle users. For example, you can notify them that their session is on the verge of closing.
Here’s how you can set it up on your site:
- Install the plugin: First, navigate to your WordPress dashboard. Go to Plugins. Click Add New and search for “Inactive Logout.” Click Install Now and then activate the plugin once the installation is complete.
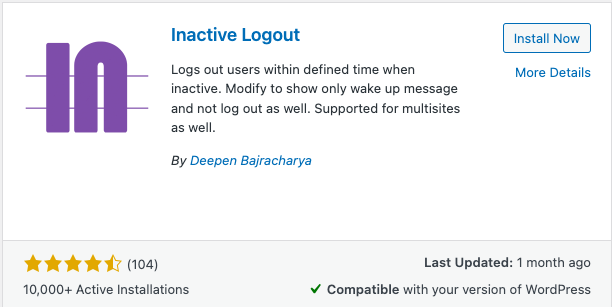
- Configure the plugin: After activation, look for the Inactive Logout settings. You can find them under the Settings menu, in the sidebar. Clicking on it will bring you to a page where you can configure various options. Set the duration of inactivity (in minutes) before logging out users.

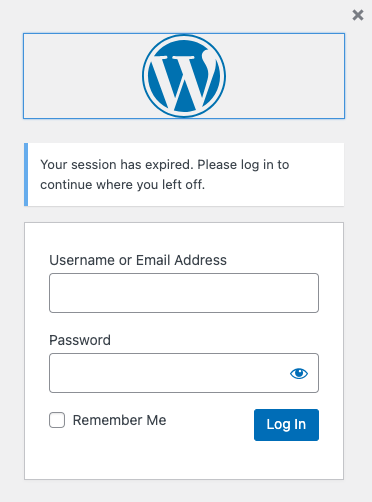
- Customize alert message: You also have the option to customize the alert message that appears to users before they are logged out. This message can inform them of the impending logout due to inactivity, giving them a chance to stay logged in if they’re still around. It’s a courteous reminder that helps avoid frustration from unexpected logouts. Also, add the alert message for when they have logged out. Click the Save Changes button when you’re done.
- Test the plugin: Once you’ve configured the settings to your liking, it’s crucial to test the plugin. Log in to your site and try being inactive for the duration you’ve set. Ensure the logout and alert message work as intended. Adjust the settings if necessary.
Considering an alternative plugin?
The WordPress Persistent Login plugin offers a variation on how idle logouts are handled. It was designed to extend how long a user is allowed to stay logged in but you can customize that time limit to log them out earlier as well. You will have to upgrade to their pro subscription at $4.80 a month. You can then manage user sessions and decide which users are allowed to stay logged in.
2. Using custom code
The code in this section works on the user’s browser. It monitors activity, or lack thereof, on the client’s side. It resets a timer whenever an activity is detected. If no activity occurs for 20 minutes, it triggers a request to a WordPress hook that is associated with the `logoutUser` function. This alerts the user of the session end and then the user is logged out.
Important: Make sure to fully back up your site before making these changes. WordPress requires a functioning, active theme to load your site, and you are about to make changes to an important theme file.
- Open your theme’s footer file: Navigate to your WordPress theme’s directory, and find the file named `footer.php`. This is typically located under `/wp-content/themes/your-theme-name/`.
- Insert the JavaScript code: Before the closing </body> tag in footer.php, paste the provided JavaScript code. This placement ensures that the script runs on every page of your website.
javascript
<script>
    (function($) {
        var maxIdleTime = 1200; // Time in seconds after which the user will be logged out. 1200 seconds = 20 minutes.
        var idleTimer;
        function resetTimer() {
            clearTimeout(idleTimer);
            idleTimer = setTimeout(logoutUser, maxIdleTime * 1000); // Convert seconds to milliseconds
        }
        function logoutUser() {
            var data = {
                'action': 'verify_user_session',
            };
            jQuery.post(ajaxurl, data, function(response) {
                alert('Due to inactivity, this session has ended');
                window.location.reload();
            });
        }
        // Listen for any activity.
        $(document).on("mousemove keypress", resetTimer);
        // Initialize timer
        resetTimer();
    })(jQuery);
</script>- Customize idle time: Adjust `var maxIdleTime = 1200;` if you prefer a different logout time. The current setting (1200) equals 20 minutes. Change `1200` to the number of seconds that suits your needs.
- Update your theme’s functions file: Open your theme’s `functions.php` file, found in the same directory as footer.php.
- Insert PHP code: At the end of the `functions.php` file, paste the PHP code provided. This code defines what happens when the JavaScript function `logoutUser` is triggered.
<?PHP
function malcare_verify_user_session()
{
wp_destroy_current_session();
wp_die();
}
add_action('wp_ajax_verify_user_session', 'malcare_verify_user_session');
?>
The PHP function linked to the hook destroys the current session using `wp_destroy_current_session()`, effectively logging the user out.
- Test your implementation: Log out of your site. Login on an incognito tab. And don’t interact with the site for as long as you set in the JavaScript.
3. By changing the default login cookie expiration time
This method creates a custom function that modifies the expiration time of the authentication cookie.
An authentication cookie is a piece of data typically used by WordPress, to identify a user session on a web server. When a user logs into a WordPress site, the system generates a unique session identifier (ID) that is stored as a cookie in the user’s browser. This cookie is sent along with every request to the server. This is so that WordPress can verify the user’s identity and permissions without requiring them to log in again for each page visit or action within the session.
Note: This method logs out users, irrespective of activity. So, even if a user is active, the time limit you specify will log them out. Consider the user experience implications of doing so, as if someone is in the middle of making changes to the site, this method can cause them to lose their work.
- Connect to your server: We are using FileZilla, an FTP client, to do this. But, you can use SSH as well. You will need the following credentials to do this: IP address, username, and password. These credentials are usually found on your hosting account.
- Access your theme’s functions file: Navigate to the root directory of your site. This is often named public_html or www. From there, go to wp-content. In the themes folder. open the folder for the theme you’re currently using. Inside this folder, you’ll find the functions.php file.
- Insert code: Right-click on the file and click on View/Edit. Paste the following code snippet into the functions.php file:
php
add_filter( 'auth_cookie_expiration', 'wpdev_login_session' );
function wpdev_login_session( $expire ) {
// Set login session limit in seconds
return 1200; // (Seconds)
}- Set desired time: Replace `1200` with the number of seconds you wish to keep a user logged in before logging them out due to inactivity. For example, `3600` for 1 hour, `7200` for 2 hours, etc.
- Save your changes: After inserting and customizing the code, save the changes to your functions.php file.
When a user logs in, WordPress determines the expiration time for the login cookie based on this custom value. Keep in mind this method sets a fixed expiration time for the session cookie; it doesn’t directly account for user activity or idle time.
Troubleshooting common issues
When implementing automatic logout features, you may encounter a few hiccups. Here’s how to troubleshoot some potential issues that could arise:
If your site crashes: If your website displays an error or crashes, it is often due to syntax errors in the code. Go back to the code you’ve recently added or modified. Check for any missing semicolons, brackets, or misplaced characters. Syntax errors are often simple typos.
If you can’t immediately find the syntax error and your site is down, revert your changes. If you’ve edited a site file, restore a backup to return it to its previous state using an FTP client or your web hosting file manager.
Changes not taking effect: It can be frustrating to notice that the changes aren’t working. This issue is mostly caused by cached data. If you’re using a caching plugin on your WordPress site, clear the cache. This action ensures that your site generates a fresh cache based on your recent changes.
Pros and cons of automatically logging out idle users
Implementing an automatic logout feature for idle users on a website can enhance security but impacts user experience.
Pros
- Unauthorized access: If a user forgets to log out of a public computer, another person using the same device can have unrestricted access to the user’s account. This opens the door for unauthorized access to sensitive data or functionalities.
- Exhaustion of resources: Idle sessions, especially in large numbers, can consume system resources unnecessarily, potentially leading to reduced system performance.
- Regulatory compliance violations: Organisations like HIPAA or GDPR include automatic logouts as a security measure to protect data. HIPAA guidelines, for example, say that healthcare providers should log out users after 2 minutes of inactivity (if the device stores protected healthcare information) or 20 minutes for other devices.
Cons
- User inconvenience: Some users may find it bothersome to frequently log back in, especially if they were only away for a short period. This could impact the user experience negatively. So, we recommend you customize the time limit based on the kind of data your website manages. The more critical the data, the shorter the time limit.
- Potential data loss: If a user is logged out, without saving their work, for instance, they could lose unsaved progress, leading to frustration and dissatisfaction.
Additional security measures for your WordPress site
Automatically logging out idle users is useful when users work on public networks or devices. It does not protect your site from more common risks like vulnerabilities and hacks. It’s just not enough of a security solution. As experts, we’ve put together a list of tips to protect your WordPress site but here are the most important:
- Install a security plugin: Security plugins act as your website’s first line of defense against malware, brute force attacks, and other vulnerabilities. They can scan for malware, monitor for suspicious activity, and even help with cleaning up if your site does get hacked. This is why we recommend using MalCare. It is the best security solution available for WordPress sites.
- Implement login security: Strengthen the login process by enabling features like 2FA, limiting login attempts, and using strong passwords. This makes it harder for attackers to gain unauthorized access via brute force attacks.
- Monitor user activity: Keep an eye on what users are doing on your site. Monitoring tools like MalCare can help you spot unusual behavior that might indicate a security breach.
- Use an SSL Certificate: An SSL (Secure Sockets Layer) certificate encrypts data transmitted between your website and your users. It protects sensitive information like login credentials and personal data from being intercepted by malicious actors. Most web hosts offer an SSL certificate as part of their service, and in many cases, it’s free.
Final thoughts
Automatically logging out idle users reduces the risk of unauthorized access, on public networks or shared devices. But, an idle user session isn’t the only thing that can be exploited. It doesn’t take into account vulnerable code or brute force attacks, for example.
However, a security plugin like MalCare is a more comprehensive way of protecting your site. MalCare offers an array of features like daily malware scanning and instant malware removal. It even offers a powerful firewall that can fight off any hackers and malicious breaches. It simplifies security, making it accessible even for those who aren’t tech-savvy, and ensures that your site remains protected around the clock without requiring constant intervention.
FAQs
What is the idle timeout for WordPress?
The ideal timeout period for idle users depends on the type of website and its data sensitivity. Highly sensitive platforms, such as those dealing with financial or medical information, might consider a strict timeout of 5 to 15 minutes. Conversely, websites with lower sensitivity could extend this period to 15 to 30 minutes, striking a balance between user convenience and protection.
How do I set session timeout in WordPress?
Setting a specific session timeout involves using the `auth_cookie_expiration` hook in the functions.php file, like extending the auto logout period. The code snippet provided above can also be used to set a specific session timeout, adjusting the seconds to match your desired duration.
How do I automatically log out idle users with a WordPress plugin?
To automatically log out idle users with a plugin, you can use the Inactive Logout plugin. Once installed and activated:
1. Go to the Inactive Logout settings in your WordPress dashboard.
2. Set the idle time after which users should be logged out.
3. Configure any additional settings, like a custom logout message.
4. Save your changes.
This plugin monitors users’ activity and logs them out after the specified period of inactivity.
Category:
Share it:
You may also like

MalCare Ensures Unmatched Protection Against User Registration Privilege Escalation Vulnerability
Imagine discovering that your WordPress site, which should be secure and under strict control, has suddenly become accessible to unauthorized users who have the same administrative powers as you. This…
MalCare Ensures Proactive Protection Against WP-Members XSS Vulnerability
MalCare continues to protect its customer sites from all kinds of attacks, even the ones exploiting zero-day vulnerabilities. The recent stored cross-site scripting (XSS) vulnerability found in the WP-Members Membership…
Top 9 ManageWP Alternatives To Manage Multiple Sites Easily [Reviewed]
ManageWP is a popular name in the WordPress maintenance plugins market. People love how much you get for a free plan, how easy it is to set up, and how…
How can we help you?
If you’re worried that your website has been hacked, MalCare can help you quickly fix the issue and secure your site to prevent future hacks.

My site is hacked – Help me clean it
Clean your site with MalCare’s AntiVirus solution within minutes. It will remove all malware from your complete site. Guaranteed.

Secure my WordPress Site from hackers
MalCare’s 7-Layer Security Offers Complete Protection for Your Website. 300,000+ Websites Trust MalCare for Total Defence from Attacks.


