How to Configure the HTTP Strict-Transport-Security (HSTS) Header in WordPress
by
7-layers of Security for Your WordPress Site
Your website needs the most comprehensive security to protect it from the constant attacks it faces everyday.

In the modern web, securing data transmission is not just best practice—it’s essential. That’s where HTTP Strict Transport Security (HSTS) comes into play, particularly for WordPress site administrators who are serious about cybersecurity.
Configuring the HSTS header on your WordPress website can appear daunting at first, but it is a vital step in fortifying your site’s integrity. This is also especially essential if you recently had to configure an SSL certificate on your WordPress site. While the specifics can get technical, grasping the concept and implementation of HSTS is within reach for WordPress site owners who are dedicated to maintaining a protection-first approach to their visitors’ browsing experience.
TL;DR: Configuring the HSTS header in WordPress is crucial for enforcing secure HTTPS connections to your site and protecting it against certain cyber threats. However, this is only one component of website security. To ensure comprehensive protection, integrate MalCare into your security plan.
What is the HTTP Strict-Transport-Security header in WordPress?
The HSTS header is a powerful tool that tells browsers to communicate with your WordPress website only over HTTPS. It is an addition to your site’s valid SSL certificate that is required to ensure your site is accessible over the HTTPS protocol. This ensures that the data exchanged between browsers and your site remains encrypted and also prevents certain types of attacks like man-in-the-middle, protocol downgrade attempts, and cookie hijacking. This preventative security is critical, as it ensures that user data remains private and unaltered during transit between the user and your website.
STS provides three controls: max-age, includeSubDomains, and preload. Here’s a brief explainer of what each control does:
- max-age: This controls the duration for which browsers should remember to access your WordPress site using only HTTPS. You can modify the values from 0 (which removes any preset HSTS policy) to 2 years (63072000 seconds), depending upon your requirements. This gets renewed every time a browser visits your site over HTTPS.
- includeSubDomains: This controls whether HSTS applies only to your main website or to its subdomains as well. If HSTS is on but includeSubDomains is not set, then browsers will access the subdomains on your site over insecure HTTP connections, or be completely unable to access any subdomain at all.
- preload: This controls whether your site will be added to the Chrome HSTS list that tells browsers to load your site using HTTPS, even for the first visit. Setting preload prevents downgrade attacks that take advantage of instances where browsers connect to websites using HTTP on their first visit.
The process to configure the HSTS header on your WordPress site involves modifying server settings to instruct browsers to use a secure connection for a set period of time when communicating with your site.
Check your WordPress site for HTTP Strict-Transport-Security configuration
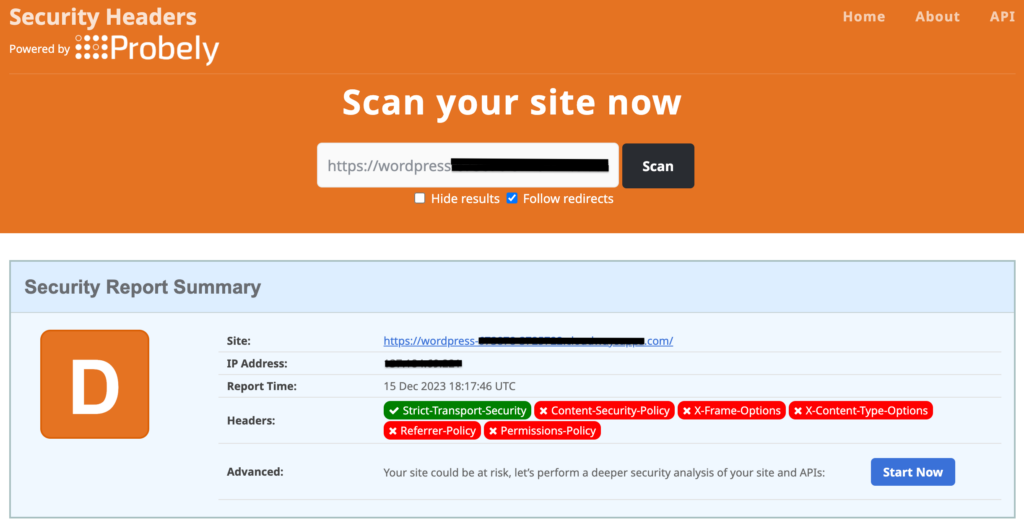
Before diving into the setup of the HSTS header for your WordPress site, it’s prudent to determine if it’s already in place. Visit the Security Headers website, where a simple entry of your website’s URL in their Scan box will reveal the presence of the HSTS header, as well as the status of various other security mechanisms active on your site. This preliminary check can save time and ensure that you’re not duplicating efforts.

If you find that the HSTS header isn’t currently active on your WordPress site, fear not; implementation is straightforward. You have the option of utilizing a plugin specifically designed for this purpose, such as HTTP Headers, or directly editing the .htaccess file, if you are comfortable with direct server file manipulation.
1. Configure HTTP Strict-Transport-Security in WordPress using a plugin
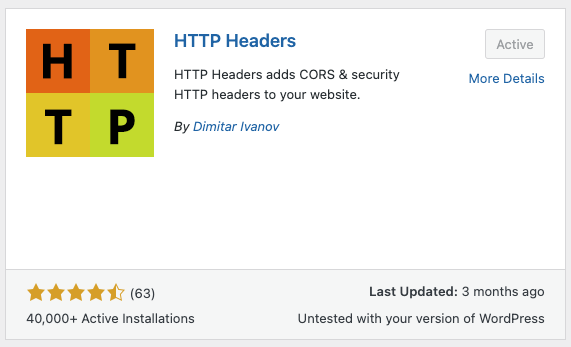
Within the WordPress plugin ecosystem, you’ll encounter various free and premium options that enable the configuration of HTTP headers, such as the crucial HSTS header. The decision to invest in a paid plugin like AIOSEO rests entirely with you and your website’s specific needs. However, for those seeking a cost-effective solution, we recommend the free HTTP Headers plugin by Dimitar Ivanov as a reliable choice for efficiently managing your site’s headers.
Here are the steps to configure the HSTS header on your WordPress site using the HTTP Headers plugin:
- Install and activate HTTP Headers: Navigate to your WordPress admin dashboard and hover your cursor over the ‘Plugins’ section. From there, select ‘Add New’ and then search for the HTTP Headers plugin. Once found, proceed to install and then activate the plugin to start using it.
- Find the STS control on the HTTP Headers dashboard: Access the HTTP Headers settings by hovering over the ‘Settings’ menu and clicking on ‘HTTP Headers’. This brings you to the plugin’s dashboard. Look for the ‘Security’ section and within it, you’ll locate the Strict-Transport-Security or STS setting.
- Modify the STS control: By default, the STS header is turned off as your site hasn’t been set up with it. To enable it, click on ‘Edit’ and then select the ‘On’ checkbox to activate the STS control. After selecting your preferred options, click on Save Changes and you are done!

- Check site headers: Return to the Security Headers website and perform another scan to review your website’s revised header configurations. If the updates aren’t reflected, try clearing your browser’s cache and scan again later.
2. Configure HTTP Strict-Transport-Policy by editing the .htaccess file
Another method to enable the HSTS header on your WordPress site is by modifying the .htaccess file. Given that .htaccess is critical to your system, it’s wise to secure a backup before making modifications. Use a plugin like BlogVault to capture a full backup of your site, including all files and the database. BlogVault maintains these backups in a secure, offsite location, offering a reliable fallback in the event of unexpected errors causing site downtime. With BlogVault, you can quickly bring your site back online, restoring it to its pre-issue status swiftly and efficiently.
Having backed up your site, you can proceed with the following steps to edit the .htaccess file:
A. Edit .htaccess file using an FTP client
To configure the HSTS header via FTP, start by launching your preferred FTP client—Filezilla is a solid choice—and retrieve your FTP credentials from your hosting control panel or by reaching out to your hosting provider’s support team.
- FTP Login: In Filezilla’s interface, input your site’s IP address, username, password, and port number if required. Hit ‘Quickconnect’ to establish a connection to your site.

- Finding the .htaccess file: Within the right-side panel of Filezilla, double-click the root directory to open it. In our case, it was the public_html directory. Here, look for the .htaccess file. Keep in mind that since .htaccess is typically a hidden file, you may need to toggle the visibility of hidden files in the FTP client’s settings.
- Editing .htaccess: Right-click on the .htaccess file and select ‘View/Edit’ to open it with your system’s default text editor. Insert the following snippet before the end of the file:
<ifModule mod_headers.c>
  Header always set Strict-Transport-Security "max-age=31536000; includeSubDomains; preload" env=HSTS
</ifModule>
This example sets the HSTS header with a max-age value of one year (always in seconds) and includes subdomains as well as preload.
- Uploading the edited file: Save the modified file by pressing Ctrl+S on Windows or Command+S on MacOS. Upon closing the text editor, a prompt will ask if you wish to update the file on your website. Confirm by clicking ‘Yes’, which will upload the revised .htaccess file back to your server.
B. Edit .htaccess file using the cPanel File Manager
If your web host provides a cPanel, you can edit the .htaccess file through the built-in File Manager.
- Access cPanel: Enter your credentials to log into your site’s cPanel dashboard.
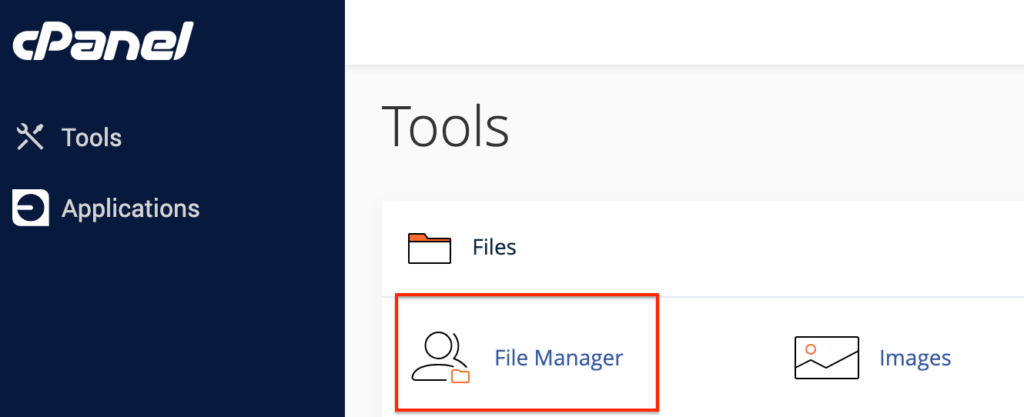
- Finding .htaccess in File Manager: Navigate to the ‘Files’ section and select ‘File Manager,’ which will display your site’s files in a new tab or window. In the left sidebar, click on the root directory (in our case, public_html) to access the main directory where the .htaccess file is typically located.
- Editing .htaccess: Once you locate the .htaccess file within the public_html folder, right-click it and choose ‘Edit’. Confirm by clicking ‘Edit’ again when prompted by the dialogue window. This opens the file ready for editing. Insert the HSTS configuration code here, such as:
<ifModule mod_headers.c>
  Header set Strict-Transport-Security "max-age=31536000; includeSubDomains; preload"
</ifModule>
This example sets the HSTS header with a max-age value of one year (always in seconds) and includes subdomains as well as preload.
- Save your changes: After adding the necessary lines to the .htaccess file, click ‘Save Changes’ located at the top-right of the editing window, and your updated directives will be applied.
C. Edit .htaccess file using SSH
To configure the .htaccess file for HSTS, advanced users may opt for Secure Shell (SSH) accessed through Command Prompt on Windows or Terminal on MacOS. This method requires a higher level of technical expertise than the other methods.
- Establish an SSH connection: Open Command Prompt or Terminal and connect to your WordPress site via SSH with the command:
ssh username@ipaddress
Replace ‘username’ and ‘ipaddress’ with your actual hosting account details, which are typically found in your web host’s control panel. Once the command is issued, you’ll be prompted to input your password.
- Navigating to the .htaccess file: After successfully logging in, if you’re not already in the root directory (in our case, public_html), switch to it using the ‘cd’ command followed by the directory name.
cd public_html
Then, list all the files, including hidden ones, within the directory with:
ls -a
This lists all contents, and you should see the .htaccess file.
- Editing .htaccess via SSH: Open the .htaccess file in the Vmacs editor by entering:
vi .htaccessOnce open, press ‘i’ to enter insert mode, allowing you to edit the file. Add the HSTS configuration:
<ifModule mod_headers.c>
  Header set Strict-Transport-Security "max-age=31536000; includeSubDomains; preload"
</ifModule>- Saving the configurations: To save the changes, press ‘Esc’ to exit insert mode, type ‘:wq’, and hit ‘Enter’ to write the changes and quit the editor. Your .htaccess file will now be updated with the HSTS header settings.
Note: If your WordPress site is hosted on an nginx server, you will need to edit the nginx.conf file instead. Use any of the three methods listed above to edit it and add the following line of code before the file ends:
add_header Strict-Transport-Security "max-age=31536000; includeSubDomains" always;How does the preload option work?
Before you try to understand how the preload option works, here’s something you need to know: even if your site has an HSTS header, a browser can ignore it if it has accessed your site over HTTP earlier. However, once the browser accesses your site over HTTPS, it will acknowledge the HSTS header and remember it for as long as specified in the header.
A browser will not know if a site has the HSTS header, and consequently access it over HTTPS, until after it successfully accesses your site over HTTPS for the first time. This gap between a browser accessing your site over HTTP and realising that it has to be accessed over HTTPS is what hackers target when they launch attacks. And this scenario is more common than you think!
This is where preload comes in. To prevent such attacks, the Google Chrome security team created an HSTS Preload list, which contains a list of websites that must be accessed over HTTPS, even on the first visit for a browser. This ensures that browsers leave no openings for malicious actors when communicating with a website for the first time. This list is now used by all major browsers like Firefox, Safari, Edge, Opera, etc. and gets updated every time the browser is updated (which is why you should always keep your browsers up-to-date).
When you select the preload option while configuring the HSTS header for your WordPress site, you make it ready to be included in the Chrome HSTS Preload list. However, this does not mean your site is included in the list. For that, you need to go to HSTSPreload.org and submit your website’s domain for inclusion. Remember, your website must fulfill certain conditions like valid SSL certificates, correct redirects from HTTP to HTTPS, HSTS header max-age value of 31536000 seconds (1 year) or greater, etc. before it can be included in the list. You also have to ensure that your site continues to fulfill these requirements at all times in the future, without which you site might be removed, or in the worst case, made inaccessible.
As security-focused as it may sound, configuring preload for your WordPress site does come with its own set of disadvantages too. First, the HSTS list is not downloaded and stored on most browsers at all times. This means they have to look up the HSTS Preload list every time you try to connect to a new website. This takes time and slows up the process for you, resulting in a negative user experience. Second, the HSTS Preload list takes a long time to update with new domains. This means adding a new domain, updating the max-age values for existing domains, or removing an old or incorrect domain takes time, and usually does not occur until the max-age value set for these domains expires. Finally, some intranet sites at workplaces or educational institutions are only accessible over HTTP, so setting preload for such sites can hamper users accessing these sites. So take these factors into consideration before you configure your WordPress site to use the preload option.
Potential issues and how to troubleshoot them
Configuring the HSTS header on your WordPress site may sometimes be not as smooth sailing as you would expect it to be. For all those times, here’s a handy guide to fixing issues resulting from the HSTS header:
HSTS header not recognized after configuration
Possible Cause: The HSTS header is not properly formatted or is placed in the incorrect section of the .htaccess file.
Solution: Verify the syntax and placement of the HSTS directives in your .htaccess file. Ensure that it is within the <ifModule mod_headers.c> section and is correctly formatted. There shouldn’t be any extra spaces, as this server configuration file can interpret spaces as a part of one of the directives.
Mixed content warnings after enabling HSTS
Possible Cause: Your site still serves some content (like images, scripts, or stylesheets) over HTTP.
Solution: Conduct a thorough check of your website content using a mixed content scanner and update all URLs to use HTTPS. This involves updating links in your site’s database, theme files, and any externally hosted resources to ensure they’re all loaded securely.
The website becomes inaccessible after enabling HSTS
Possible Cause: Failure to set up a valid SSL certificate before enabling HSTS can lock users out of the site.
Solution: Make sure a valid SSL certificate is active for your domain before you enable HSTS. If necessary, temporarily disable HSTS to restore access until an SSL certificate is properly set up.
Subdomains not working with HSTS
Possible Cause: The HSTS header may not have been configured to include subdomains.
Solution: Update the HSTS header to include the `includeSubDomains` directive, and verify that all subdomains are secured with valid SSL certificates.
Visitors still accessing the HTTP version of the site
Possible Cause: Browsers that have not previously visited your site might still attempt to access the HTTP version.
Solution: Implement 301 redirects from HTTP to HTTPS in your .htaccess file to ensure all traffic is automatically redirected to the secure version of your site.
Third-party services not connecting
Possible Cause: Some external services or APIs might not support HTTPS, leading to failures when your site enforces HSTS.
Solution: Before enabling HSTS, verify that all third-party integrations and APIs support HTTPS. Upgrade or replace those that do not comply to prevent connectivity issues.
How important are HTTP headers in WordPress?
The significance of HTTP headers in WordPress cannot be understated. They are some of the key elements in fortifying security and enhancing the performance of your site. Far from being arcane technical elements, HTTP headers are instrumental in shaping a secure and efficient user experience.
- Bolstering Security: Implementing HTTP headers fortifies your site against threats such as cross-site scripting (XSS) and malicious code injections, acting as a vigilant security force that protects against common cyber threats.
- Accelerating Performance: Properly configured caching headers serve to guide browser caching behavior, which can significantly reduce page load times, making your site more user-friendly and efficient.
- Preventing Content Type Sniffing: By setting the right headers, you can stop browsers from misinterpreting the MIME types of your content, an essential step in preventing the execution of unauthorized content.
- Shielding Against Clickjacking: The appropriate use of headers can help protect your site from being displayed inside unauthorized frames or iframes, a critical measure to safeguard against clickjacking attacks.
- Enforcing Data Encryption: Security-focused headers play a crucial role in ensuring that browsers communicate with your site using HTTPS, a protocol that encrypts the data in transit to maintain confidentiality and integrity.
- Maintaining Privacy: These headers can be tailored to limit the amount of information that accompanies web requests, allowing for greater control over privacy and data sharing.
Why HTTP headers are just the start in WordPress site security
Understanding HTTP headers is certainly a pivotal step in enhancing your WordPress site’s security. However, it’s crucial to note that they represent only a portion of a comprehensive security strategy. To bolster your website’s defenses, consider these additional practices:
- Use a security plugin like MalCare: Add MalCare to your WordPress site for robust defense mechanisms. MalCare’s firewall, malware scanning and auto-clean functionalities, and bot protection features offer real-time protection against threats.
- Regular updates: It’s important to keep the WordPress core, along with any themes and plugins, up-to-date. Consistent updates address security vulnerabilities and ensure your site is armed with the latest protections.
- Advanced password policies and authentication: Use complex passwords that are difficult to guess and add two-factor authentication for another layer of security against brute force attacks.
- Regularly backup your site with BlogVault: Secure your site with regular backups via BlogVault. It ensures you have a recent copy of your site that can be restored quickly, minimizing downtime in the event of an incident.
- Manage user access: Carefully assign user roles and permissions and restrict access to only what’s necessary to prevent unauthorized changes to your site.
- Enforce stringent file permissions: Set strict file permissions to control access to your site’s files. This helps prevent unauthorized users from tampering and accessing critical files.
In conclusion
Configuring HSTS headers is an essential step toward securing your WordPress site by ensuring encrypted connections and enhancing protection against certain cyber attacks. While adding this security layer is a critical technical safeguard, it should be undertaken as part of a broader, holistic approach to your site’s cybersecurity framework. Effective security is about layering multiple defenses to create a resilient barrier against potential threats.
To provide your WordPress site with comprehensive security coverage, we recommend using an all-in-one solution such as MalCare. MalCare’s advanced firewall protection, automated malware scanning, and immediate clean-up services ensure that your site remains secure at all times. By integrating MalCare into your security strategy, you can trust that your WordPress site is not only leveraging the full benefits of HSTS headers but is also protected against online risks.
FAQs
How do I enable HSTS in WordPress?
You can enable HSTS on your WordPress site either by using a plugin like HTTP Headers or by editing the .htaccess file and adding directives in it to force browsers to use the HTTPS protocol to load your site. Remember, editing the .htaccess file requires technical know-how, so we recommend backing up your site with BlogVault before proceeding.
Is HSTS good for SEO?
Yes. Implementing the HSTS header on your WordPress site not only improves its SEO but also adds to its security and speed. Google and other search engines rank sites that have the HSTS header configured higher than those that don’t. The HSTS header also protects your site from attacks like man-in-the-middle, protocol downgrade, etc. It also instructs browsers to directly take the HTTPS protocol route instead of checking for HTTP support, thereby increasing page load speeds. This security and speed also factor in when search engines rank sites, thus improving SEO overall.
How do I know if my HSTS is working?
If you have configured HSTS on your WordPress site and want to check if it is working properly, you can run your site on the Qualys SSL Labs site or the Security Headers site and see if HSTS shows up as active.
Can configuring HSTS headers affect my website’s accessibility?
Improper configuration of HSTS headers, especially without a valid SSL certificate, can make your site inaccessible to users. Ensure your SSL certificate is correctly installed before implementing HSTS headers.
What should I consider before setting the ‘preload’ directive in the HSTS header?
Before setting the ‘preload’ directive in the HSTS header, thoroughly test your entire site to ensure it’s fully compatible with HTTPS, including all subdomains. Preloading is a significant commitment that is difficult to reverse, and it requires submission to a global preload list.
Are there any risks associated with configuring HSTS headers on my WordPress site?
Configuring HSTS headers incorrectly can lead to website inaccessibility. It’s crucial to follow instructions carefully and consider setting a short `max-age` directive initially to test the setup before committing to a longer period.
What happens if I configure the HSTS header and then remove it?
If you configure an HSTS header and then remove it, browsers that have visited your site while the header was active will continue to enforce HSTS until the max-age directive expires. This can result in errors if your site no longer supports HTTPS.
Do all browsers support HSTS headers?
Most modern web browsers support HSTS headers. However, older browsers may not recognize HSTS, which underscores the need to keep other security measures in place.
If I use a Content Delivery Network (CDN), do I need to configure HSTS headers on my WordPress site or the CDN?
You should configure HSTS headers on both your WordPress site and your CDN to ensure secure connections throughout the entire content delivery process. The instructions to configure HSTS on your CDN can be found in your CDN’s documentation.
Category:
Share it:
You may also like
Fix Pharma Hack on WordPress and SEO
Pharma hack is a prolific malware that redirects visitors from your site to an online pharmacy that sells Viagra, Cialis, Levitra, Xanax, Tadalafil, and other drugs. It also shows up…
How To Protect Your WordPress Website From File Upload Vulnerability?
One of the core strengths of WordPress lies in its file upload functionality. The ability to seamlessly upload and integrate various types of files, from images and documents to multimedia…

MalCare Ensures Unmatched Protection Against User Registration Privilege Escalation Vulnerability
Imagine discovering that your WordPress site, which should be secure and under strict control, has suddenly become accessible to unauthorized users who have the same administrative powers as you. This…
How can we help you?
If you’re worried that your website has been hacked, MalCare can help you quickly fix the issue and secure your site to prevent future hacks.

My site is hacked – Help me clean it
Clean your site with MalCare’s AntiVirus solution within minutes. It will remove all malware from your complete site. Guaranteed.

Secure my WordPress Site from hackers
MalCare’s 7-Layer Security Offers Complete Protection for Your Website. 300,000+ Websites Trust MalCare for Total Defence from Attacks.


