How to Whitelist IP Addresses in WordPress? (Step-by-Step Guide)
by
7-layers of Security for Your WordPress Site
Your website needs the most comprehensive security to protect it from the constant attacks it faces everyday.
Whitelisting IP addresses is a manual way to ensure that certain IPs have access to your WordPress website. In some cases, it is because you have a private site for limited users. Other times, it is because plugin IPs are blocked and they cannot function properly. We have often seen this when one website has a combination of WP security plugins installed. Each one blocks the server IPs of the other, and they need to be whitelisted manually. All in One Security, Sucuri, and iThemes are particularly notorious for these issues.
There are a few ways in which you can whitelist an IP address on a WordPress site, but not all of them are equally effective or convenient. We have listed the most popular ways to whitelist an IP address in WordPress so that you can find a good method for your site.
TL;DR: Control access to your WordPress site by whitelisting IP addresses. You can whitelist an IP address easily with MalCare and allow team members and clients to access your site. However, we recommend you use whitelisting sparingly. It is a manual mechanism, and can get tedious to implement for a site with a lot of traffic. If you are concerned about malicious traffic, a better solution is to invest in a good WordPress firewall like MalCare.
What does whitelist IP address in WordPress mean
There are two ways to think about whitelisting IP addresses on WordPress:
- The first, and the most common, case is that there is a firewall on a public WordPress website that sometimes blocks good traffic with the bad. To correct this, admins can indicate to the firewall that those IPs are good by whitelisting them.
- The second case is when there is a private WordPress site with limited users. A private site is blocked from all traffic, so a whitelist in this case is a list of people allowed to visit the site at all. An easy way to understand this is to think of an invite-only event. Everyone may know of the event taking place, but only those with invitations can get in.
Whitelist vs blacklist
Whitelisting is often confused with blacklisting, because both of these methods are used to control access. However, they work in exactly opposite ways. Blacklisting is usually used as a measure to block malicious IPs. Whitelisting is used to grant access either because parts of your WordPress website are confidential, or because users are getting blocked for some reason.
Web hosts often use whitelisting in case of suspended sites. If a website is infected with malware, they suspend it in order to quarantine it from visitors and whitelist certain IP addresses to allow you to clean up and fix your site.
What is an allowlist
Allowlists are the basic concept upon which whitelisting is based, and are often used interchangeably with whitelists. An allowlist is a list of IPs that are always allowed to access a website. The difference is that this allowlist is not necessarily in response to a blacklist or for a private website. Any website—or indeed device or email inbox—can have an allowlist.
Allowlists are used widely by mailbox providers who offer their users the ability to allow certain email addresses irrespective of their content.
How to Whitelist IP on WordPress
There are a few different ways of whitelisting IP addresses. Depending on your expertise, time constraints, and convenience, you can pick one of these methods to whitelist an IP address on WordPress.
A. Whitelist IP address in WordPress using plugin
We strongly recommend that you use this method to whitelist IP addresses in WordPress because plugins reduce the chances of human error. The other methods of whitelisting IPs involve tinkering around with WordPress core files or with server configurations. The smallest misstep can crash your website entirely.
Therefore, the easiest way to whitelist a blocked IP is to use MalCare. In addition, MalCare’s firewall filters out malicious traffic with ease.
To whitelist an IP address in WordPress using MalCare follow these steps:
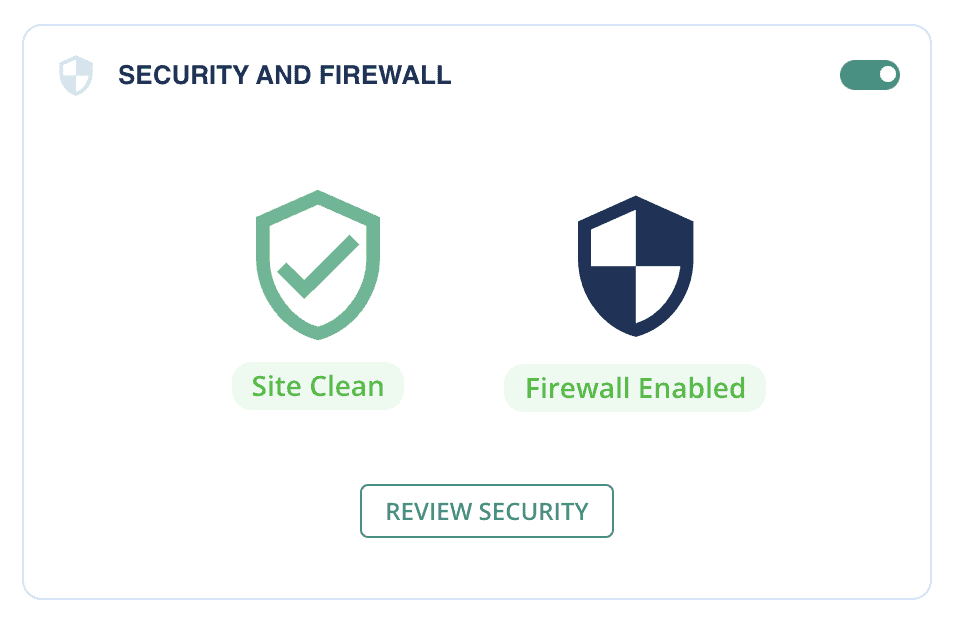
- Go to your MalCare dashboard and go to the Security and Firewall tab
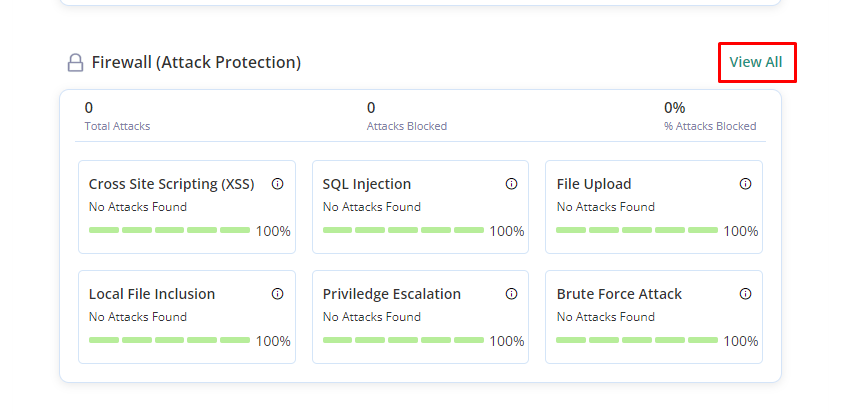
- Here you will see a tab called Traffic Requests, Click on ‘View All.’
- It will show you all the IPs that have accessed your site, and whether they are allowed or not.
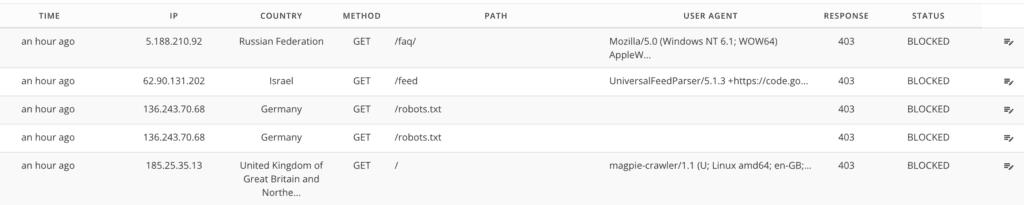
- Find the IP that you want to whitelist.
- Hover over the edit icon, and it will show you the whitelist option.
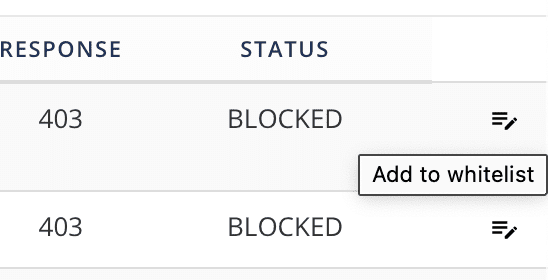
- Select ‘Add to whitelist’, and that’s it!
You have successfully whitelisted the IP you wanted to. This process can be refined with MalCare’s filters, as you can select a range of IPs or ones from a specific country.
Note: You can use this method to whitelist IPs that have visited the WordPress website, and that have been logged by MalCare’s firewall. If you want to whitelist IPs or IP ranges that haven’t been logged by the firewall, you can contact MalCare’s support.
B. Whitelist IP address in WordPress using the .htaccess file
Although we have covered this part, we do not recommend allowing IP addresses in WordPress using htaccess. There are two strong reasons for that.
- Whitelisting specific IP addresses manually can block ALL traffic except for the specified IP addresses. This can be averted but if you’re not well versed with using the .htaccess file, only a handful of IP addresses will be able to access your WordPress website. Every other IP address will be blocked. If you simply want to allow a few IPs on top of your regular traffic, this is obviously not ideal.
- This method involves accessing your WordPress core files and inserting snippets of codes. If you are not an expert, chances are that you will make errors. Small mistakes in the .htaccess file can cause your website to break, as it is a critical core file.
If you wish to use the manual method despite these consequences, this is how you can do it. You will need an FTP client to access your WordPress files, or a plugin like File Manager will come in handy.
- Take a complete backup of your site with BlogVault. While whitelisting may seem like a mundane task, accidentally adding or removing important code from your files can break your site. In which case, a complete WordPress backup can help you restore your site.
- Go to File Manager on your site dashboard, and select the public_ html folder. You will find the .htaccess file here.
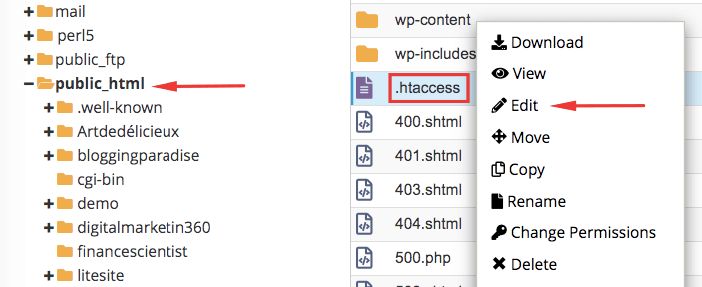
- Download the htaccess file and edit it in a text editor such as Notepad on your computer.
- To whitelist a single IP, add the following code snippet to the .htaccess file:
order deny,allow
allow from xxx.xxx.xxx.xxx
Replace the x’s with the IP address you want to whitelist.
- If you want to whitelist multiple IP addresses, just add another ‘allow from’ line like this:
order deny,allow
allow from xxx.xxx.xxx.xxx
allow from xxx.xxx.xxx.xxx
- If you want to whitelist certain IP addresses only, while excluding all other traffic, add the deny command as shown below:
order deny,allow
deny from all
allow from xxx.xxx.xxx.xxx
allow from xxx.xxx.xxx.xxx - To restrict access to a specific file, usually a WordPress core file like wp-login.php, add the following code to the .htaccess file:
<Files wp-login.php>
order deny,allow
deny from all
allow from xxx.xxx.xxx.xxx
</Files>
Admins often block access like this to prevent things like brute force attacks, which hammer the login page with repeated requests. This is also the manual way to block access to XML-RPC. - Reupload the edited file to your website’s public_html folder after deleting the original one.
You’ve done it! You have successfully managed to whitelist an IP address on your WordPress site manually. To be sure, try visiting your site from different IP addresses, and an incognito window to make sure that your website is running as it should. If it does, your job is done.
How to check if IP address is whitelisted in WordPress
To check if a certain IP address is whitelisted or not, you will need to use a plugin like MalCare. If you do not already have MalCare installed, you will need to download and install it first. After that, follow these instructions:
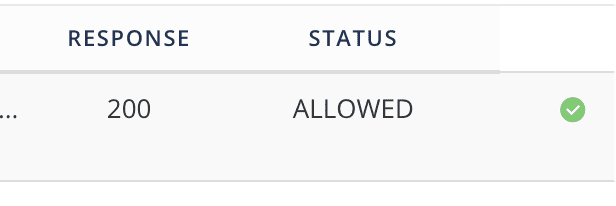
- Go to the Security and Firewall tab on your MalCare dashboard.
- Select the ‘Show more’ button in the ‘Traffic Requests’ section.
- Now click on the ‘Filter logs’ button on top of the traffic logs.
- Select ‘allowed’ in the Status bar and click apply.
- MalCare will now show you all the IPs that are allowed on your site.
This is not the same as whitelisted IPs, because the traffic logs will only show you the IPs that have visited and were allowed. You can also search for specific IP addresses to check their status.
Pros and cons of whitelisting IP addresses in WordPress
Whitelisting is an access tool. It is primarily used to control who gets to visit your site. But like any other tool, it has its pros and cons. Before you whitelist IP addresses on WordPress, you should know of the drawbacks and benefits of the process so that you can make an informed decision.
Pros of whitelisting IP addresses in WordPress
- Whitelisting can help you maintain a private site. If you want to keep your site exclusive, this is a great way to do it.
- You can close off sensitive areas of your site with whitelisting, such as the login page or XML-RPC. Whitelisting will allow you to control who can access parts of your site.
Cons of whitelisting IP addresses in WordPress
- If your home IP address changes often, or you work from different locations, whitelisting will make it difficult for you to access your own site. You will need to add all the new IPs to the whitelist every time you need to access your site.
- In case your site needs to be accessed by multiple people or teams, you will need to grant them access manually, each time a new collaborator is added. If their IPs change, that’s an added headache too.
- IP addresses are dynamic and change often, which means you can effectively block your own IP from accessing your website if you choose to restrict all traffic to a whitelist.
Best practices to Whitelist an IP address in WordPress
Whitelisting is a common tool and often used. However, given that it requires some tinkering with your website code, it is always best to conduct the process safely. Here are some practices that you should follow to ensure that your whitelisting is secure:
- Use a plugin like MalCare to simplify and secure the process. MalCare allows you to whitelist IP addresses in WordPress with a single click, and does not break your site.
- Understand the requirements of your site control. If you don’t want to accidentally block off all traffic except for the whitelisted IP, maybe you should try blacklisting. Or better yet, use MalCare to automate blocking bad IPs altogether.
- If you are using the .htaccess file for whitelisting, make sure to backup your site before adding or removing code from your site.
- Ensure that the IP address you are whitelisting is static, or else whitelisting will not work when the IP changes.
These practices will ensure that your site is safe and performing at its best.
Final Thoughts
IP whitelisting is a mixed blessing. It can be very useful for WordPress admin, as it gives you complete control over who can visit your site, and which IPs can access parts of your website. It is sometimes necessary to implement when there are issues with plugin IPs that prevent them from working correctly.
Conversely, it is important to do it right so that you don’t accidentally meddle with your site’s security. WordPress admin have been known to accidentally lock themselves out of their own site, which can become very complicated to undo.
We hope that this article will help you understand the concept enough to execute it with ease. If you have more questions about whitelisting or access control, feel free to reach out to us.
FAQs
- How to whitelist IP on WordPress?
There are two primary ways to whitelist IP addresses on WordPress—with a plugin and with the .htaccess file. Using a plugin like MalCare is a far better way to whitelist because it offers finer control over who is allowed on your site.
To whitelist IP addresses with MalCare, follow these steps:
- Install MalCare and go to the Security and Firewall tab
- Select the Traffic Requests section, and find the IP you want to whitelist
- Hover over the edit icon, and click on ‘Add to whitelist’.
2. What is IP whitelisting?
IP whitelisting is a method to control the access of visitors to your website. With IP whitelisting, you can grant network access to specific IP addresses only, and block off all other traffic from your site or parts of it.
3. Why do we whitelist IP addresses in WordPress?
IP whitelisting can be used in the following situations:
- You want to keep your WordPress site private.
- You want to restrict access to sensitive parts of your WordPress website.
- You want to make sure no one visits your site until it is ready or redesigned.
Share it:
You may also like

MalCare Ensures Unmatched Protection Against User Registration Privilege Escalation Vulnerability
Imagine discovering that your WordPress site, which should be secure and under strict control, has suddenly become accessible to unauthorized users who have the same administrative powers as you. This…
MalCare Ensures Proactive Protection Against WP-Members XSS Vulnerability
MalCare continues to protect its customer sites from all kinds of attacks, even the ones exploiting zero-day vulnerabilities. The recent stored cross-site scripting (XSS) vulnerability found in the WP-Members Membership…
![Top 9 ManageWP Alternatives To Manage Multiple Sites Easily [Reviewed]](https://www.malcare.com/wp-content/uploads/2022/12/malcare-default-image.jpeg)
Top 9 ManageWP Alternatives To Manage Multiple Sites Easily [Reviewed]
ManageWP is a popular name in the WordPress maintenance plugins market. People love how much you get for a free plan, how easy it is to set up, and how…
How can we help you?
If you’re worried that your website has been hacked, MalCare can help you quickly fix the issue and secure your site to prevent future hacks.

My site is hacked – Help me clean it
Clean your site with MalCare’s AntiVirus solution within minutes. It will remove all malware from your complete site. Guaranteed.

Secure my WordPress Site from hackers
MalCare’s 7-Layer Security Offers Complete Protection for Your Website. 300,000+ Websites Trust MalCare for Total Defence from Attacks.


