
How to add CAPTCHA to your WordPress site
by
7-layers of Security for Your WordPress Site
Your website needs the most comprehensive security to protect it from the constant attacks it faces everyday.

Are you tired of sifting through endless spam on your WordPress site and feeling you’re constantly under siege by automated bots? Dealing with unwanted comments, form submissions, and login attempts can leave even the most seasoned site owners searching for solutions. Is there a way to block these harmful bots without hindering the experience of your legitimate users?
Enter the world of CAPTCHAs—a smart, seemingly straightforward solution to a complex problem. But how exactly do you integrate CAPTCHAs into your WordPress site, and will they provide the fortress of security you desperately need?
Our in-depth article addresses these burning questions, guiding you through the intricacies of CAPTCHAs. We also delve into the pros and cons of employing CAPTCHAs, providing the insights you need to make an informed decision.
TL;DR: CAPTCHAs are a convenient way to prevent bots from bombarding your WordPress site. They can be added to your site using plugins. With MalCare, they are enabled automatically for login protection and are part of a wider security strategy.
The simplest way to add CAPTCHAs to your WordPress site is by installing one of the many plugins that provide this feature. The plugin can then utilize Google’s reCAPTCHA service to set itself up on your site.
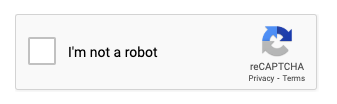
For your site’s login page, you can simply install MalCare and get the whole gamut of login security: limiting failed logins, CAPTCHAs, and a firewall to block out known attack IPs. Moreover, with MalCare, you also get a malware scanner and a one-click malware removal tool, along with a host of other security features in one plugin.
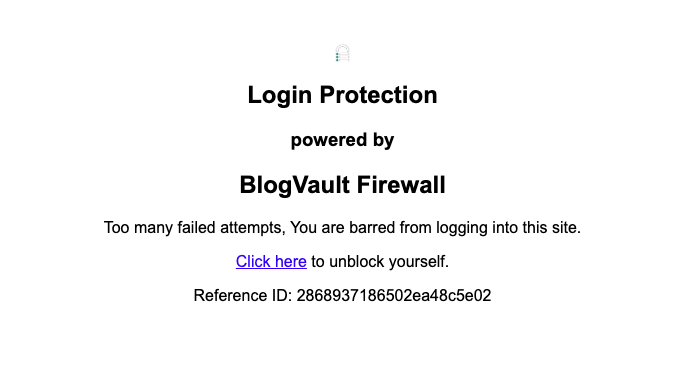
Perhaps you also want to implement a CAPTCHA on a contact form or a comment form to prevent spam submissions. You can either use an antispam plugin that has this feature and others to combat persistent spam, or you can install a dedicated plugin.
Step 1: Install a CAPTCHA plugin on your WordPress site
The WordPress plugin repository has several plugins that can help you set up CAPTCHAs on your site. Some of the prominent examples are Advanced Google reCAPTCHA, Captcha Code, reCaptcha by BestWebSoft, etc. For the sake of this article, we will be using the Advanced Google reCAPTCHA plugin.
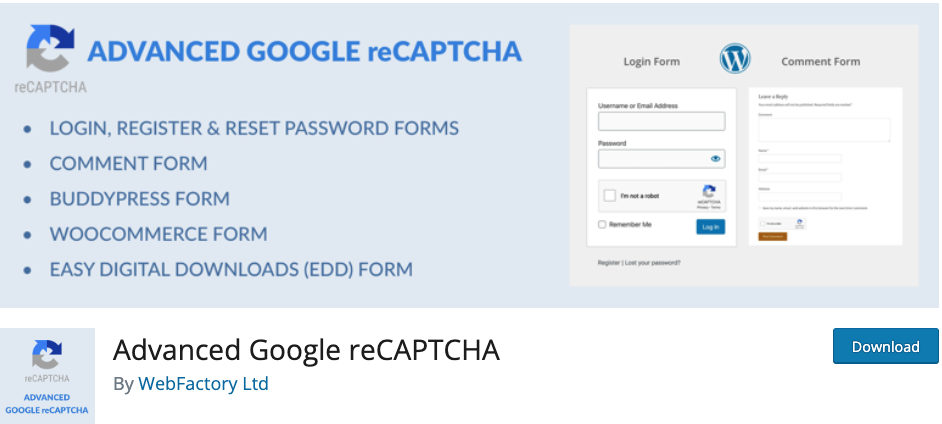
The Advanced Google reCAPTCHA is a freemium plugin, which means that it is free to install and use but you need to pay for advanced features. Its free tier is sufficient for most users.
Once installed, activate the plugin and access its dashboard by hovering your pointer over the Settings tab on your site’s admin panel and then clicking on Advanced Google reCAPTCHA.
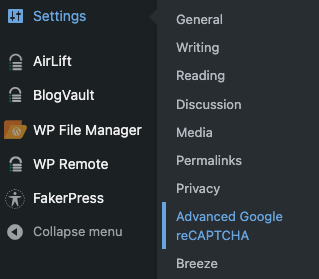
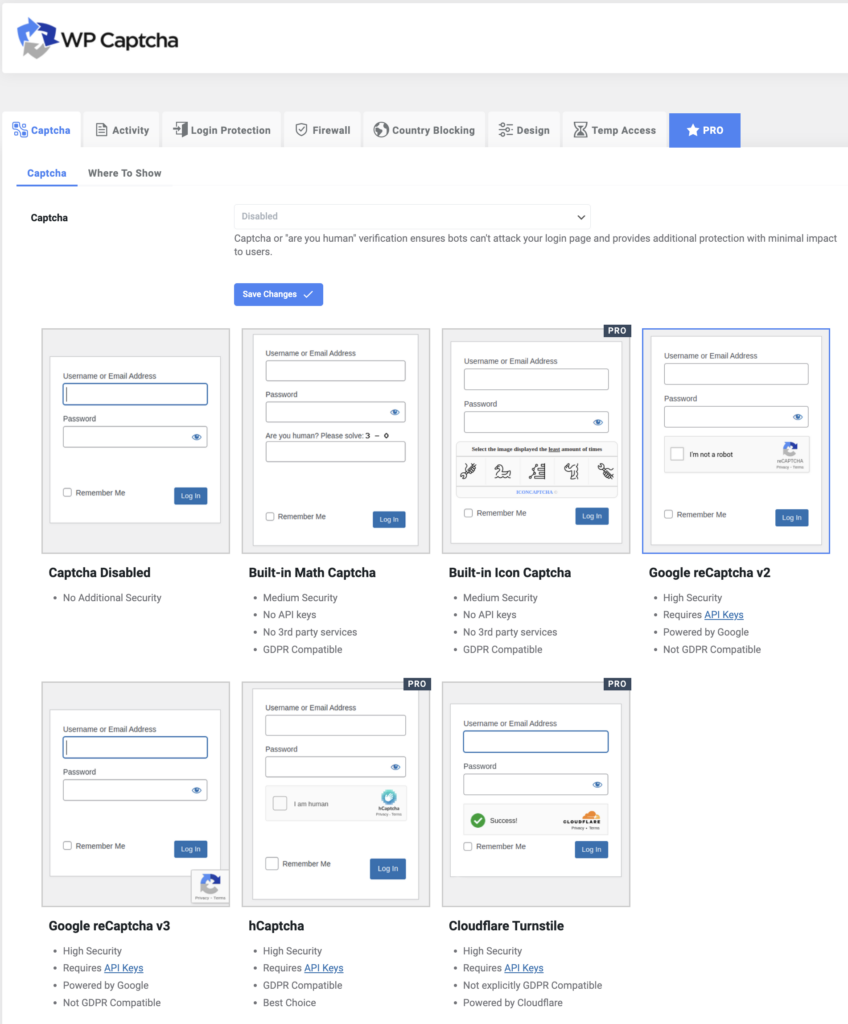
On the dashboard, click on the Captcha tab and then on the Captcha sub-tab. Here, you will see that the plugin offers 6 different CAPTCHA types, of which 3 are free and 3 are paid.
Among the 3 free CAPTCHA types, we recommend using either the Google reCAPTCHA v2 or v3. These are some of the most commonly seen CAPTCHA methods (think selecting images of traffic lights, buses, bikes, etc.) and are backed by Google’s trusted security. For the sake of this article, we will be using Google reCAPTCHA v2.
Step 2: Obtain Google reCAPTCHA keys for your WordPress site
Whether you choose Google reCAPTCHA v2 or v3, you will need to obtain 2 security keys from Google to set up CAPTCHA on your site.
Start by going to the Google reCAPTCHA admin console where you will have to register your site. You must have a Google account to sign in to the console.
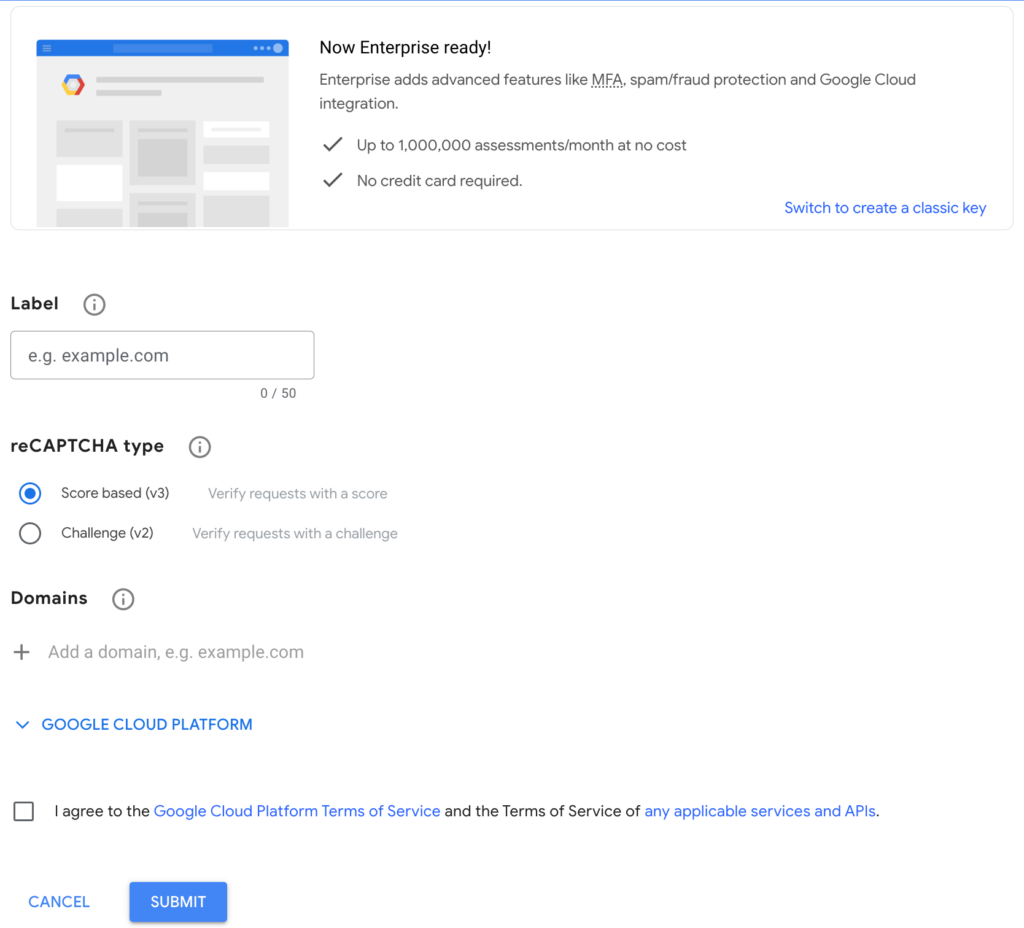
By default, the admin console is in Enterprise mode, which is designed for large organizations that handle huge amounts of requests. It has a pay-after-limit structure, where the first 1 million CAPTCHA requests per month are free, after which they are charged $1 for every 1000 requests.
For regular users, the Enterprise mode is an overkill. You can instead choose to create a regular key by clicking on Switch to create a classic key. On the new dash, you will be greeted by several options.
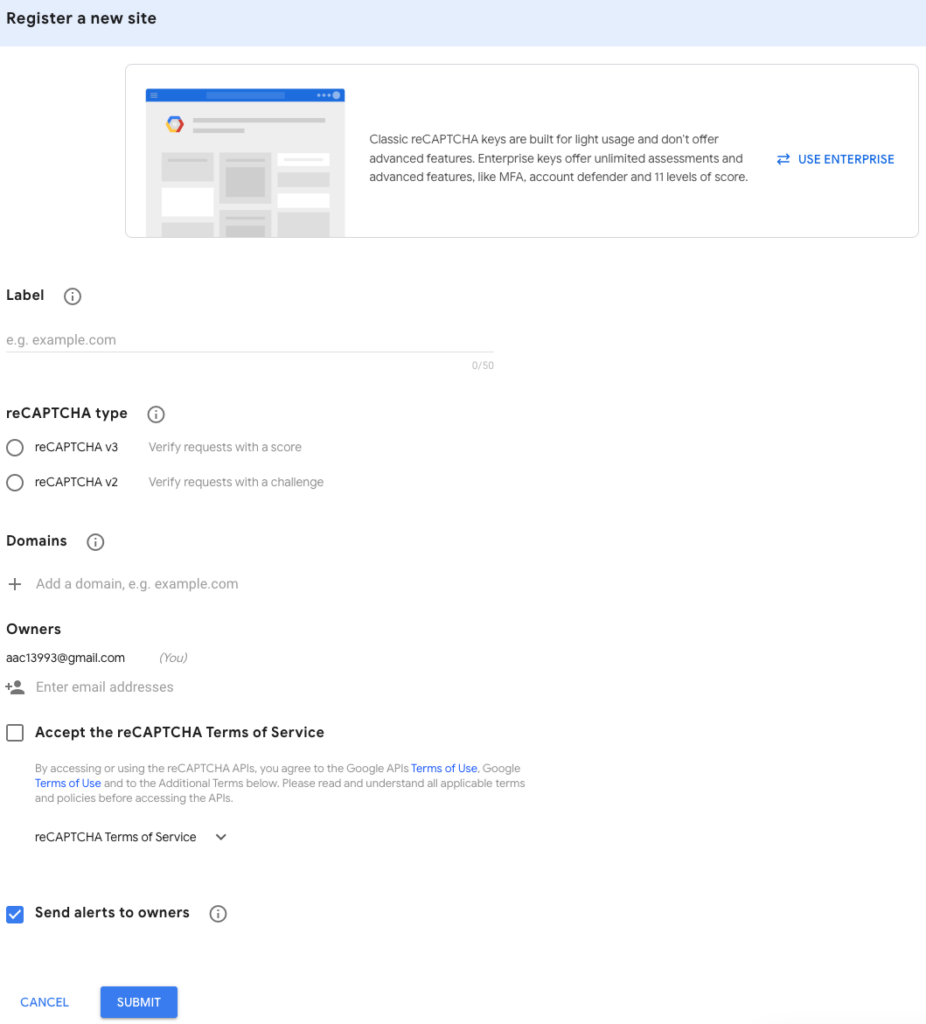
Here’s an explainer of what each does:
- Label: This is a helpful option if you manage multiple sites and want to create security keys for each. Here, you can add a label within 50 characters to quickly identify your sites. This is also helpful when you want to check the stats for CAPTCHA usage per site.
- reCAPTCHA type: This is where you select the type of Google reCAPTCHA that you want to use i.e. v2 or v3. Here’s more information to help you decide:
- v2: This is the older yet more commonly used CAPTCHA version. It has 3 ways to validate legitimate user requests from bots.
- “I’m not a robot” tickbox: You might have seen this often. It appears in the form of a checkbox that you have to click on to tell the system that you are a human user. It considers various parameters like how quickly you click on the checkbox, how you move your mouse pointer towards the checkbox, etc. to validate the challenge. For the sake of this article, we are using this method.
- Invisible reCAPTCHA badge: This appears in the form of a triangle with 3 arrows on one corner of the webpage. It offers no challenges like clicking on a checkbox but silently monitors and validates user actions in the background. The moment it detects potential abuse by bots, it springs into action and requires a challenge to be solved.
- reCAPTCHA Android: This is used in conjunction with Android apps to validate users. It requires a developer to invoke the reCAPTCHA API through Google Play Services. Sounds complicated? No worries. Choose from any of the other options.
- V3: This is the latest CAPTCHA version and is designed to be an improvement over v2. It verifies if a user action is legitimate without any user interaction by returning a score based on the action taken on your site, like creating a post, adding a comment, etc.
- v2: This is the older yet more commonly used CAPTCHA version. It has 3 ways to validate legitimate user requests from bots.
- Domains: This is where you enter your site’s URL and the URL for any subdomains you may have. Remember not to add https://, www., or any other protocol, path, port, query, or fragment. Once done, click the + symbol to add it.
Finally, accept the reCAPTCHA Terms of Service and check or uncheck the box to Send alerts to owners depending on whether you want to be informed of suspicious activity thwarted by the CAPTCHA service. Click on Submit to register your site and move to the next page where you will get your site and secret keys.
Step 3: Add Google reCAPTCHA keys to your CAPTCHA plugin
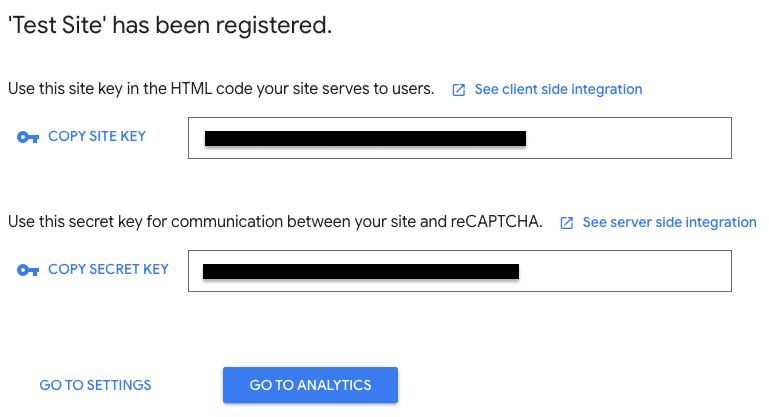
Once you have the site and secret keys, copy and paste them into their respective textboxes on your Advanced Google reCAPTCHA dashboard.
To check if the keys work, click on the Verify Captcha button and solve the challenge type you set.
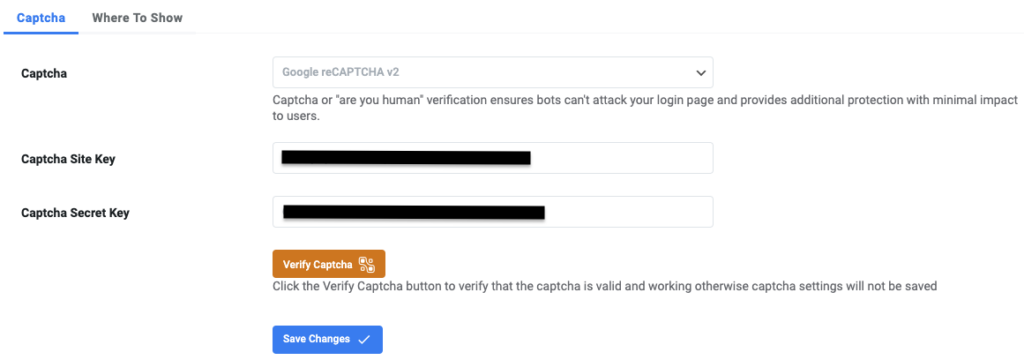
If it all works fine, click on Save Changes to put the CAPTCHA into effect.
Step 4: Configure the sections to be protected by CAPTCHAs
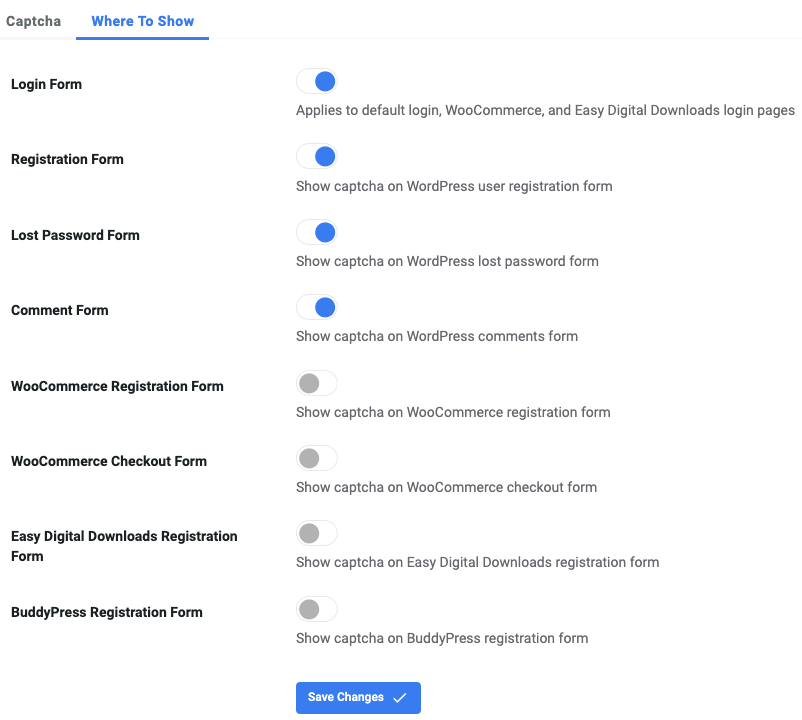
On the Captcha tab of your Advanced Google reCAPTCHA dashboard, click on the Where to Show sub-tab. Here you can select the areas where you want CAPTCHA challenges to be solved before accessing them. Once done, click on the Save Changes button to apply CAPTCHAs to the selected regions.
Pros of adding CAPTCHAs to your WordPress site
Enhanced security measures
One of the primary advantages of incorporating CAPTCHAs is the significant bolstering of your site’s security. CAPTCHAs serve as the first line of defense against brute force attacks—a method attackers use to gain unauthorized access to your site by guessing usernames and passwords. By requiring users to solve a CAPTCHA challenge before logging in or submitting data, the risk of such attacks is markedly reduced.
Effective spam control
Automated bots are often the culprits behind the flood of spam comments that plague websites, deterring meaningful user engagement and potentially harming your site’s credibility. CAPTCHAs effectively prevent these bots from inundating your site with spam, as they typically cannot bypass the CAPTCHA’s challenge-response test designed to distinguish human users from bots.
Accessibility for all users
Modern CAPTCHA systems have evolved to be more inclusive, offering alternative types of challenges to accommodate users with disabilities. For instance, audio CAPTCHAs provide an accessible option for visually impaired users, while simple math problems or image recognition tasks can suit users with other types of impairments. This ensures your website remains secure without excluding portions of your audience.
A new avenue for revenue generation
Interestingly, CAPTCHAs can also serve as a novel means of revenue generation. Some CAPTCHA systems display ads within the challenge, turning a standard security measure into an opportunity for monetization. When users solve these ad-integrated CAPTCHAs, you can earn revenue, adding a financial incentive to the security benefits.
Reducing resource waste
Unwanted traffic and activities by bots not only compromise security but also consume valuable server resources. By filtering out this automated traffic, CAPTCHAs help ensure that your site’s resources are reserved for genuine user interactions. This can lead to better performance and lower operational costs, particularly for sites that experience high volumes of traffic.
Building user trust
Implementing CAPTCHAs can also contribute to building and maintaining trust with your site visitors. When users see that you’re taking proactive steps to secure the website and their data, it reinforces the perception that their safety and privacy are valued. This heightened sense of trust can encourage greater interaction with your site and foster a loyal user base.
Cons of adding CAPTCHAs to your WordPress site
Disruption to user experience (UX)
Potentially the most significant downside is the impact on user experience. CAPTCHAs, especially if poorly implemented or overly complex, can become a source of frustration. Users might find themselves facing these challenges repeatedly or struggling with particularly difficult puzzles. This disruption can deter users from engaging with your site, affecting conversion rates and overall satisfaction.
Accessibility challenges
While CAPTCHAs aim to be accessible, not all are created equal. CAPTCHAs that are not configured with inclusivity in mind can pose significant obstacles for users with disabilities. For instance, visually complex image CAPTCHAs can be a barrier for users with visual impairments, while audio CAPTCHAs may not adequately serve users who are hard of hearing. This inconsistency in accessibility can inadvertently exclude a segment of your audience.
Vulnerabilities to sophisticated attacks
As technology evolves, so do the capabilities of automated bots. Some CAPTCHAs can be bypassed by these advanced bots, diminishing their effectiveness as a security measure. Furthermore, CAPTCHAs might not stand up to relentless brute force attacks, as determined attackers find ways to crack or circumvent these puzzles, putting your site at risk. Nowadays, there are CAPTCHA farms that are services to solve CAPTCHAs at the same speed as humans, or even quicker than them.
Ethical considerations
The use of image CAPTCHAs raises unique ethical concerns, particularly regarding the privacy of individuals who may be unknowingly featured in these images. Without explicit consent, using images of people can infringe on their privacy rights, posing ethical dilemmas about the appropriateness of such practices in CAPTCHAs.
Potential for lost engagement and SEO implications
Introducing any barrier, such as a CAPTCHA, between users and the content or services they seek can lead to lost engagement. First-time visitors or those in a hurry may decide that solving a CAPTCHA isn’t worth the effort, leading to increased bounce rates and missed opportunities for interaction. Moreover, keeping content behind CAPTCHA will result in good bots like those of search engine crawlers or monitoring plugins getting blocked. This will prevent your content from being indexed and consequently affect your SEO negatively. Using MalCare’s firewall, which intelligently allows good bots and blocks bad ones, will help mitigate this impact.
Overreliance on a single security measure
Relying solely on CAPTCHAs for security can lull site owners into a false sense of complacency. While CAPTCHAs deter certain types of automated threats, they are not a panacea for all security issues. A comprehensive WordPress site security strategy should include multiple layers of protection beyond just CAPTCHAs.
What are some other CAPTCHA service providers?
Given the evolving digital landscape, diversifying your choice of CAPTCHA providers can enhance both the security and user experience of your WordPress site. While Google’s reCAPTCHA might be the standard, exploring alternatives can offer fresh perspectives and solutions. Here are some that you might want to consider:
hCaptcha
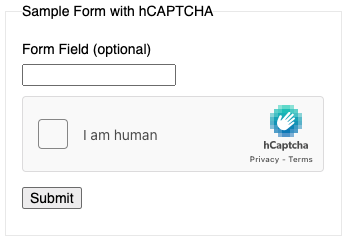
For those prioritizing privacy and wanting to monetize CAPTCHA interactions, hCaptcha presents an appealing option. You can readily adopt hCaptcha through the paid PRO version of the Advanced Google reCAPTCHA plugin or the free hCaptcha for WordPress plugin.
Cloudflare Turnstile
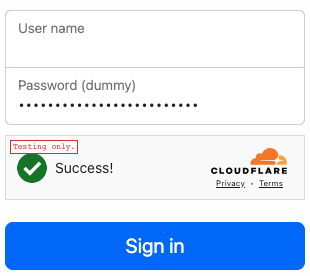
Cloudflare’s Turnstile is designed to minimize friction for genuine users while effectively barring bots. Integration with WordPress can be achieved directly for Cloudflare users, leveraging Cloudflare’s extensive security ecosystem. If you are not a Cloudflare user, you can use the paid PRO version of the Advanced Google reCAPTCHA plugin or the free Simple Cloudflare Turnstile – CAPTCHA Alternative plugin.
GeeTest
GeeTest captivates users with dynamic puzzles and challenges, stepping away from traditional CAPTCHAs to a more interactive territory. It has its eponymous WordPress plugin for users to try out for free.

Is CAPTCHA enough to protect your WordPress site against bots?
CAPTCHAs, by design, can filter out a considerable volume of automated traffic. Yet, as bots become more sophisticated, CAPTCHA vulnerabilities may be exploited. This reality underscores the importance of adopting a holistic approach to WordPress security.
Strengthen your site with a WordPress-specific firewall
Integrating a dedicated firewall, like MalCare’s Atomic Security, offers real-time protection against a myriad of threats, including brute force attacks, SQL injections, and cross-site scripting.
Deploy robust bot protection services
For an added layer of defense, leveraging a robust bot protection service becomes indispensable. Services such as MalCare provide comprehensive monitoring, detecting suspicious activities and shielding your site from complex bot attacks that CAPTCHAs alone might not catch.
Enforce strong password policies
The strength of user passwords directly impacts your site’s vulnerability to attacks. Encourage the use of long, complex passwords and consider periodic mandatory password updates to keep potential breaches at bay.
Implement Two-Factor Authentication (2FA)
Introducing Two-Factor Authentication (2FA) adds an extra layer of verification, significantly minimizing the risk of unauthorized access. Even if a password is compromised, 2FA ensures that an additional, often temporal piece of information is required to complete the login process, offering an effective deterrent against bot access.
Stay updated
Maintaining regular updates for your WordPress core, themes, and plugins closes known vulnerabilities, keeping your site a step ahead of potential attackers looking to exploit outdated software. If you use MalCare, you can easily test updates by building a staging site and then applying these updates to your live site. By doing this, you ensure that your users never face any hiccups during the update process.
Form a safety net with regular backups
Frequent, reliable backups serve as your last line of defense. In the event of a successful attack, they ensure that you can restore your site to its pre-attack state without significant data loss. Opt for a solution like BlogVault that offers automated backups and easy restoration capabilities.
Final thoughts
CAPTCHAs, undoubtedly, offer a formidable barrier against automated bot activity, efficiently filtering out spam and unauthorized access attempts. This can significantly enhance user experience by maintaining the integrity of interactions on your WordPress site. Yet, it’s vital to recognize that while CAPTCHAs are effective in curbing a specific spectrum of threats, they aren’t an all-encompassing solution.
Your website requires a broader, layered security strategy. This is where a comprehensive security solution like MalCare makes all the difference. MalCare goes beyond CAPTCHA’s capabilities, offering an all-in-one security suite designed to protect your digital realm. With advanced features such as automatic malware scanning and removal, real-time bot protection, and a firewall, MalCare addresses a wide spectrum of threats, ensuring your site remains impenetrable.
FAQs
What is a CAPTCHA?
CAPTCHA stands for Completely Automated Public Turing test to tell Computers and Humans Apart. It’s a security measure used on websites to differentiate between human users and automated bots, typically by presenting a challenge that is easy for humans but challenging for bots.
How do I add CAPTCHA to my WordPress site?
The simplest way to add CAPTCHA to your WordPress site is by using a CAPTCHA plugin. Plugins like Advanced Google reCAPTCHA, reCAPTCHA by Google, or hCaptcha can be easily integrated into your forms, comments section, or login page through the WordPress dashboard without needing to touch any code.
Can adding CAPTCHA to my site affect user experience?
While CAPTCHA is designed to protect your site, overly complex or poorly implemented CAPTCHAs can hinder user experience, causing frustration or leading users to abandon a task. It’s important to choose a CAPTCHA that balances security with user-friendliness, considering alternatives like Invisible reCAPTCHA, which provides security without disrupting the user experience.
Can CAPTCHAs be bypassed?
Some sophisticated bots as well as CAPTCHA-solving services have been developed to bypass certain types of CAPTCHA. However, advanced CAPTCHA systems, especially those that adapt and learn from attempted breaches like Google’s reCAPTCHA, continue to be effective at distinguishing between bots and humans. Ensuring your CAPTCHA system is up to date is crucial for maintaining its effectiveness.
Do I need technical skills to add CAPTCHA to my WordPress site?
Not necessarily. Many CAPTCHA plugins available for WordPress make it easy to add and configure CAPTCHA without any coding skills. The setup generally involves installing the plugin, configuring a few settings, and perhaps obtaining and entering API keys from the CAPTCHA service provider.
Category:

Share it:
You may also like

MalCare Ensures Unmatched Protection Against User Registration Privilege Escalation Vulnerability
Imagine discovering that your WordPress site, which should be secure and under strict control, has suddenly become accessible to unauthorized users who have the same administrative powers as you. This…
MalCare Ensures Proactive Protection Against WP-Members XSS Vulnerability
MalCare continues to protect its customer sites from all kinds of attacks, even the ones exploiting zero-day vulnerabilities. The recent stored cross-site scripting (XSS) vulnerability found in the WP-Members Membership…
Top 9 ManageWP Alternatives To Manage Multiple Sites Easily [Reviewed]
ManageWP is a popular name in the WordPress maintenance plugins market. People love how much you get for a free plan, how easy it is to set up, and how…
How can we help you?
If you’re worried that your website has been hacked, MalCare can help you quickly fix the issue and secure your site to prevent future hacks.

My site is hacked – Help me clean it
Clean your site with MalCare’s AntiVirus solution within minutes. It will remove all malware from your complete site. Guaranteed.

Secure my WordPress Site from hackers
MalCare’s 7-Layer Security Offers Complete Protection for Your Website. 300,000+ Websites Trust MalCare for Total Defence from Attacks.