How to Configure the X-Frame-Options Header in WordPress
by
7-layers of Security for Your WordPress Site
Your website needs the most comprehensive security to protect it from the constant attacks it faces everyday.

With the rapid rise in online threats, safeguarding your WordPress site becomes not just a priority but a mandate. Among the essential tools at your disposal are HTTP security headers, and taking center stage in this defense strategy is the X-Frame-Options header.
Getting the X-Frame-Options header in place is a straightforward process that significantly bolsters your site’s armor against common web attacks, such as clickjacking. This security header tells browsers whether your content can be displayed within frames on other sites, which could then be used for malicious purposes. While the concept might seem a bit technical, fear not—we’re here to break it down and guide you through each step.
TL;DR: The X-Frame-Options header is a security measure for WordPress sites that helps prevent clickjacking attacks by controlling whether your site can be displayed or framed on any other webpage. You can either allow it on certain external sites, allow it on sites within the same domain, or deny it completely. However, this header is just one piece of your WordPress site’s security puzzle. For comprehensive protection, integrate MalCare into your site to protect it against a wide array of cyber threats.
What is the X-Frame-Options header in WordPress?
The X-Frame-Options header in WordPress is an HTTP response header that controls whether a browser should be allowed to show a web page within a frame. For further clarity, think of a frame as a picture frame on a wall that shows a particular scene. Similarly, on the web, a frame shows part of another webpage.
Take the ‘Sign Up’ button you see at the top of the page for example. It’s sitting inside a frame that decides where on the page the ‘Sign Up’ button appears. When you click on it and it takes you to sign up for MalCare (which you should), it’s like you’ve opened a door into that new place—a new webpage.
In essence, the X-Frame-Options header provides a layer of security that helps prevent clickjacking attacks. In such attacks, an attacker could deceive a user into clicking on something different than what the user perceives, thereby potentially revealing confidential information or taking control of their computer while visiting your website. This header can be used to ensure that your content is not embedded into other sites or pages without your permission.
The X-Frame-Options header offers several directives to manage how and where your site’s content can be framed. Here’s a brief explanation of what each directive does:
DENY: This directive completely prevents all sites, including your site, from embedding your content in frames on any site. Use this when you do not want any site to display your content on their web pages.
SAMEORIGIN: This option allows your site to be embedded and displayed in frames on another site only if the latter has the same origin as your site. Use this when you want to display pages from within your site.
ALLOW-FROM: This option allows embeds and displays from a specified site/s. Use this when you want certain external sites to display your content.
When correctly configured, the XFO header is a powerful tool for WordPress site owners to defend against malicious activities aimed at manipulating their site’s content delivery.
While the primary role of the XFO header is security-focused, its configuration is also relevant for website functionality and integration with other web services. Setting this header plays a substantial role in the broader effort to secure your site and ensure that its interactions with frames across the web are firmly under your control.
Check your WordPress site for X-Frame-Options configuration
Before setting up the XFO HTTP header on your WordPress site, check if it’s already there. Visit the Security Headers website and scan your site. The results will show if XFO is set up, along with other security headers.
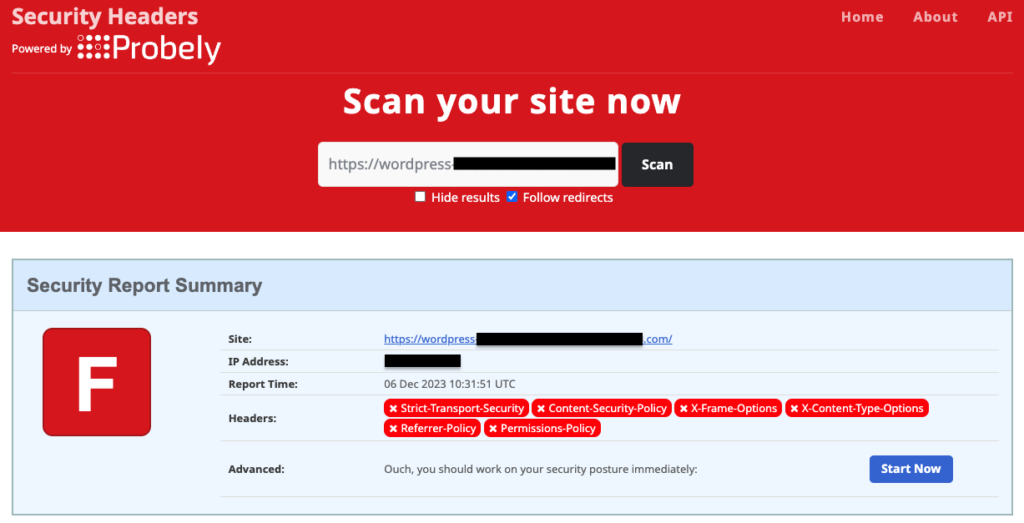
If XFO isn’t configured, use a plugin like HTTP Headers or edit the .htaccess file in WordPress.
1. Configure X-Frame-Options in WordPress using a plugin
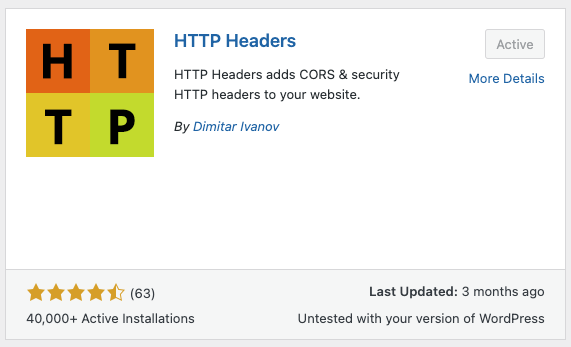
The WordPress plugin marketplace has several free and paid plugins that allow configuring HTTP headers, including the XFO header. We will leave the choice to go for paid plugins like AIOSEO up to you. But if you are looking for a free plugin, HTTP Headers by Dimitar Ivanov is our choice.
Here are the steps to configure the XFO header on your WordPress site using the HTTP Headers plugin:
- Install and activate the plugin: On your WordPress admin dashboard, hover your mouse pointer over Plugins and click on Add New Plugin. Search for HTTP Headers, and then install and activate the plugin.
- Find the XFO control on the HTTP Headers dashboard: Hover your mouse pointer over Settings and click on HTTP Headers. This will take you to the plugin dashboard. Click on Security and you will find the X-Frame-Options control therein.
- Modify the XFO control: The XFO option will be off by default since your site is not configured to use the XFO header.

To change it, click on Edit, and then click on the On checkbox. Select your preferred option from DENY, SAMEORIGIN, and ALLOW-FROM, and click on the Save Changes button.
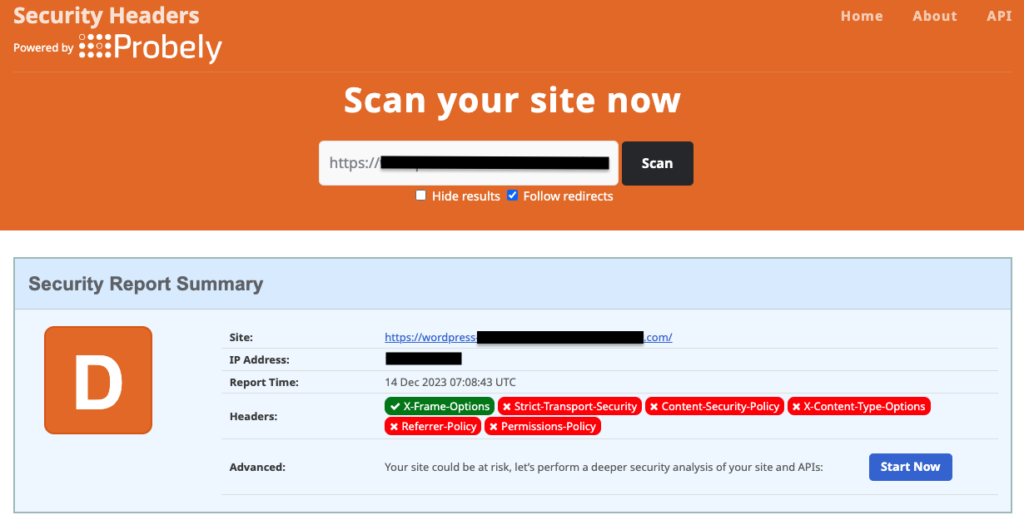
- Head back to Security Headers and scan your website again to see the updated header configuration. In case it is not updated, clear the browser cache and retry scanning after some time.
2. Configure X-Frame-Options in WordPress by editing the .htaccess file
Editing the .htaccess file is another way to configure your WordPress site to use the XFO header. Now, .htaccess is a system file, so we recommend creating a backup of your site using a plugin like BlogVault before editing it. BlogVault ensures comprehensive backups of your entire site, including both your site files and database. Additionally, these backups are securely stored offsite, providing a safety net against any unforeseen errors that might bring down your site. In such events, BlogVault enables you to swiftly restore your site to its former state in a matter of minutes.
Once you have backed up your site, let’s look at how to edit the .htaccess file.
A. Edit .htaccess file using an FTP client
For this step, you will need to use an FTP client and obtain your FTP credentials from your web host dashboard or by contacting your web host’s support. We prefer using Filezilla as our FTP client.
- Log in to your site: On the Filezilla window, enter your IP address, user name, password, and port number (if any), and click on Quickconnect.

- Locate the .htaccess file: On the right-side pane, double-click on the root directory to open it, where you should find the .htaccess file. Since this is a hidden file, you might need to enable the option to view hidden files from your FTP client’s settings.
- Edit the .htaccess file: Right-click on the .htaccess file and click on View/Edit. This will use your system’s default text editor to open the file. Add the following lines of code to it:
<ifModule mod_headers.c>
Header set X-Frame-Options DENY
</ifModule>- Save and re-upload the .htaccess file: Enter Ctrl+S for Windows or Command+S for MacOS to save the file. Closing the text editor window brings a pop-up box that asks you if you want to re-upload the file to your website and replace the original with it. Click on Yes.
B. Edit .htaccess file using the cPanel File Manager
If your web host uses cPanel for site administration, you can use the built-in File Manager to edit the .htaccess file.
- Log in to cPanel: Log in using your WordPress site’s cPanel credentials to access the dashboard.
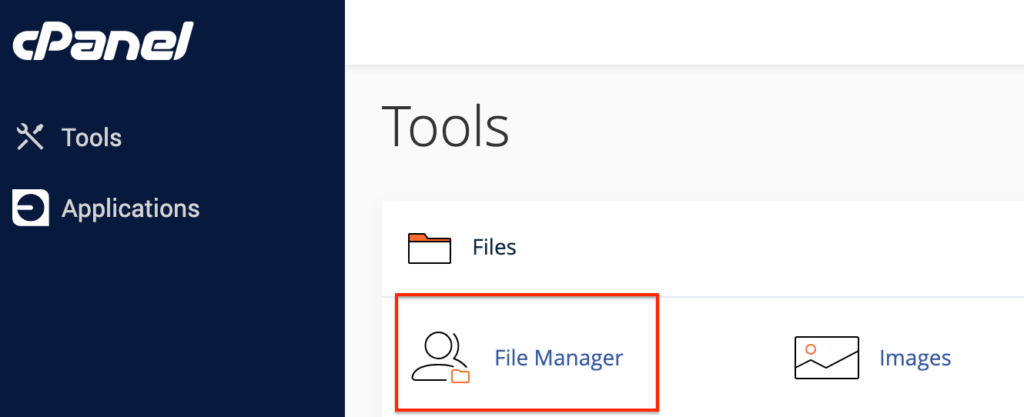
- Locate the .htaccess file using File Manager: In the Files section, click on File Manager to open your site’s file structure in a new window. On the left pane, click to open the root directory. You will find the .htaccess file here.
- Edit the .htaccess file: Right-click on the .htaccess file and click on Edit. Click on Edit again in the pop-up window to open the file in a new window. Add the following lines of code to it:
<ifModule mod_headers.c>
Header set X-Frame-Options DENY
</ifModule>- Save the .htaccess file: Click on Save Changes in the top-right corner of your window and you are done.
C. Edit .htaccess file using SSH
You can use Command Prompt (for Windows) or Terminal (for MacOS) to edit the .htaccess file using Secure Shell (SSH). This is a more technical method than the previous two so be careful when using it.
- Connect to your site using SSH: Using either Command Prompt or Terminal, connect to your WordPress site by entering the following command:
ssh username@ipaddress
Here, the username and ipaddress can be replaced by the correct details that can be obtained from your web host’s dashboard. You will be prompted to enter your password upon entering the above command.
- Locate the .htaccess file: By default, you should be logged in to your site’s root directory, which is public_html in our case. In case you are not, navigate to the required directory by entering the following command:
cd directory_name
where directory_name can be replaced by your preferred directory. Once inside a directory, list all the files within it by entering the following command:
ls -a
You should be able to locate your .htaccess file here.
- Edit the .htaccess file: Enter the following command to open the .htaccess file using the Vmacs file editor:
vi .htaccessHit i to enter edit mode and add the following lines of code to it:
<ifModule mod_headers.c>
Header set X-Frame-Options DENY
</ifModule>- Save the .htaccess file: Hit Esc and enter :wq to save the file and exit the Vmacs editor.
The .htaccess file is an Apache server-specific file. However, if your WordPress site is hosted on an nginx server, you can achieve the same results by editing the nginx.conf file using either of the methods mentioned above and adding the following line of code before the file ending:
add_header X-Frame-Options "DENY";Potential issues and how to troubleshoot them
When dealing with the X-Frame-Options header, remember that it’s a powerful tool but can be a bit of a diva when it doesn’t get its way. Here is a brief guide to troubleshooting your way out when the XFO header is just not budging:
I’m getting a “Refused to display” error in my browser’s console.
Cause: The XFO header is blocking content from being displayed in a frame because it’s set to ‘DENY’ or your own domain isn’t included if set to ‘SAMEORIGIN’.
Fix: Adjust the header value to ‘SAMEORIGIN’ if you want to allow frames on the same domain or specify trusted domains with ‘ALLOW-FROM’ (though note that ‘ALLOW-FROM’ is not supported in all browsers).
My website is not displaying properly after setting the X-Frame-Options header.
Cause: Some features on your site may rely on iframes, such as embedded videos or widgets, that are now being blocked.
Fix: Review your site’s features and configure the header to either allow those specific domains or adjust your site content to avoid using iframes from external sources.
I’ve added the X-Frame-Options header, but it doesn’t seem to be working.
Cause 1: Typo or incorrect value in the configuration file.
Fix 1: Double-check your spelling and syntax. Make sure you edit the correct .htaccess or relevant configuration file, depending on your server type.
Cause 2: Header not being applied due to server caching or WordPress caching plugin.
Fix 2: Clear your server cache and any WordPress cache to ensure the new header settings are applied.
Cause 3: Multiple instances of the header are being set, which can cause conflicts.
Fix 3: Search through your plugin settings and code to ensure that there is only one instance of the XFO header being set. Remove or adjust as needed.
I can’t embed my content on another site, even with the ALLOW-FROM directive.
Cause: The ALLOW-FROM directive can be tricky because it’s not supported by all browsers (looking at you, modern versions of Chrome and Firefox).
Fix: Consider using the Content Security Policy (CSP) ‘frame-ancestors’ directive instead, as it is more widely supported and provides greater control.
Why HTTP headers in WordPress are a big deal
Think of HTTP headers as the superheroes of your WordPress site—they pack a mighty punch in the battle for a secure and nifty web presence. They’re not just fancy tech jargon; they’re your trusty sidekicks in creating a safe browsing space.
- Supercharging Security: By enlisting HTTP headers, you bolster your site’s defenses. These unseen guardians work tirelessly to block villains like cross-site scripting (XSS) and devious code injections.
- Speedy Deliveries: Like speedy postal workers, the right caching headers direct browser traffic, making your site zippy by cutting down wait times.
- Stopping Sneaky Spies: Headers are the bouncers at the door, preventing browsers from playing a guessing game with content types, and keeping would-be attackers at bay.
- Heroic Clickjacking Shields: They’re the invisible force fields stopping your website from being trapped in a frame or iframe, thwarting any clickjacking shenanigans.
- Secret Data Codes: Our header friends also ensure browsers stick to HTTPS, making sure your data remains in stealth mode, and safely encrypted while it travels the information highway.
- Guarding Personal Spaces: These headers are like the discreet librarians of the web, deciding how much information tags along with requests, ensuring only the essentials are shared.
HTTP Headers: Not the finishing line to WordPress security
Getting a grip on HTTP headers is a great start to tighten up your WordPress site’s security, but remember, they’re just one slice of the whole security pizza.
To further strengthen your site, here are some steps:
- Cue the Super Plugin, MalCare: Imagine a digital bodyguard that’s always on duty. MalCare swings a mighty sword with its firewall, malware scanning and removal tools, and bot blockers to keep your WordPress site snug as a bug in a cyber rug.
- Update Everything: Staying current with the latest WordPress, theme, and plugin updates is like getting your flu shot; it keeps the nasties away by patching up those known vulnerabilities.
- Password Puzzle with a Side of Two-Factor: Passwords should be like that one drawer everybody has: a complex mess. Add a side of two-factor authentication and a sprinkle of limited login attempts to put off those brute-force baddies.
- Regular Site Backups with BlogVault: Think of BlogVault backups as your safety net, catching your site if it ever takes a tumble. Regular backups to a safe spot make sure you can bounce right back with a quick restore.
- Mind Your User Roles: Just like you wouldn’t give everyone a key to your house, don’t hand out full access to your WordPress site like it’s free candy. Limit users to only the parts they need.
- Lock Down Your Files: Tight file permissions are like a good deadbolt. They make sure uninvited guests can’t sneak in through the back door of your site’s file system.
Final thoughts
In wrapping up, setting the X-Frame-Options HTTP header is a key step in safeguarding your WordPress site from specific threats, including clickjacking attacks. This preventive measure is crucial, but it’s important to acknowledge that it forms just one aspect of a multi-layered defense strategy for WordPress sites. Comprehensive security requires attention to a broader spectrum of protective practices and solutions to address the diverse range of threats faced by websites today.
For an all-encompassing security solution, we recommend MalCare. MalCare offers a robust firewall, thorough malware scanning and cleaning, and real-time protection against various threats. When combined with strategic HTTP header configuration, it can significantly strengthen your website’s security posture. Implementing MalCare brings an added layer of confidence in the integrity of your site’s defense mechanisms, ensuring that your WordPress website remains secure and protected against a wide array of cyber threats.
FAQs
Can setting the X-Frame-Options header impact my site’s functionality?
Yes, if your site uses frames to display content from your own site or legitimate third-party sources, an incorrect configuration can prevent those frames from loading. It is important to test your site after making changes to the header.
What are the different values I can set for the X-Frame-Options header?
The different values for the X-Frame-Options header include ‘DENY’, ‘SAMEORIGIN’, and ‘ALLOW-FROM’. ‘DENY’ blocks all framing, ‘SAMEORIGIN’ allows framing only by the same site, and ‘ALLOW-FROM’ permits framing by specified origins (though it has limited browser support).
Is configuring the X-Frame-Options header enough to secure my WordPress site?
No, while it is an important security feature, configuring the X-Frame-Options header is just one aspect of securing your WordPress site. A comprehensive security strategy should include regular updates, strong passwords, two-factor authentication, security plugins, and proactive monitoring.
How does the X-Frame-Options header differ from the Content Security Policy (CSP) header?
The X-Frame-Options header is specifically designed to control the use of frames and framing of your content. The Content Security Policy header offers a more comprehensive set of instructions that can govern various aspects of a page’s security, including framing, script execution, and other resources.
What should I do if I encounter errors after setting the X-Frame-Options header?
If you encounter errors after setting the X-Frame-Options header, ensure you have the correct syntax, clear your site and browser caches, and verify that no conflicting headers are set by plugins or server settings. If issues persist, consider seeking help from web security experts or your hosting provider.
Category:
Share it:
You may also like
Fix Pharma Hack on WordPress and SEO
Pharma hack is a prolific malware that redirects visitors from your site to an online pharmacy that sells Viagra, Cialis, Levitra, Xanax, Tadalafil, and other drugs. It also shows up…
How To Protect Your WordPress Website From File Upload Vulnerability?
One of the core strengths of WordPress lies in its file upload functionality. The ability to seamlessly upload and integrate various types of files, from images and documents to multimedia…

MalCare Ensures Unmatched Protection Against User Registration Privilege Escalation Vulnerability
Imagine discovering that your WordPress site, which should be secure and under strict control, has suddenly become accessible to unauthorized users who have the same administrative powers as you. This…
How can we help you?
If you’re worried that your website has been hacked, MalCare can help you quickly fix the issue and secure your site to prevent future hacks.

My site is hacked – Help me clean it
Clean your site with MalCare’s AntiVirus solution within minutes. It will remove all malware from your complete site. Guaranteed.

Secure my WordPress Site from hackers
MalCare’s 7-Layer Security Offers Complete Protection for Your Website. 300,000+ Websites Trust MalCare for Total Defence from Attacks.


