WooCommerce and Elementor – The Beginner’s Guide
by
7-layers of Security for Your WordPress Site
Your website needs the most comprehensive security to protect it from the constant attacks it faces everyday.

Truly customizing your WooCommerce site with just the Gutenberg editor can be difficult. There are very few fonts, a limited number of widgets, and so little room to play with. This is where Elementor comes in. Every bit of your WooCommerce site can be customized to bring your customers the best shopping experience. You already know that the better the shopping experience, the better the conversions. This article is about how to use WooCommerce with Elementor.
TL;DR: This article is a beginner’s guide to using Elementor with WooCommerce. In addition, we recommend you back up your website with BlogVault. BlogVault’s real-time backups are built for WooCommerce sites, so you will never lose a single order, transaction, customer, or product.
Setting up a WooCommerce store for the first time can be a daunting prospect, but it is really quite easy. WordPress and WooCommerce have both been designed to make sites accessible to content creators, rather than just developers.
Elementor too can seem bewildering in the beginning, but it has great potential to give that certain je ne sais quoi to your store.
In this article, we’ll walk you through setting up a WooCommerce site, installing Elementor, and other plugins that you’ll need to manage a great WooCommerce site. We recommend getting these additional plugins too because once your store takes off, you’ll want a maintenance crew to keep the wheels greased.
Let’s start with the basics. How do you create a WordPress site? If you’ve already set up your WooCommerce site, you can skip ahead to the section about understanding and exploring Elementor.
Create a WordPress site
There are a few core steps to creating a site before customizing it: pick a host, create a domain, install WordPress, and add SSL (Security Socket Layer). Here’s an article that talks about setting up a WordPress site from scratch. But here are the brief steps:
- Pick a host: Here are a few things to consider when picking a host: what are your requirements, is there enough support from the host, and is it affordable? There are so many hosts to choose from, so we recommend taking the time to shop around and look for something that suits your needs and budget. A word of caution here: the lowest priced option is rarely the way to go. If you would prefer to just jump in, we host our test sites on Cloudways. Building a WooCommerce site on Cloudways is incredibly easy and comes with WooCommerce installed. It is a good place to start, and the hosting dashboard has great info about your site, if you are that way inclined.

- Register a domain: A domain is the name of your site. Before you pick a domain, think about what your site’s goals are. What are you trying to sell? Who are your buyers? With that in mind, come up with a domain name that is identifiable and easy to remember.
- Install WordPress: The process of installing WordPress will vary slightly from host to host. Check the host’s documentation or reach out to their support for help. With Cloudways, you have to choose WooCommerce when creating a new application. With Hostinger, you’ll have to choose WordPress and it will automatically install WordPress.
- Add SSL: Again, this varies between hosts. Some hosts provide SSL certificates for free with their hosting, whereas with others you will need to use a certificate authority instead. With Cloudways, this security certificate is added automatically. Once you have a certificate, you can set it up very easily with the Really Simple SSL plugin.
Set up a WooCommerce site
Now that you have a basic WordPress site in place, it is time to install WooCommerce and set it up. WooCommerce powers your store, right from listing products, to managing customers, and facilitating payments.
In this section, we’ll talk about the basics of setting up WooCommerce, and things you should do before you start tweaking pages with Elementor. Here’s what you should do:
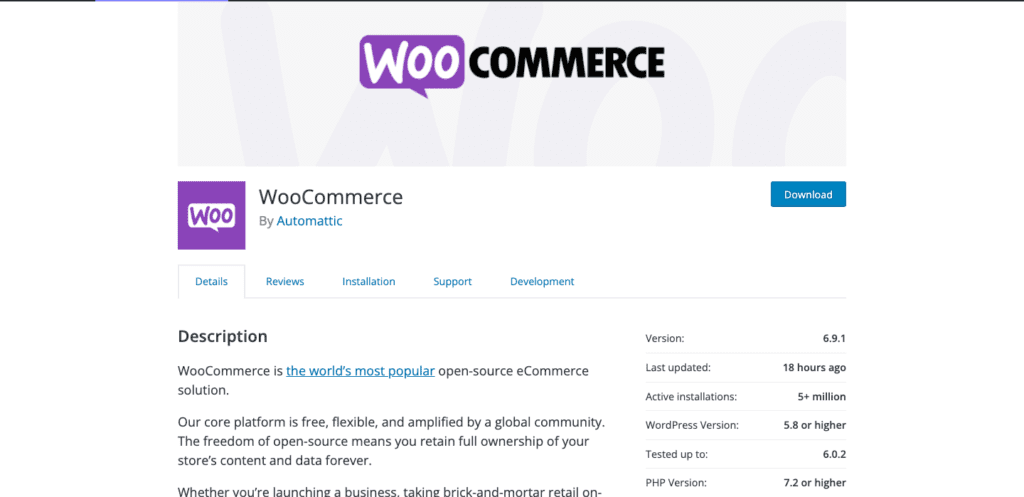
- Install WooCommerce: If you’re using Cloudways to build your WooCommerce site, you can skip this step. If not, hover over plugins and click Add New. Search for the WooCommerce plugin and click Install and Activate.
- Setup WooCommerce with Setup Wizard: With the Setup Wizard, you can add details about your WooCommerce site like basic shop details, preferred payment options, shipping details, and any additional add-ons you need. Here’s an article that can help with more details. Just click WooCommerce in the sidebar to get started.
- Install the Hello Theme: The Hello Theme is a bare-bones theme by Elementor and is designed to complement the page builder. You don’t have to do this step but it definitely helps you get your money’s worth out of your Pro license. You can install it without having installed Elementor. Click Appearance on your sidebar and Theme. Click Add New, search for Hello in the search bar and click Install and Activate.

- Set up your store: Add things like products, photos, descriptions, prices, categories, a privacy policy, a refund policy, etc. This gives you a canvas to work with when you start editing with Elementor.
Now, you’re ready to add payments.
Add payment methods
To build a fully functional store, the next item on your checklist is to add a payment method. After all, if a customer likes one of your products, you’d like to be paid right?
There are a plethora of payment plugins and gateways for you to choose from. Each of them varies a great deal from the other, so you would need to do some research to figure out what works best for your store. Adding a payment method will also open up the Cart and Checkout pages on your site. Here are the steps to do so:
- Choose a payment method: You can choose a cash-on-delivery payment method or use a payment gateway. Pick a payment gateway depending on how your customers prefer to pay, transaction fees, and where your shop is located.
- Install the payment gateway: Once you’ve chosen your preferred option, you’ll have to install the plugin and integrate your account into WooCommerce. We have articles on integrating WooCommerce with Stripe and PayPal, two popular options that cover a wide number of payment options and geographies.
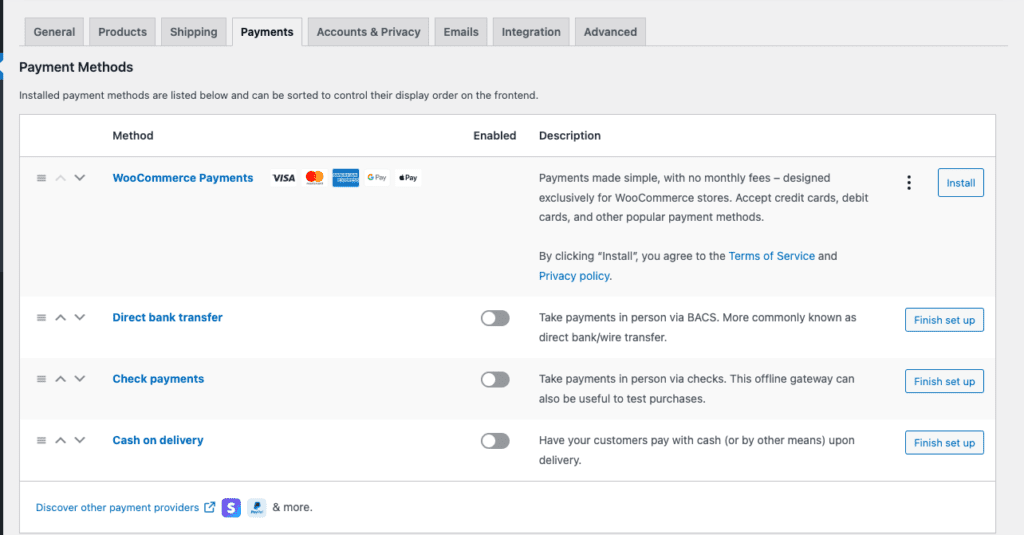
- Test the payment method: Go through the purchase process and see what the experience is like for a customer buying a product from you. This also gives you an idea of what the default product, cart, and checkout pages look like. Many payment plugins will have a test or a sandbox feature to allow you to replicate the process.
Install Elementor on your WooCommerce site
We recommend you invest in the Pro version because of the amazing array of WooCommerce widgets that become available to you. Here are the steps for that:
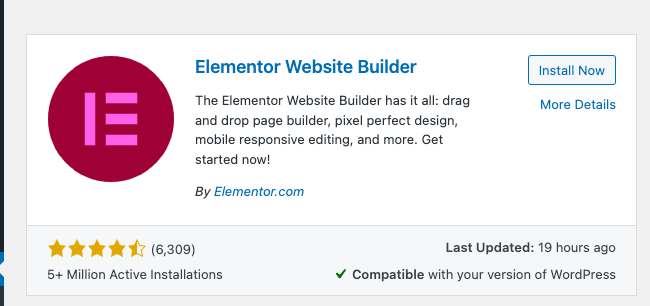
- Install and Activate Elementor: Back on your WordPress dashboard, click Plugins and then Add New. Search for Elementor in the search bar. Click Install when you find the right plugin and click Activate when you’re done.
- Create an account: You’ll be redirected to a page where you’ll be asked to create an account and choose a plan. There are 3 licenses to choose from and a free version. We’ll tell you what the differences are in a later section. Once you’re done, go back to the WP dashboard.
Understanding the Elementor Page Editor
Elementor is a design powerhouse, enabling you to create custom pages for your store with an easy drag-and-drop interface. The range of options can be bewildering at first glance but don’t worry, all it takes is a little tweaking to get used to it. So long as you have backups, getting right in is the best way to learn your way through Elementor.
With that in mind, this section will help you familiarise yourself with the layout of the page editor.
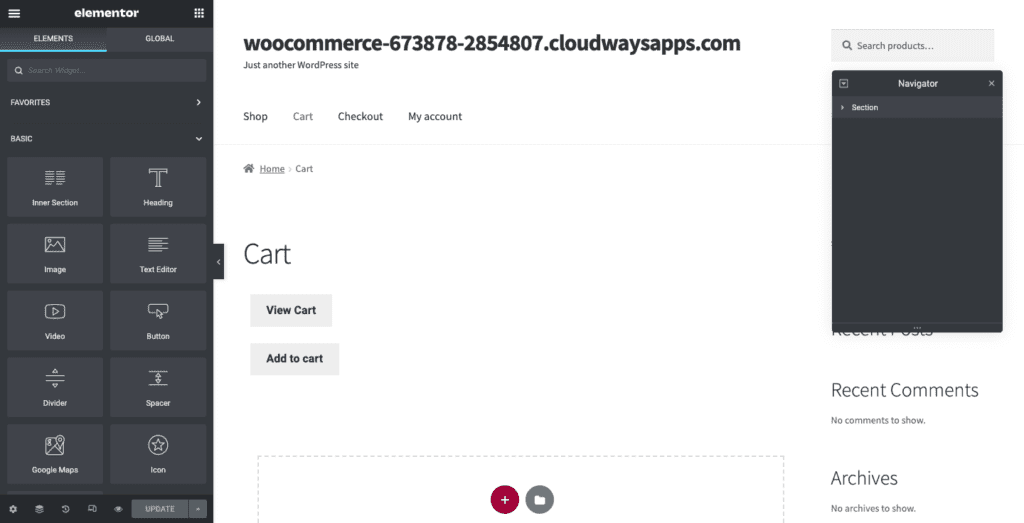
- Open a page to edit: Hover over Pages on your side menu and click All Pages. Hover over any page and click Edit. Once the page editor opens up, click Edit with Elementor. This will lead you to the Elementor page editor.
Here’s a picture of what it looks like:
There are a bunch of critical pages on your store that directly contribute to your customer’s shopping experience. It’s important to note that some pages will have a shortcode that looks as follows:
woocommerce_checkout
This is important. Do not delete it unless you’re using Elementor Pro’s WooCommerce widgets. But, you can put images or text before or after this shortcode.
Now, let’s talk about how to edit the page.
- Add Sections: If you hover over different parts of your page, you’ll notice that a blue box appears. This denotes a section of the page. Click the 6-dotted symbol in the middle of a section to edit it. Click + in the dotted line box. This will create a new section.
- Select Columns: Each section is divided into columns. Hover over a section and different blocks of content will be highlighted with a blue box. Columns contain the individual elements which can be individually customised. You can choose the layout of the columns you’d like. You’re now ready to drag and drop new elements.
- Add Elements: On the left you’ll see a library of Elements. They’re sorted by categories, like Site and WooCommerce. Drag and drop an element into a column. You can edit this element in the sidebar. Click the blue pen that appears at the top right of a column and the sidebar changes to reveal different customisations (depending on the element in that column). If you are editing text, for example, you’ll see the text editor on the left.
- Preview your changes: You can preview the changes you’ve made to your site by clicking the eye button at the bottom of your sidebar.
- Check the site on responsive mode: Click the Responsive mode logo at the bottom and you can preview the page in different views to see how the page looks on mobile, desktop, and other screen sizes.
- Publish/Update your site: Once you’re done, you can either save a draft, update or publish your page by clicking the button at the bottom left.
Now that you understand the layout of your page editor, here is an explanation of some basic widgets.
Editing text
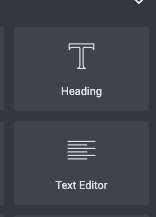
- Drag and drop Headline or Text Editor element: Add a section and choose the number of columns. Then, drag and drop the Headline or Text Editor element from the sidebar. “Add Text Here” will be added to the page.
- Fill in correct text: Select all the text and replace it with your desired copy.
- Customise text: Select the text and click Style in the sidebar. Change the color by choosing from the colour bar. Additionally, you can change the font by clicking the pencil next to Typography. You can also change the type of stroke and add a shadow or change the alignment of a text editor.
Adding images
- Drag and drop the Image element: Add a section if you need to and select the number of columns. Then, drag and drop the Image element.
- Add an image: Click the pencil logo at the top right corner of the image. In the sidebar, hover over the image and select Choose Image. Replace the default image with yours.
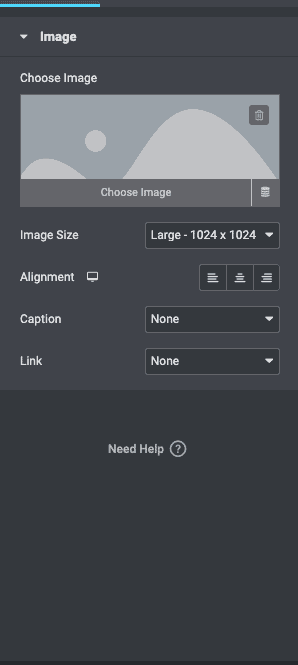
- Edit the image: You can change the size or alignment, add a caption, or link it to a media file or URL.
Adding a button
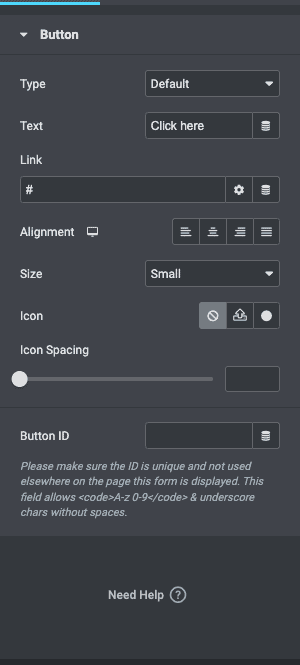
- Drag and drop the Button element: Once you have a column, drag and drop a button element.
- Customise button: You can change the type of button, the text that goes on the button, alignment, colour, or size. Add a link or action.
With those basics underway, here is a tip that will reduce a tonne of work:
Create Site Settings
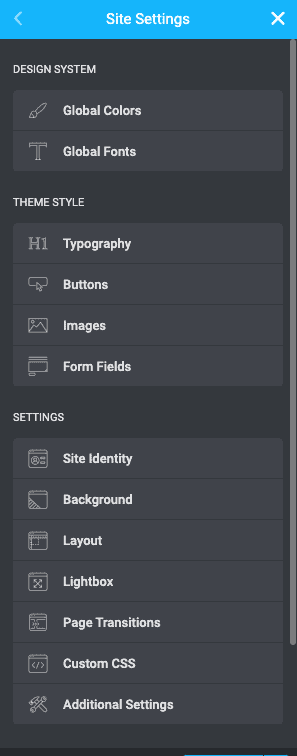
You can create a colour theme, set global fonts, and set templates for things like the header, footer and buttons. Click the hamburger icon on the top left corner of your page editor and click Site Settings. Once you’ve figured out a design for your site, this feature will save you a lot of time when pulling together new pages in the future.
These are the basics. Once you’re familiar with the controls of Elementor, you can put this new found power to good use.
How to use WooCommerce with Elementor Pro
If you’re open to creating WooCommerce site pages with an Elementor Pro license, this section will tell you what widgets to use for specific pages.
How to edit the WooCommerce product page with Elementor
This is the page where your customer can learn more about the product. Here are the steps to editing a single product page:
- Edit a Product Page: You can either edit existing templates by Elementor or create one from scratch. It is easier to edit a template if you have no idea where specific widgets should go. You can just edit existing widgets.
- Customize with widgets: If you’d like to start from scratch, here are the widgets you can add:
- Product title: This is the widget that includes the title of your product. It can be edited in the sidebar.
- Product image: You can edit the image’s size in the sidebar. Just select the image and explore the setting on the right.
- Product Rating: This can be a very helpful widget for your customers. It gives them an opportunity to see other people’s impression of your product.
- Short description: This is a widget that adds your description as you’ve included when you added the product description.
- Product price: Add this widget to add the price. The price is added to a specific product when you add products to your WooCommerce site. So, this text here is populated automatically.
- Add to cart: This is the button to add a product to the cart. YOu can change the color, text, or size in the sidebar.
- Woo Breadcrumbs: Breadcrumbs are a feature to show product categories. For example, if you were buying a black pair of men’s shoes from a fashion site, the breadcrumbs could be Home/Men’s Fashion/Shoes/Black Leather Shoes.
- Product related: This is the “Related Products” section that you often see on e-commerce sites. You can add it by dragging and dropping the Products Related widget.
- Upsells widget: This widget powers the “You may also like” section of your product page.
Each of these widgets can be customized in terms of fonts, colors, alignment, position, and more.
- Review the changes: Click the responsive mode and check how the page looks on different devices.
- Publish or update: If it’s all good, you can either publish or update the page.
Recommendations when editing your product pages:
- Add high-quality images for products
- Write great product descriptions
- Choose descriptive and meaningful names for products
How to edit the WooCommerce shop page with Elementor
Also known as the archive page, this is where your customer can see all your products. The goal of this page is to create one where your customers can find what they want easily.
- Edit template or create a new page: In a later section we’ll talk about creating a new template. You can also just use an existing template or start from scratch. If you’d like to create from scratch, hover over Pages and click Add New. Then, you can add the following widgets:
- Add Widgets to customise: We’ve listed the widgets we recommend you add for a great shopping experience:
- Product Categories: This will help your customer filter products through categories.
- Menu Cart: This adds a cart logo in your menu where your customer can see what all they’ve added to their cart.
- Products: This will display all the products you’ve added to your store.
- Archive Product: This gives customers the opportunity to sort by default, popularity, latest or price.
- Custom Add to Cart: You can customise the add to cart button. Change the text, colour or size.
- WooCommerce Breadcrumbs: This shows all the categories and where in the archive a particular product fits. It’s like a pathway from the homepage to the page your customer is currently on.
- Archive title ad description: You can add a title and description and edit it by changing the settings in the sidebar.
- Review the page: Once you’ve edited what you want, review how the page looks on different devices. Once you’re happy, click Publish.
How to edit the WooCommerce cart page with Elementor
Second only to the checkout page in importance, a well-designed cart page can make or break your sale. When designing this page, we recommend putting in a lot of research to figure out what your customers need to see when reviewing their selections before payment. Check out popular e-commerce sites and tweak the design as you go along.
You can use the Elementor Cart widget to fully customise the cart page. Here are the steps to do so:
- Edit the existing cart page: You can edit an existing page by hovering over pages and clicking All Pages. Then, click Edit when you hover over the Cart page. Then, click Edit with Elementor.
- Replace the short code with a widget: The shortcode is a piece of code that adds a feature to a page. With the Cart widget, you don’t need it, so delete the short code and replace it with the widget from the sidebar.
- Customise the page: Check the sidebar and explore the settings. You can try the following things:
- General: Choose the number of columns in each section and make certain columns sticky by toggling it in the sidebar.
- Order Summary: Change the Update Cart button if you’d like.
- Totals: You can customize the labels, alignment and more for the cart total section, including the Proceed to Checkout button.
- Additional Options: Lets you toggle the ability for the cart to be updated automatically.
If you click Style in the sidebar, here are the things that you can customize:
- Sections: Control the style of the different sections – like adding a drop shadow or a background color.
- Typography: All the text can be changed to match your website’s aesthetics.
- Buttons: Change the color, text, size and more.
- Order Summary: Customize how the order summary looks.
- Totals: Edit the Cart Total section.
- Checkout Button: You can customise the colour, size, text and alignment of the checkout button.
- Review in Mobile view: Once you’re done, review the page in the Mobile view. If you’re happy with the way things look, click Publish.
How to edit the WooCommerce checkout page with Elementor
Right, this is the most important page on your ecommerce site. It is the last page your customer sees, and where they make their decision to buy. Checkout pages have the highest drop-off rates, and therefore you need to make sure it is as friction-less as possible.
Elementor Pro has a Checkout widget that makes editing a checkout page very easy. It works alongside the Cart and My Account widgets, enabling you to edit the existing checkout page. With the widget, you can make design changes to your checkout page like text colour, alignment, sections, and much more.
- Open the checkout page with the Elementor editor: Hover over Pages and click All Pages. Hover over the Checkout Page and click Edit. At the top, click Edit with Elementor. Wait a second and this will open the page in the Elementor editor.
- Replace the Checkout shortcode with the Checkout Widget: The shortcode is WooCommerce’s way of including Checkout fields to your page. It looks like this:
woocommerce_checkout
Instead, add the checkout widget from the library on the left. This will give you a preview of what the checkout page looks like.
Note: Since, you’re editing at the checkout page, add a few products to your cart, and click the button to checkout. This will show you what the page looks like with products in it for a better experience.
- Customise the page: You can explore the many settings of the Elementor Checkout Widget in the sidebar. Here are some settings you can change:
- General: You can choose one or two column layouts, make one column sticky, and add an offset so the header doesn’t disrupt the column.
- Changing billing or shipping forms: You can edit the header for each of these forms, each placeholder, and each field.
- Additional information: This is the section where your customers can add instructions or information about the order.
- Coupon settings: Customise the alignment and typography of your coupons.
- Payment: You can customise all aspects of the payment button; alignment and color for example.
You can edit more things by clicking Style:
- Purchase button: You can change the colours, the text, spacing, etc for the purchase button. This is the button that your customers will click to go forward with paying for their cart.
- Order summary: You can choose the typography and spacing of the list of products ordered.
- Typography: You can customize all the text except forms.
- Forms: Customize the typography and color of your forms. Use the Rows Gap settings to increase the spacing.
- Review the page in Mobile View: Make sure the site looks good even in the mobile view.
Recommendations for when editing your checkout page:
- Have enough payment options
- Remove any unnecessary fields
- Keep all the checkout information on one page
How to build a template with Elementor
With Elementor, you can create custom templates that fit your brand. You can customize the header and footer, for example, so they appear with your site branding on every page. In this section, we’ll be creating a custom template for a header. Here’s how you do that.
- Create a New Template: The Global Header element is what you see on every page of your site. To create a template, click Elementor in the sidebar, then click Theme Builder. Now click Add New Template.
- Choose the right type of template: If you’re creating a header, choose Header in the dropdown for type of template. Choose a meaningful name for this template so you can identify it easily later. Then, click Create Template.
- Browse the template library: Now, you can choose from the predefined templates in the library and click Insert. Every template is fully customizable, so pick the one that is closest to what you are looking for.
- Edit and customise template: Use the editor to create the template of your dreams. Play around with color, images, fonts, etc.
- Publish template: Once you’re down tweaking the template, click Publish at the bottom of the sidebar and you’ll be prompted to pick where you’d like the template to be displayed. Choose what you’d like from the dropdown. Click Save and Close. You’ll be redirected back to the editor but your new template will be live.
- Review: Click Have a Look in the popup at the bottom and this will lead you to a preview page. Make changes as you’d like.
How to build an eCommerce pop-up with Elementor
If you’re looking to add a popup, here are the steps:
- Create a popup template: Click Template in the sidebar and click Popups and Add New. Name your template and click Create Template.
- Create a popup: You can either create one from scratch or edit an Elementor template. You can choose the colour, text, etc.
- Publish the popup: This essentially saves your popup as a template that you can link later. Click Publish and Save and Close.
- Edit the page: Click Pages in the side bar and All Pages. Choose the page you want to add the popup to and click Edit with Elementor.
- Add a button: Once the page editor opens, drag and drop the Button widget from the sidebar. Add the text you’d like and make it whatever colour you’d like.
- Link to popup: In the sidebar, under Layout, choose Link, Dynamic, Actions and Popup. Then click Open Popup and select the popup you created.
- Review: Review the functioning of the button and click Update when you’re ready.
Elementor versus Elementor Pro: When to make othe switch?
The free version of Elementor is stocked with the tools to design basic pages and is great for blogs. When designing a WooCommerce site, you’re better off buying the license for Elementor Pro. They have so many widgets and elements that are specially designed for an amazing WooCommerce experience.
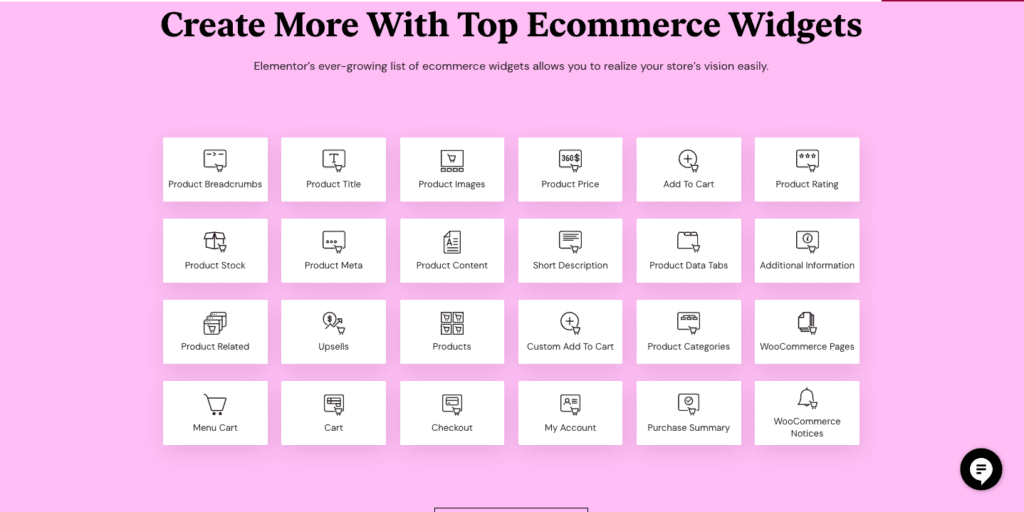
Here’s a list of some of the great widgets that you should definitely try:
- Product Category: This helps your customer sort products by categories. This makes it so much easier for them to find and buy something.
- Add to Cart: It’s super easy to customize the button to your brand. You can change the color, borders, fonts, etc.
- Product Upsell widget: Have you ever seen the Related Products section on Amazon? This is the same thing. You’re showing your customer other products that they may be interested in based on the current product they are viewing.
- Empty Cart Message: Add an engaging message for customers to know that their cart is empty if they try to checkout. This is a good way to get them to go back to your product listing for another look.
- Product Rating: Social proof is a powerful motivator, and it builds trust in your product and on your site. You may also want to request reviews from previous customers for this specific reason.
- Product Review: This brings credibility to your products for new customers.
Pros and cons of Elementor
Elementor isn’t the only page builder out there, and many developers or designers will certainly have a preference. We like Elementor because it is ubiquitous and easy to use, but your needs may well be different. We’ve broken down the main considerations of choosing a page builder into the following pros and cons list. If a necessary feature is in the cons list, you may want to look for an alternative page builder.
Pros
- Ease of use: The drag and drop functionality is super easy. You can truly customize your page without any coding or using any other plugins.
- Value for money: There are 24 WooCommerce-specific elements available with the Pro version. They are all major aspects of the shopping process, and are designed to create a better experience for your customers.
- Built-in Responsive design: Unlike Gutenberg, where you have to preview your changes on a new tab, with Elementor what you see is what you get. You can change the view and continue to edit.
Cons
- Cost: While the free version does help customize a basic site, the true magic happens with the Pro version. There are three plans which can range from $49 to $999 a year.
- Glitchy updates and not enough support: They have had issues in the past with glitchy updates and very little support to help site owners out.
- Issues with WooCommerce: Sometimes, Elementor stops working on a WooCommerce site. We hve a section later on where we’ll talk about how to fix that.
Elementor not working with WooCommerce? How to fix it
This is especially common if you’re installing WooCommerce after you’ve installed Elementor. Here are a few things you can try to fix the issue:
- Update your Elementor, WordPress, and WooCommerce version: Make sure your plugins and PHP are all up to date. We have an article on updating plugins safely that you might find helpful.
- Enable Switch Editor Loader Method: Click Elementor in the sidebar and click Settings. Then, head over to the Advanced tab and enable Switch Editor Loader Method by clicking the check box.
- Clear your cache: If you have a cache plugin, clear your cache and see if that helps. You can also temporarily disable the caching plugin and this will enable you to bypass any caching issues.
- Check if any other plugins are interfering with Elementor functioning: To do so, deactivate all plugins and check to see if you’re able to load Elementor. If so, reactivate all the plugins and keep deactivating them one by one till it works again. Then you know which plugin is the problem. You can either keep the plugin deactivated or roll it back to an older version.
Recommended plugins for WooCommerce sites
- BlogVault: Safeguard every order, purchase, customer, and transaction on your WooCommerce store with BlogVault’s real-time backups. Completely automated, BlogVault’s real-time backups sync to your store every 5 minutes, and are stored offsite for even greater safety.
- MalCare: This best-in-class WordPress security plugin is all you need to protect your site from hackers and their malware. Easily scan and clean malware in just a few clicks, and prevent malware from entering your site with an advanced firewallProtect your customer details from ever being accessed by hackers with MalCare.
- Google Analytics: The OG analytics tool to analyze your traffic and understand your customers better. We have an article on integrating Google Analytics into your WooCommerce site.
- YITH WooCommerce Order Tracking: This plugin helps manage shipping information easily. It allows your customers to track their purchases.
- YITH Advanced Refund System for WooCommerce: This plugin helps you set up a refund system.
Final thoughts
If you’re ready to invest in a page builder, Elementor can be a great option. But, before you make those changes, backup your site with BlogVault. It’s a great way to protect your site from mishaps and serves as insurance in case something goes terribly wrong.
FAQ
How good is Elementor for a WooCommerce site?
Elementor is excellent for a WooCommerce site because it has so many elements that you can customize, specifically for making your customer’s journey better. With the Pro version of Elementor, you won’t need other plugins to build a high-functioning WooCommerce site.
Is Elementor the best page builder?
Elementor is one of the best page builder plugins, amidst others like SeedProd and WPBakery. It’s easy, highly customizable and totally worth the cost.
What are the best add-Ons for WooCommerce?
Some essential add-ons for WooCommerce sites are BlogVault for backups, MalCare for security, YITH WooCommerce Order Tracking, and YITH Advanced Refund System for WooCommerce.
How do I add Elementor to WooCommerce?
You can install Elementor from your WordPress admin’s plugin directory. Next, activate it and add your license key if you’re using the Pro version. You’re now ready to build the site you want.
Is WooCommerce free with Elementor?
WooCommerce is free. Elementor has both a free and paid version. Though, for WooCommerce, you’re better off buying the paid version of Elementor.
Can I edit WooCommerce with Elementor?
Yes, you can edit a WooCommerce site easily with Elementor. In fact, every inch of your WooCommerce site can be edited with Elementor. Just install, activate, and get customizing.
What is Elementor in WooCommerce?
Elementor is a page builder plugin for WordPress and WooCommerce sites. They offer free and paid versions of the plugin. Once you install it, you have a wide range of elements to drag, drop, and customize.
Category:
Share it:
You may also like

MalCare Ensures Unmatched Protection Against User Registration Privilege Escalation Vulnerability
Imagine discovering that your WordPress site, which should be secure and under strict control, has suddenly become accessible to unauthorized users who have the same administrative powers as you. This…
MalCare Ensures Proactive Protection Against WP-Members XSS Vulnerability
MalCare continues to protect its customer sites from all kinds of attacks, even the ones exploiting zero-day vulnerabilities. The recent stored cross-site scripting (XSS) vulnerability found in the WP-Members Membership…
Top 9 ManageWP Alternatives To Manage Multiple Sites Easily [Reviewed]
ManageWP is a popular name in the WordPress maintenance plugins market. People love how much you get for a free plan, how easy it is to set up, and how…
How can we help you?
If you’re worried that your website has been hacked, MalCare can help you quickly fix the issue and secure your site to prevent future hacks.

My site is hacked – Help me clean it
Clean your site with MalCare’s AntiVirus solution within minutes. It will remove all malware from your complete site. Guaranteed.

Secure my WordPress Site from hackers
MalCare’s 7-Layer Security Offers Complete Protection for Your Website. 300,000+ Websites Trust MalCare for Total Defence from Attacks.


