How to Add Stripe to WooCommerce – Beginner’s Guide
by
7-layers of Security for Your WordPress Site
Your website needs the most comprehensive security to protect it from the constant attacks it faces everyday.

Setting up the right payment gateway for your WooCommerce site is a crucial step in getting your e-commerce business off the ground. Since you’ve decided that Stripe is the way to go, we’re here to help you get started.
To add Stripe to WooCommerce site, you are required to activate a plugin and connect it to your Stripe account. In this article, we will guide you through how to set up a stripe to WooCommerce and cover some key things to note about Stripe.
TL;DR: Stripe is popular for its high security and variety of accepted payment options. Integrate stripe to WooCommerce with this easy-to-follow guide. But, before you get started, we recommend backing up your site with BlogVault so you don’t run the risk of losing any progress you’ve made on your site so far.
Video Tutorial:
Requirements to add Stripe to WooCommerce
Before you get started with setting up stripe with WooCommerce, there are a few things that we recommend you consider.
- Picking the right plugin: There are numerous options for Stripe integration plugins for WooCommerce. Each has its strengths, and which one you choose largely depends on the features they offer. For instance, WooCommerce Stripe Payment Gateway requires an extension for subscription plugins and is great for businesses that sell clothing or accessories.
- Adding an SSL Certificate: Make sure you have an SSL certificate. An SSL certificate encrypts connections and we recommend you get the certificate anyway.
- Requires WooCommerce versions 2.2 and above: Stripe only processes refunds for WooCommerce versions 2.2 and higher, so make sure your site is up to date. Keeping your site up to date also has the added benefit of better security and lesser bugs, so we’d recommend you do it anyway.
Creating a Stripe account
Before integrating Stripe to your WooCommerce site, you need to create a Stripe account. Setting up a Stripe account is a fairly intuitive process. This process will vary slightly from country to country but you can just follow the steps we’ve mentioned below.
- Create an account: Go to the Stripe website and click Start Now. This will lead you to a page where you fill in your email, and full name, select the country, and create a strong password. Click Create Account when you’re done.
- Verify your email address: Go to your email account and click the Verify email address button.
- Activate Payments: Go back to the Stripe account and click Activate Payments. This step is necessary for you to accept payments. So, while it is skippable, we recommend you go ahead and click it. The following steps will walk you through activating payments.
- Add business basics: You’ll be asked for your registered business address, type of business, and business structure (if it’s not an individual business)
- Add business details: Fill in your legal business name or LLC name, employer identification number, and registered business address and phone number. Also, select the type of industry that fits your business. Add additional details like business website and product description.
- Add details of business representative: Fill in details for a point of contact in your company.
- Add business owners: If it’s appropriate for your company, fill in these details as well.
- Select fulfillment details: Select how long it will take your customer to receive/use your product or service.
- Add statement descriptor: This is what will show up in the statements that your customer will receive. So, keep it easily identifiable. There is a character limit for this section.
- Enter bank details: You can either do it manually or select your bank and follow the instructions.
- Enable two-step verification: You can select between using SMS or an authenticator app.
- Enable sales tax calculation: This step is optional. But it does help make taxation easy.
- Fill in additional information: Fill in anything else that is required in the next page. This may vary depending on what was filled in the last few steps. Once you’re done, click Submit. You’re now all set up and ready to receive payments.
How to add Stripe to WooCommerce?
Now that you’ve created a Stripe account, you can integrate it with your WooCommerce site. While there are many plugins to choose from, we’ve picked four plugins to guide you through how to add stripe to WooCommerce:
- WooCommerce Stripe Payment Gateway
- Stripe Payment Gateway for WooCommerce
- Payment Plugins for Stripe WooCommerce
- WooCommerce payments
WooCommerce Stripe Payment Gateway
This plugin by WooCommerce is available for sellers in 37 countries across the globe with more countries being added to the list often. It’s preferred for its wide range of accepted payment options. For subscriptions, you’ll need to install the WooCommerce Subscriptions extension. If this is the payment plugin you’ve picked, let’s get started on connecting Stripe to WooCommerce.
- Activate the WooCommerce Stripe Payment Gateway
Click Plugins in the menu on the left and click Add New. In the search field, look up “WooCommerce Stripe Payment Gateway“. Click Install and Activate. - Connect to your Stripe account
Navigate to your WooCommerce dashboard and head over to the Payments tab. Toggle on Stripe (Credit Card) and when the page loads, log into your Stripe account. You’ll be redirected back to your site when you’re done. - Enable test mode
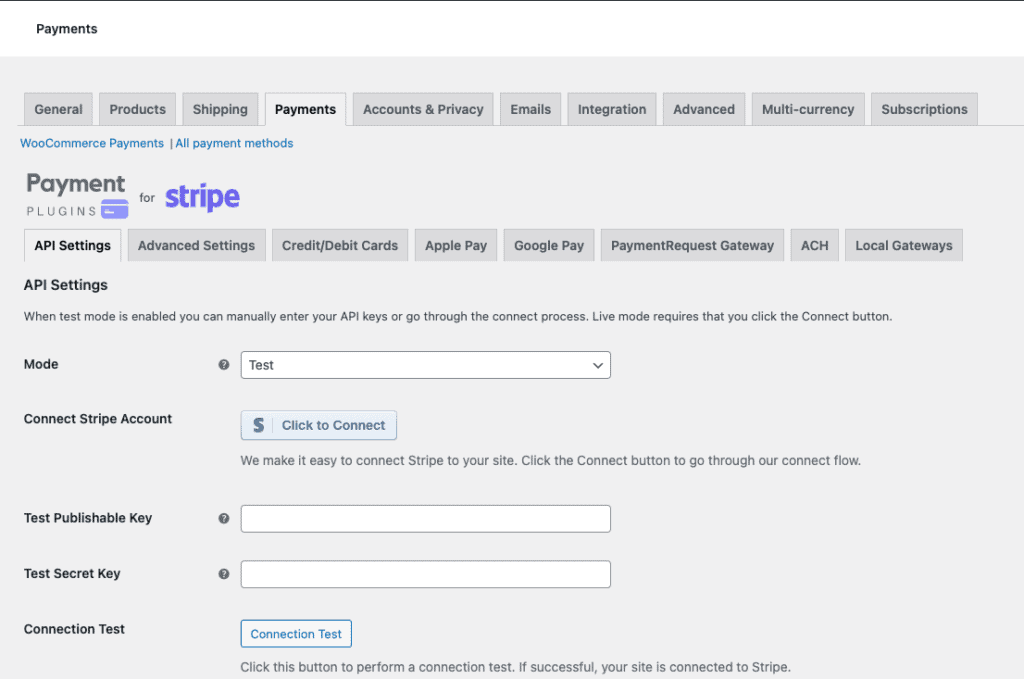
Back on the WP dashboard, hover over the WooCommerce logo on the left, and click Settings. Go to the Payments tab and click Stripe (credit card). Click the Settings tab. In the general section, click Edit Account Keys. In the pop-up, click the Test tab. - Configure test API keys
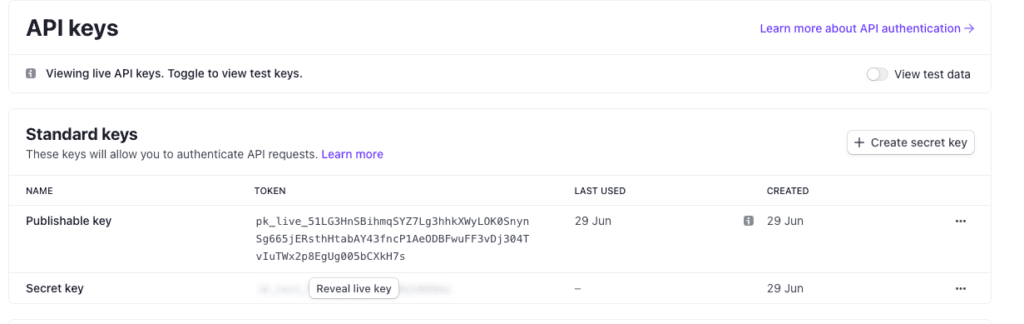
Switch to the Stripe website and click Developers on the top right. Next, toggle the Test Mode on the top right. On the menu on the left, select the API Keys tab. Copy the publishable key and secret key. Go back to the WordPress admin site and paste the links in the test publishable key and test secret key fields. - Configure test webhook
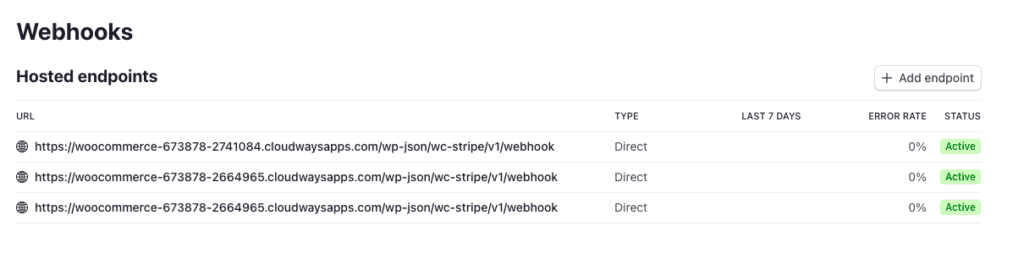
On your WP admin dashboard, head to the Stripe settings page. Copy the webhook endpoint URL that is provided. On your Stripe developers dashboard, go to the Webhooks page and click + Add Endpoint. Paste the endpoint URL in the endpoint URL field.
- Select Events
Select the events you require from the list that is shown below. If it shows up, select the latest API version. If not, go ahead and click Add Endpoint after you’re done. Stripe recommends you select the following events at the minimum.
- source.chargeable
- source.cancelled
- charge.succeeded
- charge.failed
- charge.captured
- charge.dispute.created
- charge.dispute.closed
- charge.refunded
- review.opened
- review.closed
- payment_intent.succeeded
- payment_intent.payment_failed
- payment_intent.amount_capturable_updated
- payment_intent.requires_action
- setup_intent.succeeded
- setup_intent.setup_failed
- Test the payment gateway
While you can test it out using your own details. we recommend that you use the test credentials that Stripe offers. - Disable test mode
To disable test mode, click Edit Account Keys as seen in step 3. Click the Live tab. Go back to the Stripe account and toggle off the test mode. Then copy and paste the Live API keys. Do the same process for webhooks as well and select events.
- Double-check
We recommend you double-check the API keys and webhook. You’re then ready to receive payment.
Stripe Payment Gateway for WooCommerce
Stripe Payment Gateway for WooCommerce, by FunnelKit, is a free plugin that allows you to easily integrate Stripe with your online store. It comes with an onboarding wizard that makes it super simple to set up. It also supports over 135 currencies and numerous payment methods, making it ideal for businesses operating internationally.
- Install and activate the plugin
Go to the Plugins menu on wp-admin, and click on Add New. In the search field, look up Stripe Payment Gateway for WooCommerce. Click Install and Activate. - Set up the payment gateway
Hover over WooCommerce, and click on Settings. Then click on the Payments tab. You should see a message thanking you for installing the plugin. Click on Start Onboarding Wizard to commence the setup. - Connect Stripe account
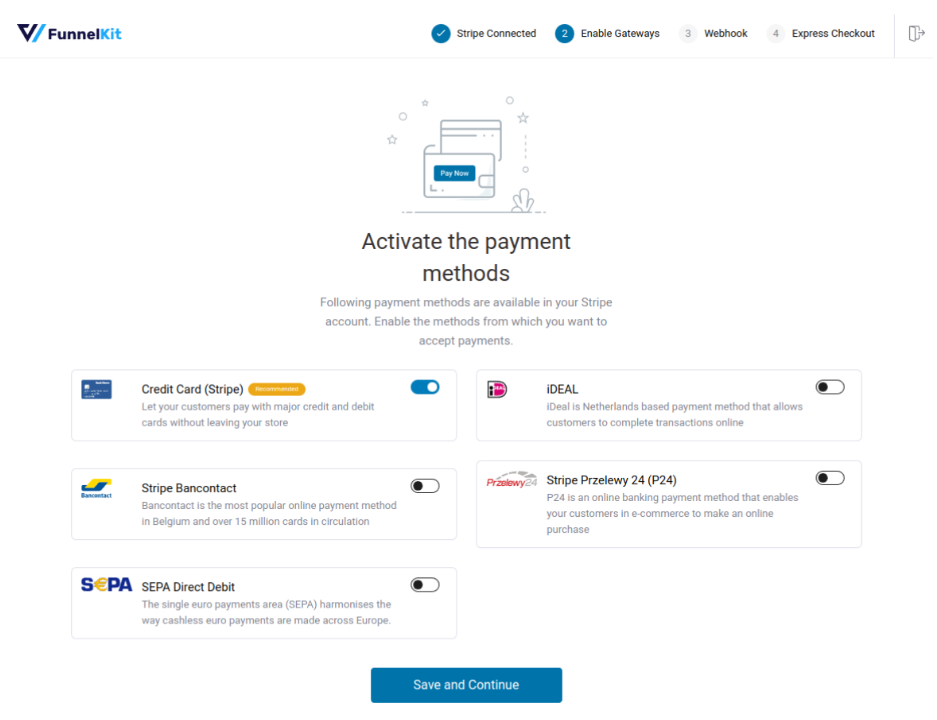
The Onboarding Wizard will prompt you to login to your Stripe account. Then, select the Stripe account you want to integrate with the plugin and click Connect. Next, activate the payment methods you want to offer on your WooCommerce store and click Save and Continue. - Setup webhooks
Click the Setup Webhook Now button to automatically create and set up webhooks.
Once you’re finished with connecting up the account, you’ll be redirected to wp-admin, and the WooCommerce payment settings page.
Payment Plugins for Stripe WooCommerce
Payment Plugins for Stripe WooCommerce is a great alternative to WooCommerce Stripe Payment Gateway. It’s one of the many plugins that are powered by Stripe and It supports WooCommerce Subscriptions, WooCommerce Pre-Orders, WooCommerce Blocks, and, in some countries, it also supports installment payment structures. To integrate Stripe with WooCommerce, here are the steps to get started:
- Install and Activate:
In the Plugins directory, look up Payment Plugins for Stripe WooCommerce. Click Install and Activate. - Enable Test Mode:
Clicking Activate will lead you to the plugin’s dashboard. Click Settings and make sure that the mode is set to Test. Next, switch to the Stripe site and toggle on the Test Mode.
- Configure Test API keys:
Click Connect to Stripe and log in to your Stripe account. This will automatically connect with your test API keys and webhook.
- Test the payment gateway:
You can now test the checkout and payment process of your customer. To disable Test mode. - Add webhook URL
Copy the webhook URL from your plugin’s dashboard. Switch to the Stripe developers dashboard and click + Add Endpoint. Paste it in the endpoint URL field. - Select the events
Select all the events you want from the list below. Once you’re done, select the latest API version if it shows up and click Add Endpoint. According to Stripe, the minimum you need are:- source.chargeable
- source.cancelled
- charge.succeeded
- charge.failed
- charge.captured
- charge.dispute.created
- charge.dispute.closed
- charge.refunded
- review.opened
- review.closed
- payment_intent.succeeded
- payment_intent.payment_failed
- payment_intent.amount_capturable_updated
- payment_intent.requires_action
- setup_intent.succeeded
- setup_intent.setup_failed

- Copy the signing secret:
After clicking Add Endpoint, you’ll be redirected back to the dashboard. In the table, click Reveal to show the signing secret. Copy this and paste it in the Webhook Secret field on your WP admin dashboard. You’re now ready to receive payments.
Note: If the webhook was added while in test mode, disable test mode and repeat the same process. Make sure that you’re on live mode both on Stripe and WooCommerce.
WooCommerce Payments
WooCommerce Payments is a plugin by Automattic but has a built-in partnership with Stripe. So, it allows you to manage all things transaction and payment related on your WooCommerce dashboard. You now no longer have to login to Stripe just to solve disputes and monitor your transactions. Everything is in one place. To get started, follow the steps we’ve mentioned below.
- Install and activate
Go to the WordPress dashboard and hover over the Plugins tab. Click on Add New and search for WooCommerce Payments in the plugins directory. Install and activate the plugin. - Set up WooCommerce Payments
You will be redirected to the WooCommerce Payments page. Click Finish Setup. You’ll need to select the correct email ID and let your site connect. Next login with your Stripe account. You’re now all set. This will redirect you back to the WordPress dashboard. You can even see your transaction history, disputes, deposits, etc by using the tabs on the left. - Enable Test Mode
Once you’ve logged in, you can select the check box below Test Mode. Any transaction you make now will be in test mode. - Disable Test Mode
Once you’re done testing, you can unselect the checkbox near the Test mode option to switch off the test mode. The set up is finallly done and you’re ready to receive payments.
Choosing the right plugin to setup Stripe to WooCommerce
Cost, admin capabilities, accepted payment options, and features are a few factors you should definitely consider when picking the right payment gateway plugin to configure strip to WooCommerce.
Cost: All three plugins in this case are free, but in the case of WooCommerce Stripe Payment gateway and Payment Plugins for Stripe WooCommerce, the extensions cost extra.
Manage transactions: WooCommerce Payments offers a dashboard on your admin panel where you can manage everything. The other two plugins require you to use your Stripe dashboard.
Accepted payment options: WooCommerce Stripe Payment Gateway accepts the most payment options of the three, and not only major credit cards and payment methods, but also Diner’s Club, AliPay, and Microsoft Pay for desktop users.
Features: Payment Plugins for Stripe WooCommerce and WooCommerce Stripe Payment Gateway requires you to install extensions for features like subscriptions, etc.
Why should you use Stripe?
Security
Stripe has been audited by the most stringent compliance auditors, and is certified as a PCI Level 1 Service Provider. All sensitive data and communication is encrypted and it requires TLS or SSL security for all its services. You can rest assured that your data and your customer’s data is safe and secure with Stripe.
Additionally, we recommend securing your site with a security plugin like MalCare that offers a malware scanner, state-of-the-art firewall, and quick and easy malware cleanup. For more tips on WooCommerce security, we suggest looking through our article that dives deep into the topic.
Privacy
Stripe collects information like government ID and bank details for verification. Additionally, when a customer buys something from your site, Stripe collects personal data like name, age (if you’re selling age restricted products), shipping details, bank details, transaction history, etc. Stripe uses these customer details for fraud detection services or sends them to business owners authorized by the customer, for advertising, payment, etc.
Pricing
Stripe is well liked for its flat rate processing fee pricing structure. Some key points to note are:
- No set up fees or regular charges.
- Pay as you go/transaction fees are 2.9% + 30 cents for card transactions and 2.7% + 5 cents for in-person payment methods in the USA. An additional 1% is charged for international cards, as well as an additional 1% as conversion charges. Costs also vary depending on the country, payment type, and bank.
- There may be additional costs depending on what plugins you’re using to integrate Stripe, extensions you’re using or products you’d like to add on. Stripe Radar for example, a fraud prevention product, costs 7 cents per screened transaction (2 cents if you have their standard pricing of 2.9% + 30 cents).
Payments
Payment cycles vary depending on the country and level of risk in your location (high risk locations can have 14-day cycles). Instant payouts have become available in select countries. When you set up an account with Stripe, an account balance is created. After a transaction, the fees are deducted, and the remaining amount appears in your pending balance. After a payment cycle is completed, the accumulated balance becomes an available balance.
Final thoughts
Setting up a Stripe account makes integrating with various payment plugins a breeze. It also comes with the added benefit of providing a variety of payment options, high security, and a pay-as-you-go payment structure.
In terms of which plugin to pick, we recommend WooCommerce Payments because it offers the ability to manage your entire site in one place.
But before you install your payment gateway of choice, we’d recommend backing up your site with BlogVault. It is a quick and easy plugin that automatically backs up your site. With that said, we wish you luck on your WooCommerce site.
Frequently Asked Questions
How do you set up Google Pay or Apple Pay with Checkout Plugins?
Setting up Google Pay or Apple Pay requires a separate plugin called Checkout Plugins
- Find the plugin in your plugins directory.
- Once it’s installed and activated, connect the plugin to your Stripe account.
- You’ll be redirected to the page to enable gateways, toggle on Stripe Card, and select Enable Gateways.
- Skip the option to enable express checkout and webhooks.
- Click Let’s Customise button and you will be redirected back to the WordPress Dashboard inside WooCommerce.
- Click on the Express Checkout tab and select the checkbox to enable it.
- Customise the Express Checkout buttons and where it will appear on your site.
- Select Save Changes and you’re good to go.
- If the customer is using an Apple device to buy your products, the option will be Apply Pay. Otherwise, it will be a Google Pay button.
What are the best payment gateways for WooCommerce?
WooCommerce Payments, Paypal Zettle, Amazon Pay, PayFast, Authorize.net, and Square are some of the most popular payment gateways. We have an in-depth article that dives into a list of WooCommce payment gateways and will help you find the best fit.
What is a webhook?
A webhook is a way that web applications communicate between each other. It changes the behaviour of a web application with custom call backs. Simply put, it sends information and data from one application to another, when an event occurs. For example, if you’ve got a charge.failed as an event that you’ve activated, then Stripe will tell your WooCommerce site when a charge has failed.
What are API keys?
API stands for Application Programming Interface. An API key is a code generated by a web application. It identifies a user or developer that is trying to access a site.
Category:
Share it:
You may also like
![Top 9 ManageWP Alternatives To Manage Multiple Sites Easily [Reviewed]](https://www.malcare.com/wp-content/uploads/2022/12/malcare-default-image.jpeg)
Top 9 ManageWP Alternatives To Manage Multiple Sites Easily [Reviewed]
ManageWP is a popular name in the WordPress maintenance plugins market. People love how much you get for a free plan, how easy it is to set up, and how…

MalCare Proactively Defends Against Icegram Express SQL Injection Vulnerability
MalCare’s recent data has revealed numerous attempts to exploit a newly found SQL injection vulnerability in the Icegram Express plugin. Attackers commonly use this sophisticated SQL injection technique to extract…
Atomic Security’s Deep WordPress Integration Helps Protect Against Core XSS Vulnerability
The recent WordPress core vulnerability is a critical one, primarily because of two reasons. Firstly, it affects the WordPress core itself, which means that every WordPress site is vulnerable to…
How can we help you?
If you’re worried that your website has been hacked, MalCare can help you quickly fix the issue and secure your site to prevent future hacks.

My site is hacked – Help me clean it
Clean your site with MalCare’s AntiVirus solution within minutes. It will remove all malware from your complete site. Guaranteed.

Secure my WordPress Site from hackers
MalCare’s 7-Layer Security Offers Complete Protection for Your Website. 300,000+ Websites Trust MalCare for Total Defence from Attacks.


