How To Password-Protect Your WordPress Site?
by
7-layers of Security for Your WordPress Site
Your website needs the most comprehensive security to protect it from the constant attacks it faces everyday.

There are several reasons to restrict public access to a WordPress site: from maintaining a site under construction, catering content to specific user types, unveiling exclusive event details, to handling sensitive information. Regardless of the content—be it the entire website, an individual page or post, categories of posts, products, or even sections of a page or post—restricting access is key.
One of the simplest and most effective methods to restrict access is through password protection. Whether you aim to secure individual pages or posts, or WooCommerce products, good password security can add a layer of protection to your website.. And for those seeking additional customization, there is a plugin for every other type of password protection.
In this comprehensive article, we will delve into the different ways to safeguard your site, covering all you need to know to password protect WordPress site.
TL;DR: You can password-protect individual pages and posts with built-in WordPress features. To safeguard sections, install either Ultimate Membership or Access Category Password.
Securing your WordPress site from unwanted public access is not only possible, but it’s also highly customizable. We delve into safeguarding different aspects of your WordPress site with password protection.
- Posts
- Pages
- WooCommerce products
- Categories
- Entire site
- Parts of a page
- Membership content
- Protecting a directory
Before making any changes to your site, we strongly recommend taking a WordPress site backup first. The smallest misstep can crash your site, and a backup is essential to safeguard your site from harm.
How to password protect WordPress pages, posts, and WooCommerce products
Password-protecting WordPress posts offer privacy, content exclusivity, and controlled access. If you’re running a membership site, a professional service website, or an event registration platform, password protection WordPress pages can provide a secure means to grant access only to authorized individuals. Additionally, while most online stores operate on an open-access policy, there are certain scenarios where you might want to restrict access to specific products. Whether you offer exclusive merchandise to select customers, run membership-based sales, or host pre-release offerings for a privileged few, password-protecting WooCommerce products helps you to curate a tailored shopping experience. If any of that is up your alley, here are the steps to use the inbuilt feature:
Step 1:
Start by opening the editor. You can either create a new post, page or WooCommerce product. You can also edit an existing one.

Step 2:
In the right-hand column of the post editor, you’ll find the Visibility settings. It usually says Public. If you’re using the classic editor, click Edit next to Visibility to reveal additional options. If not, just click Public.

Step 3:
Select Password protected from the drop-down menu.
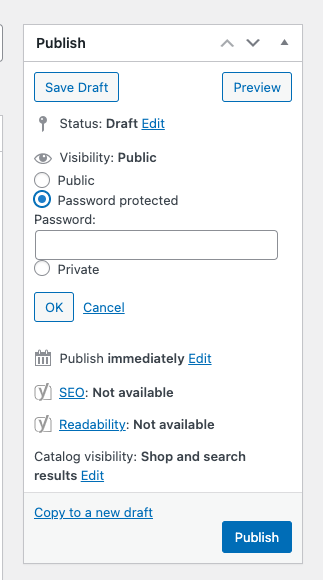
Step 4:
Enter the password you want to use for accessing the post. Make sure to use a strong and secure password.
Step 5:
Click Update or Publish.
Step 6:
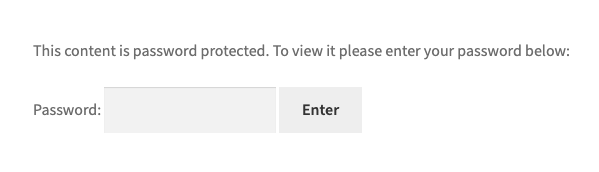
Last, preview the password-protected post, page or WooCommerce product.
How to password protect WordPress categories
By password-protecting specific categories, website owners can provide exclusive content to particular user groups while keeping the rest of the site publicly accessible. For instance, a blog with various categories may have premium or members-only content in certain categories, such as tutorials or in-depth analysis, and by password-protecting these categories, the website can incentivize users to subscribe or become members. This approach allows for more targeted content delivery, ensuring that only the intended audience can access the valuable resources within those restricted categories. Additionally, password-protecting categories can also serve as a parental control mechanism, limiting access to certain topics or content not suitable for all audiences.
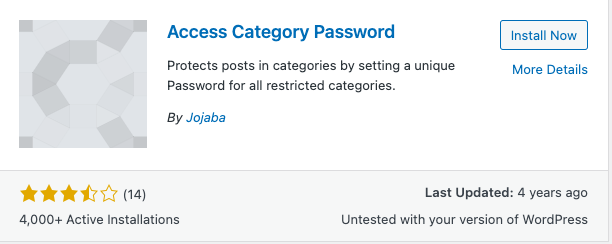
We’re using the Access Category Password plugin and here are the steps to do so:
Step 1:
Install and activate the Access Category Password plugin from the WordPress repository. Once activated, navigate to the plugin’s settings by clicking Settings in the sidebar and selecting Access Category Password in the menu.
Step 2:
Choose between Cookie or Session protection methods, depending on your preference for managing user access.

Step 3:
Generate new passwords to safeguard your selected categories, ensuring only authorized visitors can view the content.
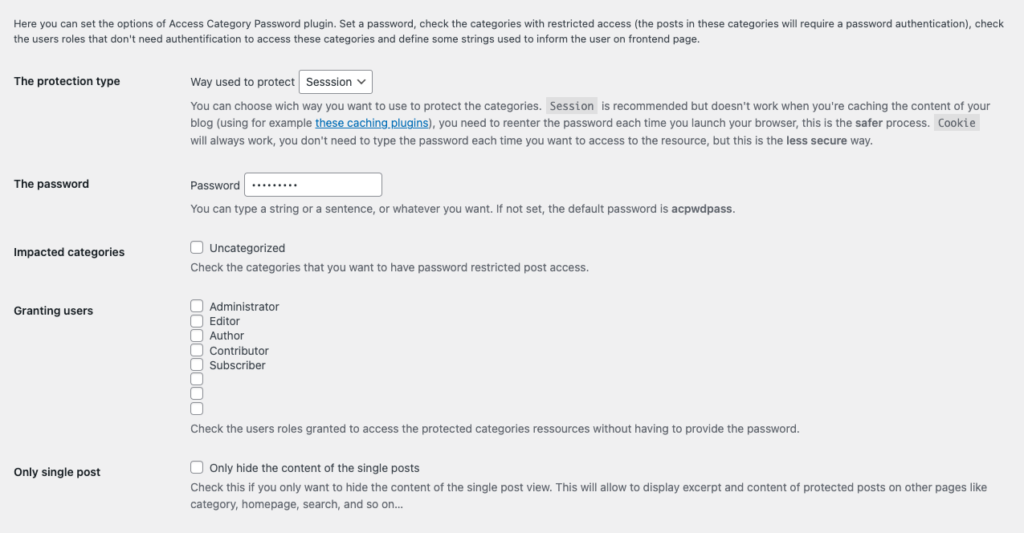
Step 4:
Select the specific categories you want to protect with passwords, granting exclusive access to relevant content.
Step 5:
Optionally whitelist certain user types, such as administrators or logged-in users, to bypass password protection and enjoy unrestricted access.
Features
- Customize info message about password protection
- Display excerpts
- Opt to hide only specific post pages
- Customize error messages
- Customize placeholder texts
- Customize validation button texts
For an alternative solution, try the Password Protected Categories WordPress plugin, which offers similar category-based password protection features.
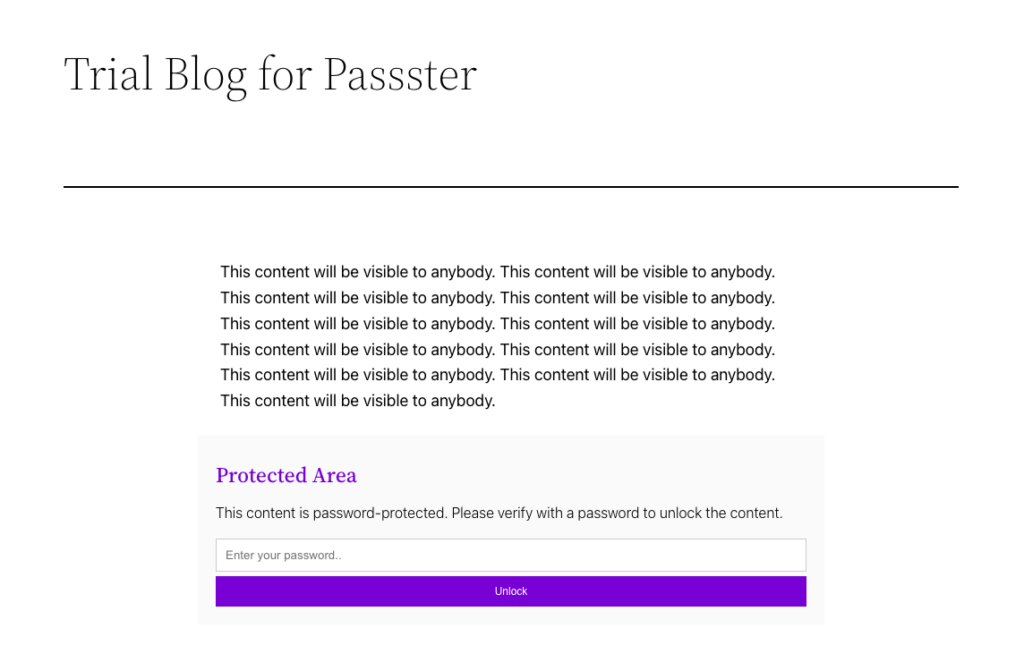
How to password protect parts of WordPress pages
Password-protecting parts of a WordPress page provide a flexible approach to controlling content accessibility. This feature allows website owners to selectively restrict certain sections of a page, ensuring that only authorized users can view sensitive or premium information. For instance, a blog post may contain both free and premium content, and by password-protecting the premium section, the website can encourage users to sign up or subscribe for exclusive access. Similarly, in an e-commerce setting, password protection on specific product details can be used for members or special customer groups, offering them unique benefits or pricing. This granular control enables a tailored user experience, making it an effective tool for offering personalized content to different segments of the audience, without locking down the entire page or alienating non-privileged users. The Passster plugin allows you to create personalized password-protected sections within your posts and pages. Here are some things you can try:
Step 1:
Install the Passter – Password plugin, ensuring your WordPress version is 6.0 or higher. Activate the plugin to begin using its features.
Step 2:
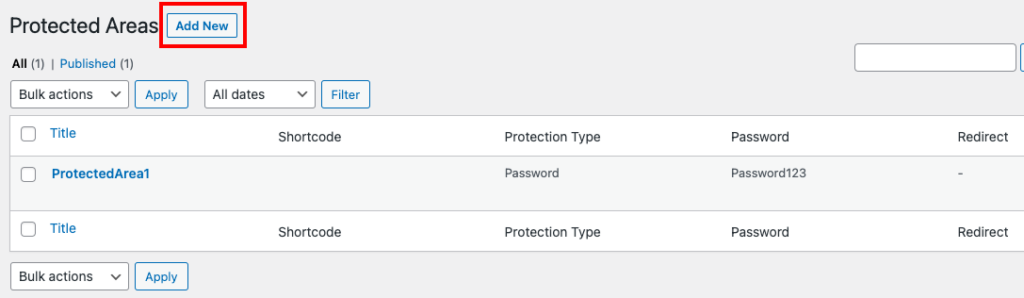
In your WordPress dashboard, locate Passter in the sidebar and click on Password Protected Areas.
Step 3:
Click Add New to generate a password-protected section for your content.
Step 4:
You will be redirected to a page that resembles a regular post or page. Give the protected area a memorable name for easy reference.
Step 5:
Populate the designated area with the content you wish to protect, keeping in mind that this section will not be visible on the front end until access is granted.
Step 6:
If needed, you can further customize the protected section using a theme builder to align it seamlessly with your overall design.
Step 7:
Once the setup is complete, publish the page with the password-protected area.
Step 8:
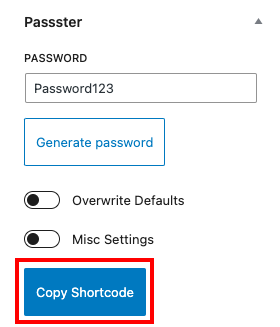
From the sidebar, locate the shortcode associated with the protected area and copy it.
Step 9:
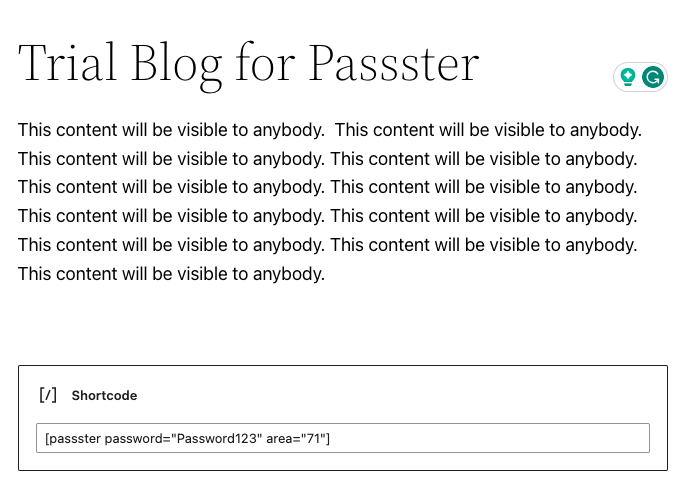
Go to the post or page where you want to include the password-protected section and paste the shortcode in the desired location.
Step 10:
Click Publish or Update when you’re ready.
Step 11:
When you preview the page, you will notice that the password-protected content is hidden.
Features
- Multiple passwords per page
- Global password protect
- Quick edit
- Bulk password management
- Customizable form
- Stats and reports
Password Protect Pages also lets you password-protect sections of a page, making it a great alternative.
How to password protect an entire WordPress site (2 ways)
Password-protecting an entire WordPress site can be a strategic choice for specific situations. It ensures exclusivity for a limited audience, such as private communities or organizations. During development or beta testing, password protection allows control over access for developers, testers, and stakeholders. For businesses and professionals, it offers a secure platform for confidential client communication or internal purposes. Temporary maintenance or redesigns can be shielded from public view, safeguarding an unfinished or visually unappealing site. Partnerships benefit from content preview options, and membership or subscription sites can grant exclusive access. Additionally, password protection can bolster security for sites with valuable intellectual property.
There are two ways we’ll discuss in this section – plugin and HTTP basic authentication. Let’s get started.
Using a plugin
We’ll be using a plugin called Password Protected to fortify our entire website.
Here’s a step-by-step guide to using the Password Protected plugin:
Step 1:
Begin by installing the Password Protected plugin from the WordPress repository. Once installed, activate it to get started.
Step 2:
In your WordPress dashboard, you’ll find the Password Protected option in the sidebar. Click on it to access the plugin’s settings.
Step 3:
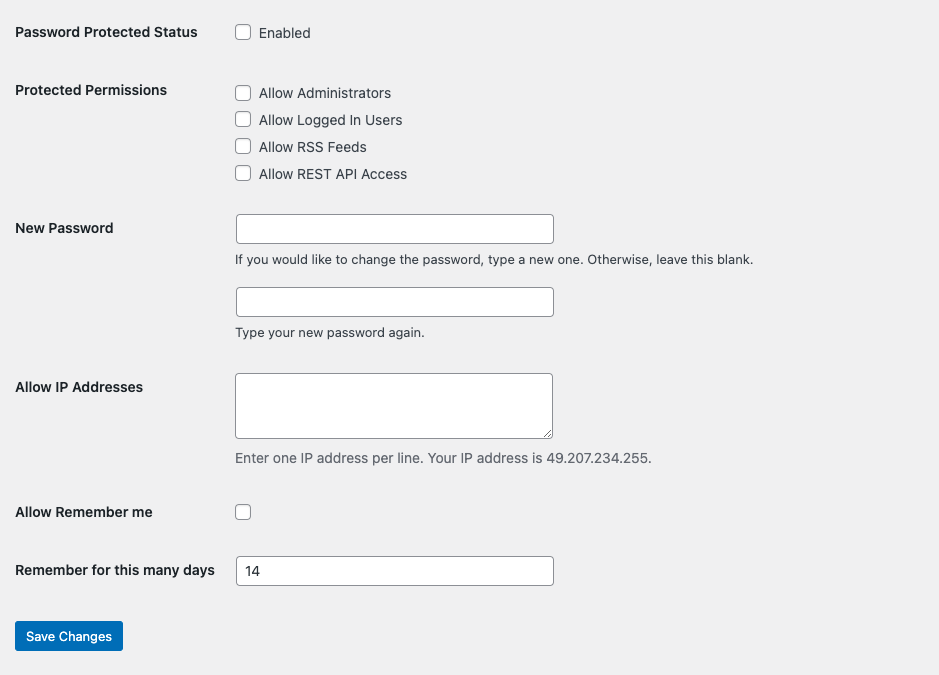
Within the plugin settings, you can set a password to protect your entire site.
Step 4:
Additionally, you can customize who can access the website. The plugin offers the flexibility to whitelist specific IP addresses or allow only registered users, such as admins or logged-in users, to view the site.
Step 5:
You can create a personalized page that visitors will see when they attempt to access the site. This allows you to convey any necessary messages or instructions regarding password access.
Step 6:
For an extra layer of security, you have the option to enable reCAPTCHA, which helps prevent bots from attempting unauthorized access.
Features
- Easy installation and activation
- Global site protection
- Customizable access control
- IP whitelisting
- User whitelisting
- Customized page with authorization instructions
- reCAPTCHA integration
- Positive reviews
If you prefer an alternative solution, the Password Protect Pages plugin offers another route to password-protect specific pages on your website. Another easy-to-use plugin is My Private Site. This plugin is also popular, has no known theme incompatibilities, and offers customizations even if the site is not set to private. Another plugin is Passster which we will talk about in a later section, for its ability to password-protect parts of a page.
Using HTTP authentication:
Step 1:
Login to your server with the following command:
ssh user_name@ipaddressStep 2:
Type in your password when prompted.
Step 3:
Use the following command to list the files on your site:
ls -a
See if there is a file called .htpasswd
Step 4:
If there isn’t, create a .htpasswd file on your server by executing the following command
htpasswd -c .htpasswd user_nameIf the .htpasswd file already exists on your server, remove the -c parameter and run the command as htpasswd .htpasswd user_name
This will ask for a password for the user ‘user_name’ and store it in the file. If you reopen the file, you will see the encrypted password.
Step 5:
Save and exit the .htpasswd file with the following command:
!wq
Step 6:
Once you are back in the main directory, type in the following command to get the full directory path:
pwd
You will need this exact path for the next step in the process.
Step 7:
Next, edit the .htaccess file located in the public_html folder and add the following code:
AuthType basic
AuthName "Protected Directory"
AuthUserFile /full_path_to/.htpasswd
Require valid-user
Here, replace ‘full_path_to’ with the complete path to the location where your .htpasswd file is located.
How to password protect a WordPress directory
Password-protecting a WordPress site using HTTP basic authentication adds an extra layer of security to the entire website or specific sections. This method requires visitors to enter a username and password before they can access the site’s content, making it an effective way to restrict access to authorized users only. HTTP basic authentication is particularly useful during the development phase, allowing site owners to prevent public access while testing or refining the website. Additionally, for private communities or exclusive content offerings, HTTP basic authentication offers a straightforward and easy-to-implement solution to control user access without relying on complex plugins or custom development. HTTP authentication is a versatile but basic password protection process. There are various applications, right from protecting your entire site or protecting a single file but for the sake of this article, we are going to password-protect a directory. So, if you’re interested, follow these steps:
Step 1:
Login to your server :
ssh user_name@ipaddressStep 2:
You will be prompted to enter a password.
Step 3:
List all the files on your site using the following command:
ls -a
See if there is a file called .htpasswd
Step 4:
If you don’t have the file, create a .htpasswd file on your server by executing the following command:
htpasswd -c .htpasswd user_nameIf the .htpasswd file already exists on your server, remove the -c parameter and run the command as:
htpasswd .htpasswd user_nameThis will ask for a password for the user ‘user_name’ and store it in the file. If you open the file, you will see the encrypted password.
Step 5:
Type in the following command to get the full directory path of the location where the .htpasswd file is stored:
pwd
You will need this exact path for the next step in the process.
Step 6:
Next, create a .htaccess file in the directory that you want to protect and add the following code:
AuthType basic
AuthName "Protected Directory"
AuthUserFile /full_path_to/.htpasswd
Require valid-user
Here, replace ‘full_path_to’ with the complete path to the location where your .htpasswd file is located.
Protecting a single file with HTTP basic authentication
The process can be replicated for other things as well. For example, to password-protect a single file, edit the .htaccess file in the directory that contains the file to add the following code:
<Files filename>
AuthType basic
AuthName "Protected File"
AuthUserFile /full_path_to/.htpasswd
Require valid-user
Replace the filename with the name of the file to protect it. You can add multiple filenames here to protect more than one file, with each file separated by the pipe (|) character.
There are more use cases for HTTP basic authentication, however, there are some downsides to relying on it in the long term.
How to Create a paywall using membership plugins
You can create exclusive memberships, manage user profiles, and restrict content visibility based on user roles or subscription levels. Membership plugins help nurture a community, offer premium content to loyal customers, or facilitate a subscription-based service with multiple tiers. In this section, we explore the Ultimate Membership plugin and the WooCommerce extension.
Let’s start by talking about the free version of Ultimate Membership:
Step 1:
Begin by installing and activating the Ultimate Membership plugin from the WordPress repository.
Step 2:
Click the Ultimate Membership tab in the sidebar and click Dashboard.
Step 3:
You will be prompted to allow the plugin to create a bunch of pages that can help you get started.
Step 4:
On the dashboard, you get an overview of users.
Step 5:
Click the Settings tab in the sidebar and start to customize pages.
Step 6:
Click the Access tab and then customize the access controls.
Step 7:
You can customize the email experience, templates and get more install information.
To unlock additional features and integrate membership plans with product sales, consider purchasing the WooCommerce extension for the Ultimate Membership plugin. The extension costs approximately $249 per year and offers a wide array of powerful features.
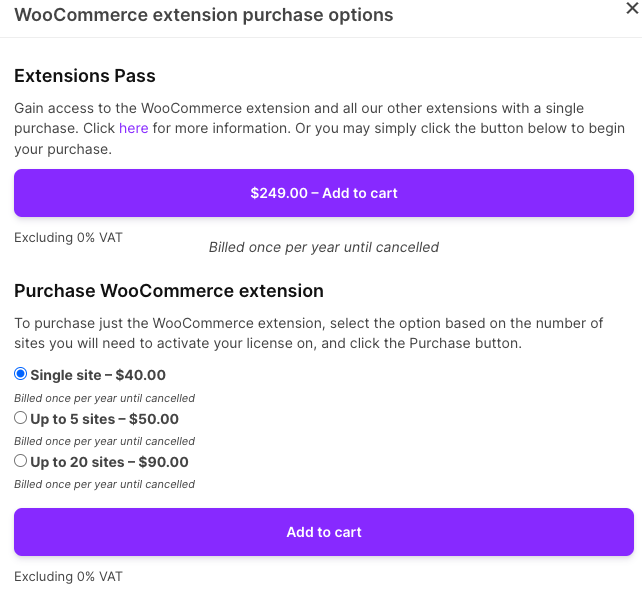
Features of the WooCommerce Extension
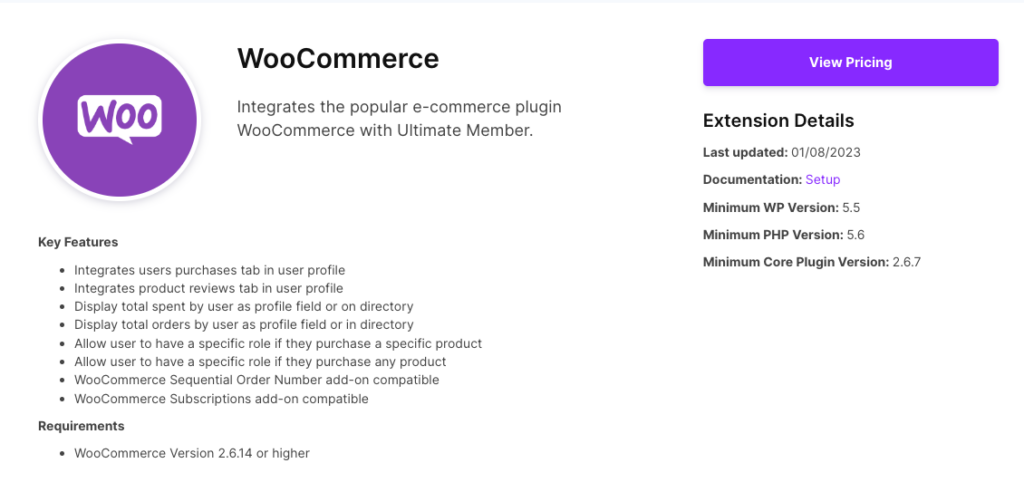
- Track and display user purchases
- Showcase user-generated product reviews
- Display the total amount spent and the total number of orders
- Assign specific roles to users
There are a lot of membership plugins like WooCommerce Memberships and Paid Membership Pro. We recommend you take some time to compare them and find one that works for you.
Troubleshooting
Stumbled into an unexpected hurdle while trying to password-protect your WordPress site? In this section, we delve into essential troubleshooting methods to address common issues with password protection.
- Verify if the issue is browser-specific by accessing the website using an alternative browser.
- Try opening the website in incognito mode to rule out any caching issues. If the problem persists, clear your browser’s cache.
- Clearing cookies can resolve login or session-related problems. Try clearing cookies and revisiting the site.
- Ensure that you are using the correct username and password to log in. Double-check for typos or incorrect input.
- Confirm that the templates or themes being used are compatible with your WordPress version. Outdated or incompatible themes can cause issues.
- Temporarily disable plugins and switch to a default theme to check if any third-party element is causing conflicts.
If all else fails, remove the changes you have made to verify if the site works. If the password protection additions are the issue, try doing them again more carefully.
Why should you password protect WordPress site?
In this section, we explore the numerous benefits of password protection, ranging from fortified website security and controlled content access to targeted audience engagement and flexible user interactions.
- Restricted access: By password-protecting specific content, you can limit access to only those users who have the password. This can be useful when you want to share sensitive information, private content, or exclusive material with a select group of people.
- Membership or exclusive content: Password protection is often used for membership sites or websites that offer premium content to subscribers. By requiring a password, you can control who can access certain pages or posts, making it an effective tool for offering exclusive content to your audience.
- Privacy and security: If you need to share confidential information, documents, or internal resources within a team or organization, WordPress password protection can add an extra layer of privacy and security. This prevents unauthorized users from stumbling upon sensitive information.
- Controlled sharing: Sometimes you may want to share a draft or unfinished work with a specific group of collaborators or clients for feedback. Password protection allows you to share content without making it public or searchable until it’s ready for release.
- Parental control: If your website contains content that may not be suitable for all audiences, such as adult content or explicit material, password protection can help prevent unauthorized access, especially in cases where parental controls are required.
- Temporary access: Password protection can be used for time-limited access. For example, if you’re hosting an event or conducting a workshop with limited participants, you can share content for a specific time frame and then revoke access afterward.
- Bypass search engines: Password-protected content won’t be indexed by search engines, keeping it hidden from public view and allowing you to control who can access it.
- Enhanced user experience: For websites that require users to log in or provide a password to access premium features or personalized content, password protection can make the login process more seamless and straightforward.
- A/B testing and exclusive offers: Password protection can be used for A/B testing, where different versions of a page or post are shown to different groups of users for analysis. Additionally, it allows you to offer exclusive discounts or promotions to specific groups of users.
The best way to secure your WordPress site
Password protection is your first line of defense for any WordPress site. However, for more advanced security, using a robust plugin like MalCare significantly enhances your site’s protection. Armed with a smart scanner, it effectively identifies both commonplace and sophisticated threats.
MalCare is a powerful security plugin designed to fortify your WordPress website with a comprehensive suite of protective features. The plugin boasts an excellent firewall, actively blocking suspicious traffic and intrusion attempts, while its reliable scanner performs thorough, real-time scans to detect malware and viruses. Should any malicious code be found, MalCare’s one-click malware removal feature ensures swift mitigation. With MalCare by your side, you can rest assured that your site is shielded from malicious attacks and vulnerabilities.
FAQs
How do I make my WordPress site private?
Plugins like Passster and Password Protect Pages offer advanced settings to make your site entirely private, requiring visitors to enter a password before accessing any content.
How do I lock my account?
To lock your WordPress account, ensure that you have a strong and secure password. Avoid using easily guessable passwords and consider implementing two-factor authentication (2FA) for an extra layer of security. Two-factor authentication requires users to provide a second verification token, usually via a code sent to their mobile device, in addition to their password.
How can I protect my WordPress site with a password?
You can protect your WordPress site with a password by using built-in features or plugins specifically designed for password protection. Built-in WordPress options allow you to password-protect individual pages and posts. Plugins like Password Protected or Ultimate Membership enable more comprehensive password protection, including site-wide access control and membership management.
Is my site secure if I password-protect it?
While password protection adds an extra layer of security, it’s not a foolproof solution. It helps control access to certain areas of your site, but other security measures should also be in place to ensure overall protection. Consider using security plugins, implementing regular updates, taking backups, SSL certificates, and strong passwords for all user accounts to fortify your site’s security comprehensively.
Share it:
You may also like
How to Fix the Google Blacklist Warning from Your Website
Google blacklist is a colloquial term used to describe big red warnings visible when visiting websites. There are a few flavours, depending on various factors, but they all mean that…

MalCare Stands Strong Against WP Activity Log Premium SQL Injection Vulnerability
A significant SQL injection vulnerability was identified in the WP Activity Log Premium plugin, a popular tool for tracking user activity on WordPress sites. An SQLi vulnerability poses a serious…
Fix Pharma Hack on WordPress and SEO
Pharma hack is a prolific malware that redirects visitors from your site to an online pharmacy that sells Viagra, Cialis, Levitra, Xanax, Tadalafil, and other drugs. It also shows up…
How can we help you?
If you’re worried that your website has been hacked, MalCare can help you quickly fix the issue and secure your site to prevent future hacks.

My site is hacked – Help me clean it
Clean your site with MalCare’s AntiVirus solution within minutes. It will remove all malware from your complete site. Guaranteed.

Secure my WordPress Site from hackers
MalCare’s 7-Layer Security Offers Complete Protection for Your Website. 300,000+ Websites Trust MalCare for Total Defence from Attacks.


