3 Proven Ways to Change phpMyAdmin Password Quickly
by
7-layers of Security for Your WordPress Site
Your website needs the most comprehensive security to protect it from the constant attacks it faces everyday.

If you are looking to change phpMyAdmin password guide, you are probablytrying to protect your database, regain access, or tighten things up with a more secure password.
That can feel a bit stressful, especially if you are worried about breaking something.
The good news is that this is usually straightforward. We will walk you through it clearly and help you avoid the common mistakes.
TL;DR: Change the password for the correct database user in phpMyAdmin. Then update config.inc.php if phpMyAdmin stores the password there. If your site uses that same database user, update wp-config.php too. If you are changing the password because you think your site may have been hacked, run a malware scan now as a safety measure.
Log in to phpMyAdmin
Before you change anything, it helps to know what password phpMyAdmin is actually using.
In most setups, phpMyAdmin does not have a separate password of its own. It uses the username and password for a database user on MySQL or MariaDB. On a local setup, that may be root. On live hosting, it is often a custom user created in cPanel, Plesk, or your hosting dashboard.
That is why this can feel confusing. You search for a phpMyAdmin password, but the real password belongs to the database server.
Start by accessing phpMyAdmin through the method your setup supports:
📝 Note: If this password update is part of a wider cleanup, now is also a good time to secure your WordPress site.
If you can log in, you are ready for the next step.
If you are setting a password for the first time, you may be able to do that from the SQL tab. You will often see older guides use this command: SET PASSWORD FOR 'root'@'localhost' = PASSWORD('your_root_password');
That command still appears in many tutorials, but it does not work everywhere anymore. On newer MySQL versions, this is often the better choice:
ALTER USER 'root'@'localhost' IDENTIFIED BY 'your_new_password';

FLUSH PRIVILEGES;
A quick warning here. Do not assume the user is always root. Do not assume the host is always localhost. On many hosting setups, the correct account is different. If you change the wrong user, you will not fix the real problem. Using a backup plugin to safeguard your site becomes essential.
Check how phpMyAdmin handles login before you change anything:
If you can access the phpMyAdmin files, open config.inc.php and look for lines like these:
$cfg['Servers'][$i]['auth_type'] = 'config';

$cfg['Servers'][$i]['user'] = 'username';

$cfg['Servers'][$i]['password'] = 'password';
These lines tell you how authentication works:
This matters because a phpMyAdmin change password is often a two-step job. First, you change the password for the database user. Then, if phpMyAdmin stores that password in config.inc.php, you update it there too.
That second step is easy to miss when you are in a hurry.
Change phpMyAdmin password
There are three common ways to change the password in phpMyAdmin. If you are doing this as part of a wider cleanup, it also helps to follow a WordPress security checklist so you do not miss anything important.
📝 Note: If you are on shared hosting, you may not have permission to change the root password. That is normal. In that case, you usually need to change the password for the database user your host created for your site.
Method 1: Password settings
This is the easiest method when the option is available.

📝 Tip: If you are not sure what to use, let your password manager generate a strong password for you. It is faster, safer, and much easier than trying to come up with one yourself.
If this works, do not stop here. You still need to make sure phpMyAdmin is not trying to use the old password from config.inc.php.
Method 2: User accounts
This is often the safest method because you can see the exact user you are editing.


📝 Note: A password manager really helps here. It can create a strong password for you and store it safely, so you do not have to rely on memory or reuse an old one. Yes, password managers are safe when you use a trusted one and protect it with a strong master password.
If you want the most reliable path for a normal phpMyAdmin password reset, this is usually it.
Method 3: SQL queries
If the buttons you need are missing, or you want direct control, you can change the password from the SQL tab.
Older syntax:

SET PASSWORD FOR 'root'@'localhost' = PASSWORD('your_root_password');Newer syntax that works on many recent MySQL setups:
ALTER USER 'root'@'localhost' IDENTIFIED BY 'your_new_password';If you are changing a different account, replace root with the correct username.
If you get a syntax error, stop and check your MySQL or MariaDB version. That is usually the issue. Trying random versions of the command tends to waste time. If you are making these changes after suspicious activity, it is also worth learning how to clean a hacked WordPress site.
phpMyAdmin change password in the config.inc.php file
This is the step that locks most people out.
If phpMyAdmin saves your login details in the config.inc.php file, it will keep using the old password until you update that file too. So even if the password change worked, phpMyAdmin may still refuse to log in.
Sometimes phpMyAdmin asks you to enter your username and password on the login screen. If that is how your setup works, you may not need to change anything in this file. But if phpMyAdmin signs in automatically, you usually do.
You will usually find config.inc.php in the main phpMyAdmin folder, or inside a local server folder such as XAMPP or MAMP.
Option 1: FTP client
If you prefer a visual way to edit files, using an FTP client is usually the simplest route.

$cfg['Servers'][$i]['host'] = 'localhost';

$cfg['Servers'][$i]['auth_type'] = 'config';

$cfg['Servers'][$i]['user'] = 'username';

$cfg['Servers'][$i]['password'] = 'password';$cfg['Servers'][$i]['auth_type'] = 'config';to this:
$cfg['Servers'][$i]['auth_type'] = 'cookie';means phpMyAdmin will show a login form instead of using a saved password automatically.
That is often a better setup, especially on shared systems.
Option 2: SSH
If you have SSH access, this is often quicker.
ssh username@ipaddress/var/www/html/phpmyadminbut yours may be different.
vi config.inc.phpThen find and update:
$cfg['Servers'][$i]['password'] = 'your_new_password';If you switched auth_type to cookie, phpMyAdmin should now show a normal login form. If that change followed suspicious activity, scan your site for malware as well so you are not only fixing the symptom.
Troubleshooting
If something goes wrong, it is usually because one small piece was missed, not because the whole process failed.
Most of the time, the password changed in one place, but another file or service is still using the old one.
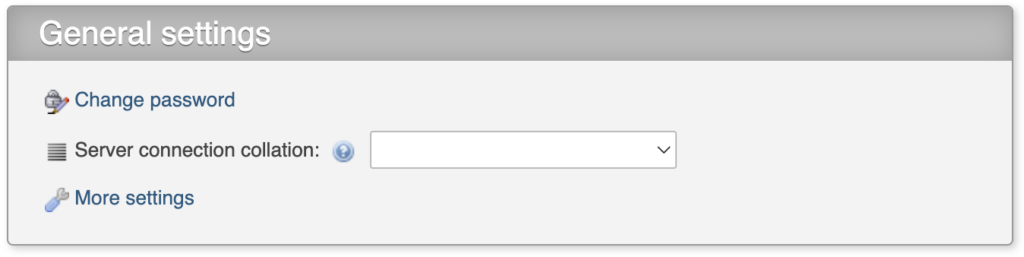
Can’t find the “Change Password” option in General Settings
This usually means one of these things:
Use the User Accounts tab or the SQL tab instead.
Don’t have root access:
That is common on shared hosting.
If you do not see or control the root account, change the password for the database user your host created for your site. In some setups, your host may require you to do this through the hosting panel instead of inside phpMyAdmin.
Database connection was disrupted after changing your password on SQL queries
This happens a lot on local setups.
First, make sure you updated config.inc.php if phpMyAdmin stores the password there. Then restart your local server stack. On localhost, that simple restart often fixes what looks like a bigger problem.
Can’t access phpMyAdmin because of host, username, and password
Go back to config.inc.php and check each line carefully. A single typo can block access. Look for:
$cfg['Servers'][$i]['auth_type'] = 'config';

$cfg['Servers'][$i]['user'] = 'username';

$cfg['Servers'][$i]['password'] = 'password';
You may also see:
$cfg['Servers'][$i]['AllowNoPassword'] = true;

$cfg['Servers'][$i]['verbose'] = 'localhost';
If you still cannot get in, and you have enough access elsewhere, create a new MySQL user:
CREATE USER 'yourUsername'@'localhost' IDENTIFIED BY 'yourPassword';

GRANT ALL PRIVILEGES ON *.* TO 'yourUsername'@'localhost' WITH GRANT OPTION;

FLUSH PRIVILEGES;
Then use that account to log in and repair the original one. If you think the issue is part of a wider compromise, this guide on how to recover a hacked WordPress site is worth following next.
A small but important note. The correct grant syntax is *.*. If that part is wrong, the command will fail.
Error establishing the database connection
If your website stops working after the password change, phpMyAdmin may not be the only place that needs updating.
Check wp-config.php and make sure the DB_PASSWORD value matches the new database password. If WordPress still has the old password, you will see a database connection error.
Also check:
Database not connecting with new password
We see this most often on local setups.
If everything looks correct, restart the full server stack. Stop all related services first if needed, then start them again. That simple step often fixes it.
Best practices for password security
Once you are back in, it is worth taking a minute to avoid having to do this again in a rush.
If you changed this password because something felt off, take the extra minute and check other access points too. Hosting users, SFTP, SSH, WordPress admins, and database users are all worth reviewing.
Parting thoughts
A change phpMyAdmin password procedure is straightforward once you know what you are changing and where that password is stored. The part that trips people up is not the password change itself. It is forgetting that phpMyAdmin or WordPress may still be trying to use the old password. If you are already locked out, do not panic. It is usually one missed file, one wrong user, or one stale local service.
If you have a backup plugin in place, you also have a safety net while you work through the fix. Slow down, check each piece, and you will usually find it.
FAQs
How to reset the admin password in phpMyAdmin?
To reset the admin password in phpMyAdmin, change the password for the correct database user through User Accounts or with an SQL command. If you mean the WordPress admin password, reset it in the WordPress users table instead.
How do I find my phpMyAdmin credentials?
You can find your phpMyAdmin credentials in the config.inc.php file if phpMyAdmin stores them there. Look for the username and password lines, which usually appear only when auth_type is set to config.
How to set a username and password in phpMyAdmin?
To set a username and password in phpMyAdmin, create or edit a MySQL or MariaDB user account. phpMyAdmin usually does not use a separate username and password of its own.
How to change MySQL password in MySQL?
To change a MySQL password in MySQL, run an ALTER USER command for the correct database user. If your site uses that same user, update the password in the site config file too.
How to access phpMyAdmin with username and password?
To access phpMyAdmin with a username and password, open your phpMyAdmin URL and sign in with your MySQL or MariaDB login. On some hosts, you can also open it directly from cPanel or another hosting panel.
How to login to phpMyAdmin without username and password?
You can log in to phpMyAdmin without entering a username and password when your hosting panel signs you in automatically or phpMyAdmin stores the login details in config.inc.php. This depends on how your server is set up.
Category:
Share it:
You may also like
-
wp_verify_nonce in WordPress: What It Checks and How to Use It Safely
By the time wp_verify_nonce shows up, your WordPress code is usually about to do something that matters. A form may save a setting. A link may delete an item. An…
-
WordPress nonce_failure: What It Means and How to Fix It
Right after the Save button fails, nonce_failure can sound like a serious WordPress problem. The message is shorter than it should be, and it tells you almost nothing about the…
-
WordPress Request Nonce Is Expired: What It Means and How to Fix It
One click should usually be enough to: save the post, submit the form, update the setting, and finish checkout. Instead, WordPress refuses the request and shows: WordPress Request Nonce Is…


How can we help you?
If you’re worried that your website has been hacked, MalCare can help you quickly fix the issue and secure your site to prevent future hacks.

My site is hacked – Help me clean it
Clean your site with MalCare’s AntiVirus solution within minutes. It will remove all malware from your complete site. Guaranteed.

Secure my WordPress Site from hackers
MalCare’s 7-Layer Security Offers Complete Protection for Your Website. 300,000+ Websites Trust MalCare for Total Defence from Attacks.


