WP Content Uploads: A Complete Guide
by
7-layers of Security for Your WordPress Site
Your website needs the most comprehensive security to protect it from the constant attacks it faces everyday.
Having a solid understanding of WordPress file structure is crucial to security your WordPress site—and the wp-content/uploads folder is a big part of that equation. This folder can be confusing for everyone, whether you’re a newbie trying to figure out where your uploaded content goes or an experienced user wrestling with managing the folder’s size and organization. That’s where we come in.
Drawing on our deep knowledge of WordPress at MalCare, we’ve crafted this article to dissect the uploads folder in the wp-content folder. From explaining its function to guiding you through its management, we’re here to make your journey easier and your WordPress site more efficient.
TLDR: The uploads folder within the wp-content directory stores all media files you add to your website. This pivotal folder isn’t immune to hacks, making it essential to secure it with a robust security plugin like MalCare.
What is the wp-content folder?
The wp-content folder stores the fundamentals of your WordPress website’s appearance and features.
The plugins and themes folders contain all plugin and theme code, including the customized bits. Certain plugins cleverly stow away temporary or cache data in the wp-content folder. The wp-content folder also includes all the elements that are integral to your website: widgets, menus, fonts, etc.
One of the most important folders within the wp-content folder is the uploads folder. This is where all your images, videos, and pdf files are stored. This folder is indispensable during processes like website migration for example, securing the transfer of all your media content.
The wp-content folder’s significance becomes starkly apparent in its absence. If it goes missing, your site crashes without an active theme. That’s not all. You stand to lose all your content and images. We recommend that you make changes with caution.
Structure of the wp-content folder
- Uploads: This directory is akin to a digital library, filing all the media files uploaded to your WordPress site neatly into year and month-specific subfolders. From images featured in posts and pages to video and audio files included in the content, the uploads folder holds them all. Moreover, it accommodates downloadable documents like PDFs, documents, spreadsheets, and any attachments involved in posts and pages.
- Themes: As the name suggests, this folder cradles all the themes installed on your WordPress site.
- Plugins: A critical component of your WordPress site, the plugins folder, securely houses all the plugins you’ve added.
- Upgrade: The upgrade folder is a transient visitor, making its appearance during updates.
- Languages: The languages folder stores all the necessary linguistic files if you’re using WordPress in a language other than English.
- Mu-plugins (optional): An optional folder, mu-plugins, caters to any must-use plugins, which stay active on your website by default.
Accessing the uploads folder
Whether you’re hunting for a specific file, organizing your media, or troubleshooting an issue, gaining direct access to the wp-content/uploads directory can be incredibly useful. In this section, we’ll walk you through the steps to find the folder using cPanel, FTP clients or SSH terminal.
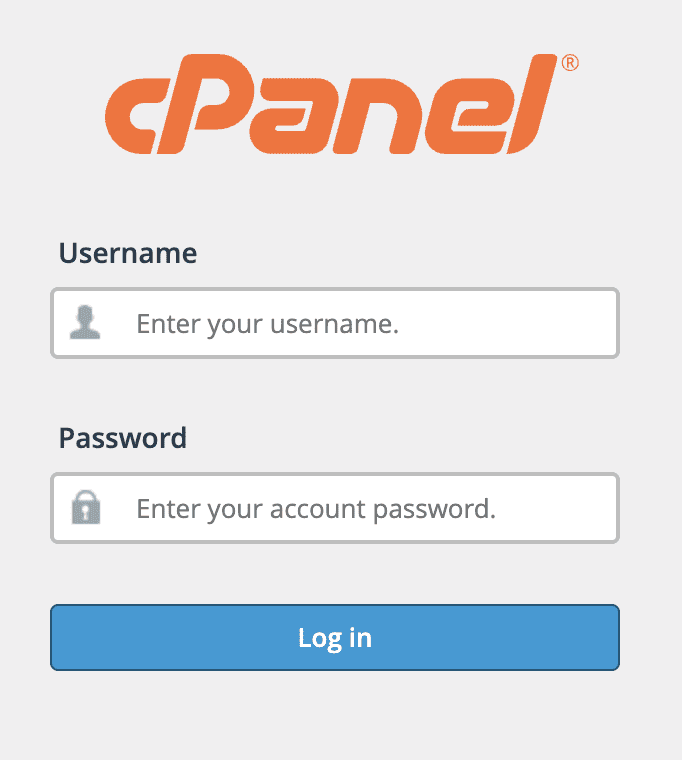
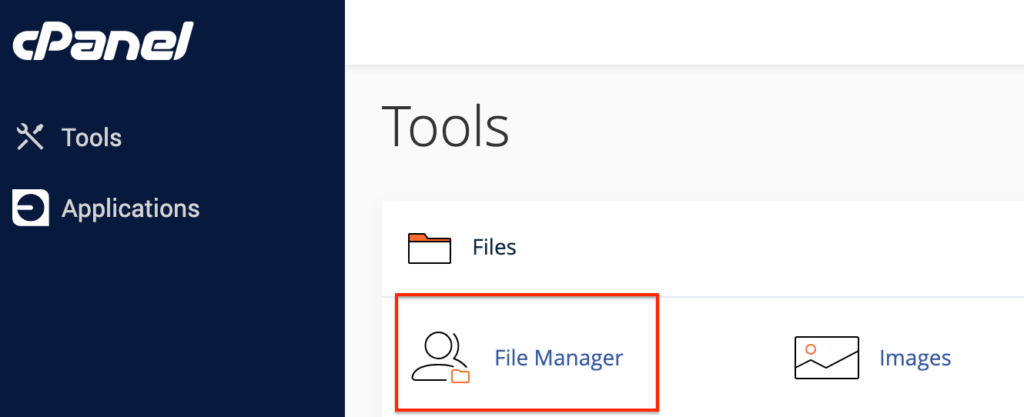
A. cPanel
- Log into your cPanel account.
- Scroll to the Files section and click on File Manager.
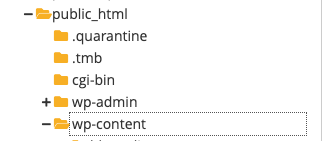
- On the left side of the screen, you’ll see a list of all your files in a panel. First, open your root folder. In our case, this is public_html.

- Next, click wp-content, and inside that folder, you’ll find the uploads folder.
B. FTP
- Open your FTP client, like FileZilla, and connect to your web server using your FTP account details. This information can be found on your hosting account and includes a public IP address, username, port and password.

- Once connected, navigate to the root folder. The name may vary but in our case it is the public_html directory.
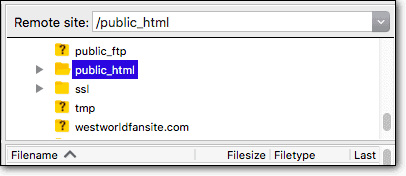
- Inside public_html, you’ll find the wp-content directory. Open that and you’ll find the uploads directory inside.
C. SSH
- Connect to your server through SSH using the following:
ssh username@server_ip_address- Enter your password when prompted.
- Navigate to the root directory using the command
cd /path/to/your/website/root folderReplace /path/to/your/website/root folder with your own directory
- To go to the wp-content directory, type:
cd wp-content- Finally, navigate to uploads using the command:
cd uploadsPlease remember that while the above constitutes the standard structure, it can fluctuate. Depending on your unique WordPress setup, customization, and the plugins used, other directories may also be present in your wp-content folder.
Add media to the wp-content/uploads folder
Understanding how to reliably add media to the uploads folder is a crucial WordPress skill. Here are multiple ways to upload your files, depending on the size or number of things you want to upload.
A. Upload via admin panel
There is a size limit to consider for this method. The default is 10MB but is often set by the host you’re using. So, it’s great for quick uploads.
- Sign into your WordPress admin panel.
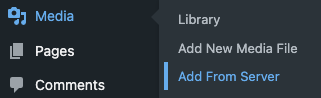
- Click Media in the sidebar and then click Add New Media File.

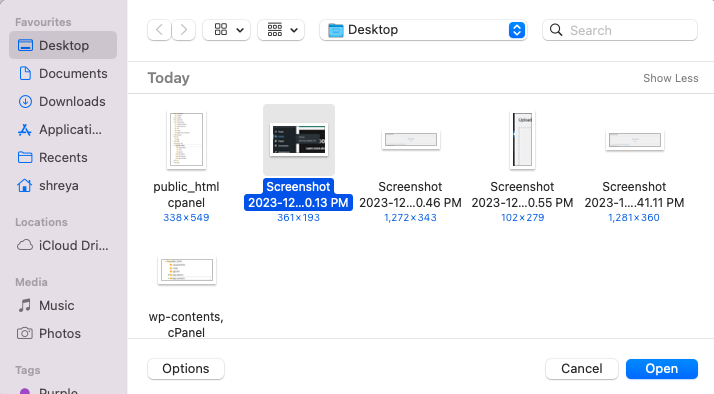
- Click Select files and browse your computer for the files that you want to upload.
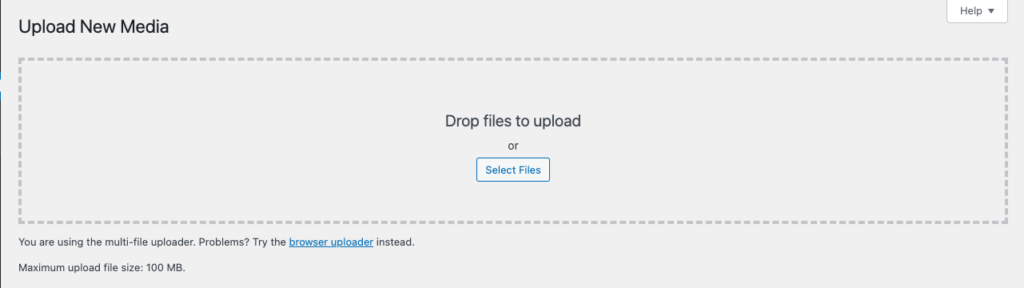
- Click Open when you’re done.
Pro tip: You can increase the size of the upload by adding the following code to the wp-config.php file:
@ini_set( ‘upload_max_size’ , ‘64M’ );
@ini_set( ‘post_max_size’, ’64M’);
@ini_set( ‘max_execution_time’, ‘300’ );
This is one of many ways to increase the limit of your file uploads. The M refers to MB. So, in this case, we’re increasing the upload size limit and post size limit to 64MB. The upload time is set to 300 seconds and the upload will fail if it takes longer. Customize it as you wish.
2. Upload via plugin
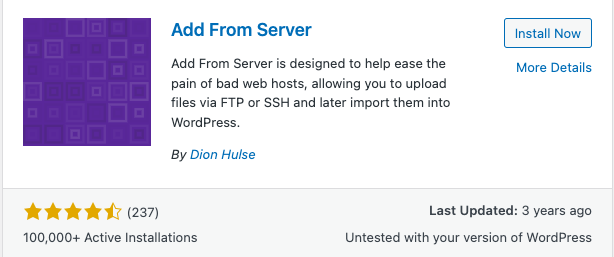
If you need a smooth bulk upload system, a plugin might be the way to go. We’re using the Add from server plugin that helps you add files that have been uploaded via FTP.
- Install and activate the Add From Server plugin.
- After activation, navigate to Media in the sidebar and then click Add From Server.
- Browse to the location of your files. Select them and click Import.
3. Upload via FTP
This method requires some technical knowledge but it’s a useful way to upload heavy files.
- Open your FTP client (such as FileZilla) and connect to your website using your FTP login details. These credentials are found on your hosting account.
- Navigate to the wp-content, and then to uploads directory from the right panel.
- Select your file(s) from your local machine (usually on the left panel of FileZilla).
- Right-click on the selected file(s) and click Upload.
- Your files will be transferred to the uploads folder.
If you’re unable to add media, it may be due to file permissions. In that case, change the file permissions of the uploads folder to 744.
Securing your wp-content/uploads folder
The uploads folder is frequently considered vulnerable as it’s one area of your website where file upload and manipulations are allowed. This makes it a potential target for attackers. By exploiting weaknesses in file upload security, hackers can upload malicious scripts disguised as benign files. Once uploaded, these files can execute harmful actions like creating backdoors, stealing sensitive information, or defacing your website.
Restrict PHP execution in the uploads folder
The majority of hacks that exploit the uploads folder involve uploading and executing malicious PHP files. By disabling PHP execution, even if a malicious file gets uploaded, it won’t be able to run and harm your site. You can disable PHP execution very easily with the MalCare plugin. But, if you’re looking for a manual method, follow these steps:
- Access your website’s root directory via an FTP client or your hosting control panel’s File Manager.
- Navigate to wp-content/uploads.
- Create a new .htaccess file on your local machine. Some editors may not allow a file to start with a “.” so you may need to create htaccess.txt and rename it later.
- Open this file and add the following lines:
<Files *.php>
deny from all
</Files>- Save and close the file.
- If you had to create htaccess.txt, rename this file now to .htaccess once it is in the destination folder.
Other security measures that you can take
- Use a security plugin: One of the simplest and most effective ways to secure your uploads folder is by using a dedicated WordPress security plugin. MalCare can scan your entire site, including the uploads folder, for suspicious files.
- Implement a firewall: Web application firewalls (WAF), like the one provided with MalCare, act as a shield between your website and incoming traffic. They scrutinize the traffic and filter out malicious requests, providing strong protection against brute force attacks, SQL injections, and other similar threats. MalCare installs the best WordPress firewall as soon as you install the plugin.
Managing performance with wp-content/uploads folder
When the uploads folder becomes very large with high-resolution images, videos, or other files, it can substantially increase the server response time which leads to slower page loading. Further, it can eat up your storage space, inflate the size of your site backups, and drain your server resources, affecting the overall server performance. In the upcoming section, we’ll delve into the strategies for effectively optimizing your uploads folder for site performance.
- Use Airlift: Airlift is a powerful speed plugin designed to optimize your website’s performance by minifying and combining scripts, optimizing images, and reducing server response times.
- Use a caching plugin: Caching plugins help serve your web pages faster by storing a static version of your website, reducing the number of requests to your server. This can greatly speed up your website and improve user experience.
- Optimize database: Regular maintenance of your WordPress database helps keep your site running smoothly. Database managers like phpMyAdmin can help you do this. Here are the steps:
- You will see a list of all your tables. At the bottom of the list, click Check All. There’s a dropdown box next to it.
- Navigate to your cPanel, locate the Databases section, and click on phpMyAdmin.
- Once phpMyAdmin opens, select the database that you want to optimize from the list on the left side.
- In the dropdown box, select the Optimize table option. The system will then begin the optimization process for the selected tables.
- Once the optimization process is complete, phpMyAdmin will provide a message about the status of the tables. If the process has been successful, the message will display that the tables have been optimized and are now up to date.
Final thoughts
We’ve established that the upload folder is an important one for your site’s functioning. It’s also a very vulnerable folder because it’s an avenue that hackers can exploit to upload malicious code to your site. Therefore it is critical to secure the folder and MalCare is the best way to do so.
MalCare is a powerful security solution specifically designed to safeguard WordPress sites. It boasts an easy-to-use interface with automated processes, making it accessible for all levels of users. One of its key strengths is advanced malware detection, powered by over 100 signals that scan your site daily for potential threats. In addition, MalCare’s sophisticated firewall adds another layer of protection, blocking malicious traffic and preventing brute-force or bot attacks. This ensures complete protection of your website.
FAQs
What is the wp-content/uploads folder?
The wp-content/uploads folder is a default folder in WordPress where your images and other media files are stored when you upload them to your posts and pages.
How can I change the file permissions for the uploads folder?
You can change the file permissions via an FTP client. Right-click the uploads folder, select ‘File Permissions’, and then you can input the appropriate value.
Why can’t I upload images to the wp-content/uploads folder?
This could be due to various reasons including incorrect file permissions, exceeding your website’s maximum file upload limit, or a plugin/theme clash.
How do I increase the maximum upload file size?
You can increase it by modifying your website’s php.ini, .htaccess, or functions.php file, where you’d need to specify a larger value for the upload_max_filesize and post_max_size directives.
How often should I back up my wp-contents/uploads folder?
It’s recommended to back up your entire WordPress site, including the wp-contents/uploads folder, regularly. The frequency can depend on how often you update your site, but a common recommendation is to perform a backup at least once a week. BlogVault is a backup plugin that takes incremental backups every time a change is made. So, your site always has a safety net.
Category:
Share it:
You may also like
How to Fix the Deceptive Site Ahead Warning on Your WordPress Site
When Google shows a Deceptive Site Ahead warning to a site visitor, it means they think your website might be harmful due to malware, phishing, or other security risks. This…

How to set, get, and delete cookies in WordPress
Cookies are small pieces of data that make your web experience smoother and more personalized. Websites rely on these cookies for essential functions like remembering your login details for future…

Top 9 iControlWP Alternatives: Manage Multiple Sites Easily
Of all the top WordPress management plugins we tested, iControlWP was definitely at the bottom of the list. It was difficult to set up and took over an hour to…
How can we help you?
If you’re worried that your website has been hacked, MalCare can help you quickly fix the issue and secure your site to prevent future hacks.

My site is hacked – Help me clean it
Clean your site with MalCare’s AntiVirus solution within minutes. It will remove all malware from your complete site. Guaranteed.

Secure my WordPress Site from hackers
MalCare’s 7-Layer Security Offers Complete Protection for Your Website. 300,000+ Websites Trust MalCare for Total Defence from Attacks.


