“This site has been marked as a phishing site” isn’t just a browser error. It’s a flashing red light that your site is potentially hacked. Your immediate priority is to scan your website to confirm the intrusion.
This Google blacklist error can lead to lost sales, SEO penalties, and frantic damage control. You need a quick solution to save your website. This article delivers exactly that. We’ll go over everything you need to know to recover your site.
“This site has been marked as a phishing site” error indicates your website has been compromised by hackers. Use a WordPress security plugin to scan your site for malware and clean infected files automatically. Then submit your cleaned site to Google Search Console for review.
What the phishing warning means
When browsers display the Google safe browsing phishing alert, they’re essentially putting up a digital stop sign. It’s to protect visitors from potential harm to their data and credentials.
WordPress phishing hack means criminals are impersonating your website to steal sensitive data from your visitors. They’re trying to gain information like passwords, credit card numbers, or personal information.
Why Your Site Got Flagged: 3 Common Causes
- Your Site Was Hacked: Cybercriminals injected malicious code into your website files, creating hidden redirects, invisible malware or backdoors.
- False Positive: Sometimes perfectly legal websites get wrongly flagged because they have some unusual behaviour. They usually flag having multiple login forms, collecting sensitive information or phrases that trigger automated detectors
- Compromised Third-Party Elements: Your site might be clean, but may have compromised external elements. This could include advertising networks serving malicious ads, plugin vulnerabilities exploited by hackers or compromised external scripts.
Now that you understand what triggered the warning, it’s time to take action. Let’s talk about how to remove phishing warnings from websites.
Step 1: Confirm the phishing warning
First, let’s verify exactly what’s triggering the Google Search Console phishing alert. This diagnostic step prevents wasted time fixing the wrong problem and gives you concrete evidence to work with. Here are three things I would recommend you do:
Scan with a security plugin
Use a good malware scanner plugin to do this. Use a malware scanner that looks through all your site files and database tables. This makes sure that your site is completely scanned.
We tested the best WordPress malware scanners. We found that MalCare comes out at the top. It was easy to set up and does a complete scan. As a bonus, the malware scanner is a free feature.
To use the plugin, just install it and sync to their dashboard. It will automatically run a full site scan. This can take 2-5 minutes, depending on the size of the site. Within minutes, you’ll know if there is a security breach or if this was a false alarm.

Check Google Safe Browsing status
Another way to get more information is to check Google’s official diagnostic tool – Google Safe browsing. It will tell you what your current safety status is. Here’s how:
- Visit Google Safe Browsing Site Status
- Enter your domain (example.com) in the search box
- Review the results for any “Dangerous” or “Suspicious” flags
- Note specific issues listed (malware, unwanted software, etc.)
This free tool shows you exactly what Google’s automated systems detected and when the flag was first triggered.
Verify browser warnings
The last thing I recommend that you do is to test how major browsers currently view your site. This can be an indicator of a real problem too. Also, you may have to fix the same problem for the other browsers too.
- Chrome: Open an incognito window and visit your site. Look for red warning screens or “Not Secure” indicators in the address bar.
- Firefox: Use private browsing mode to check for similar blocking messages or security warnings.
- Safari: Test on both desktop and mobile versions for consistency.
Screenshot any warnings you encounter—you’ll need this documentation for your review requests later.
Expert advice: You could manually inspect your website files by examining PHP files for suspicious code injections. You will also need to check database entries for malicious redirects. However, manual inspection isn’t a good option because it is time consuming and prone to human error.
Step 2: Remove the phishing threat
Once you’ve confirmed the issue, it’s time to clean your website causing your “this site has been marked as a phishing site” warning. You have three approaches, each with distinct advantages and drawbacks.
Use a security plugin (recommended)
We’ve previously tested all the WordPress malware cleaning services in the market. Most couldn’t find all the malware on our hacked site. The others struggled to remove malware and viruses reliably. We found that MalCare offers the most straightforward cleanup process for sites.
-
Install MalCare from your WordPress plugin directory
-
Register your site with their service (free tier available)
-
Run a complete scan to identify all malicious files and code
-
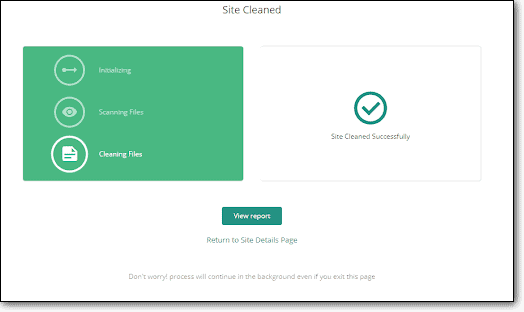
Click “Clean Site” to automatically remove threats
-
Verify cleanup with a follow-up scan
Expert Advice: We recommend you use an automated system like Malcare because it removes malware the best. It can clean your site without breaking your site’s functionality. It’s also faster than the other two options. The only downside is that you will need to upgrade to a paid subscription.
Hire a professional malware removal service
A malware removal service will have experts that can clean the site for you. This is especially helpful if your automated cleaner found some complex malware that it is struggling with.
You will have to reach out to the support team, give them any credentials they need and wait till they clean your site. They will be able to completely clean your site and you don’t have to do anything.
The only problem is that the experts can be expensive and you may be stuck in queue for a while before they get to you.
Remove the malware manually
Manual malware removal means hunting through your website’s files and database to delete malicious code. You’ll need to access your web server via FTP or hosting control panel. You’ll also need the technical knowledge to distinguish legitimate website code from harmful injections.
Expert advice: Create a complete backup of your site. Manual removal carries significant risk of breaking your website if done incorrectly.
- Access your files: Download your entire WordPress installation via FTP client (FileZilla) or hosting file manager
- Set up a clean comparison: Download fresh WordPress core files from WordPress.org to compare against your current installation
- Prepare your tools: Use a text editor with search functionality (Notepad++, Sublime Text) to examine suspicious files
- Start with recently modified files: Check your hosting control panel for files changed around the time the warning appeared
Critical items to check for malicious code
Suspicious PHP Code Patterns:
- eval(), base64_decode(), gzinflate() functions (often used to hide malware)
- Long strings of scrambled characters or encoded text
- PHP code in image files (
.jpg,.pngfiles containing<?php) - Files with random names (e.g., x7fg2h.php, temp_file_123.php)
Database Red Flags:
- Unauthorized admin users in the wp_users table
- Suspicious URLs in wp_options table (especially siteurl and home values)
- Malicious JavaScript injected into post content
- Unknown plugins or themes listed in options
File System Anomalies:
- .htaccess file modifications (check for unfamiliar redirect rules)
- New files in /wp-includes/ or /wp-admin/ directories
- PHP files in upload directories (/wp-content/uploads/)
- Backup files with suspicious timestamps
JavaScript Injections:
- Hidden iframes or redirects in theme files
- Obfuscated JavaScript in header.php or footer.php
- External scripts loading from unknown domains
Expert advice: I’ve done this before and I would not recommend it. There is a huge risk of your site breaking, if you accidentally delete legitimate code. It’s also incredibly time consuming – delaying your website recovery.
Step 3: Request a Google security review
After successfully cleaning your website, you need to formally request that Google remove the “this site has been marked as a phishing site“ flag.
Here’s how to do it:
-
Access Google Search Console: Visit search.google.com/search-console and log in with your Google account
-
Verify your property: Ensure your website is already added and verified (if not, add it using HTML tag or DNS verification)
-
Navigate to Security Issues: Click on “Security & Manual Actions” in the left sidebar, then select “Security Issues”
-
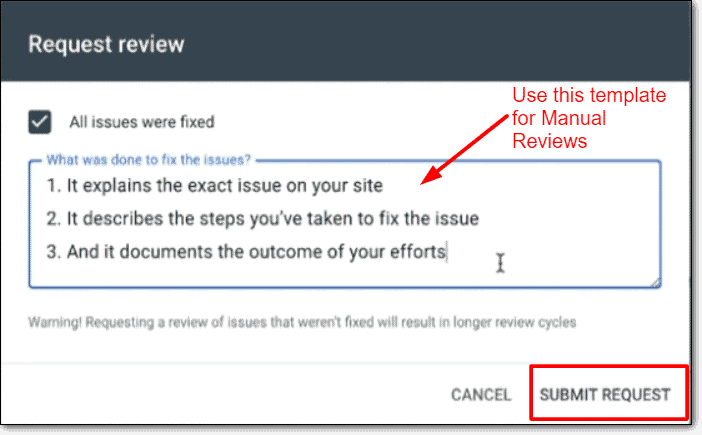
Click “Request a Review”: You’ll find this button next to any active security warnings
-
Complete the review form: Provide detailed information about your cleanup efforts
When filling out the review request, be specific about your remediation steps. Google’s reviewers need evidence that you’ve addressed the root cause, not just surface symptoms.
Essential Information to Include:
- Cleanup method used
- Specific threats eliminated
- Security measures implemented
- Verification of cleanup
Google’s systems re-scan your website, and complex cases may receive additional review. Google says the process can take from a few days to a few weeks. You’ll receive email notification of the decision via Search Console.
Expert advice: Be thorough in your initial request. Incomplete cleanup often results in rejection, adding time to your recovery. Repeatedly asking for reviews can also slow down the process, so wait for the initial decision before resubmitting.
Once Google approves your review request, warning updates can still take a few days to propagate through Search and browsers. Traffic recovery varies by site and is not guaranteed on a fixed schedule.
Prevent future phishing warnings
Congratulations! You’ve successfully removed a phishing warning from your site. Let’s acknowledge that we don’t ever want to do this again. So, here’s a list of proactive measures you can take to protect your site.
-
Disable “admin” username: The default “admin” account is every hacker’s first guess. Create a new admin account with a unique name (like “siteboss” or your business name), then delete the default “admin” user entirely.
-
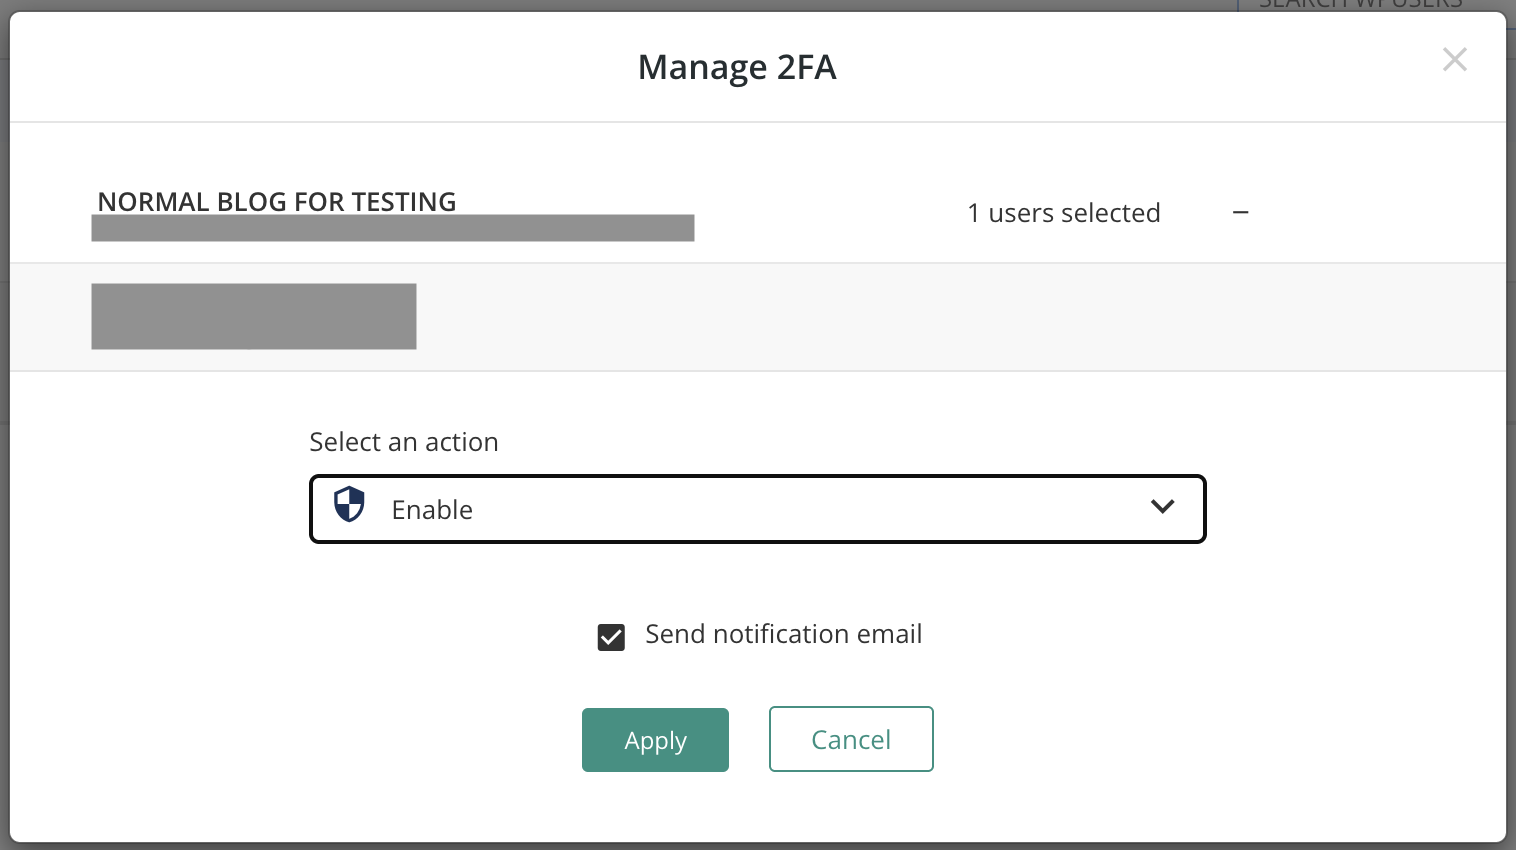
Enforce 2FA: Use two-factor authentication on all user accounts. Even if hackers steal your password, they can’t access your site without your phone or authentication app.
-
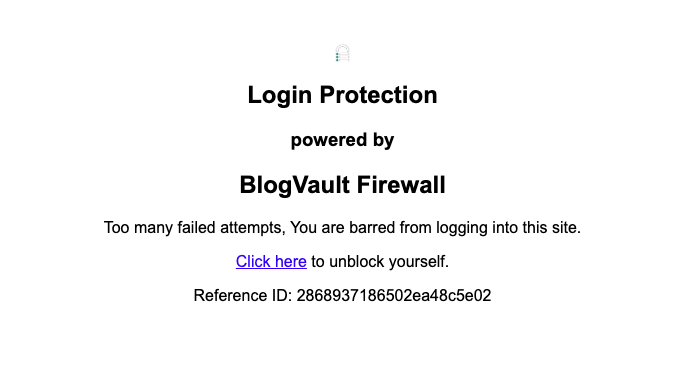
Limit login attempts: Configure automatic IP blocking after 3 failed login Limiting failed login attempts can stop automated attacks before they can guess your credentials.
-
Delete unused plugins/themes: Inactive plugins and themes are hacker magnets—they provide vulnerabilities without contributing value. Remove anything you’re not actively using, including default WordPress themes you never customize.
-
Keep everything updated: We’re talking WordPress core, plugins and themes. You’ve probably had a bad experience with updates and want to avoid it. But, the security patches are critical to protecting your website.
-
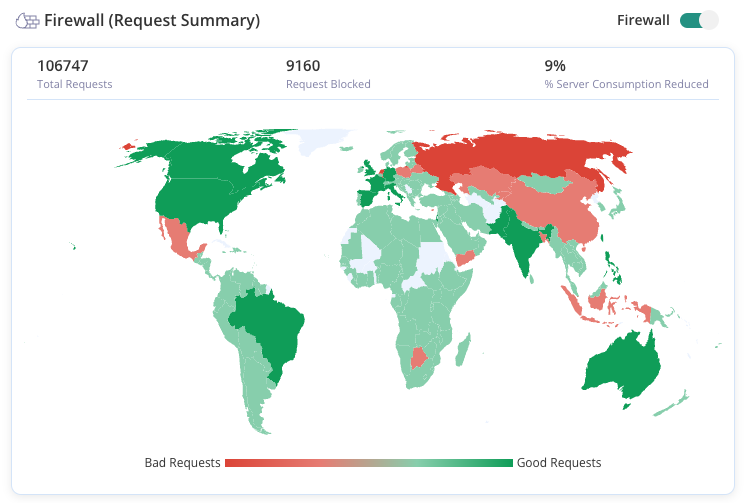
Install a firewall (WAF): A Web Application Firewall blocks malicious traffic before it reaches your site, preventing most attacks entirely. A good firewall plugin like MalCare will automatically install a WAF upon setup.
-
Install a security plugin: You need a plugin that will scan your site daily and warn you of any breaches. This way, you can fix the problem as soon as it happens.
-
Audit user accounts monthly: Compromised user accounts often go unnoticed for months. Delete unused accounts , especially those with “Editor” or “Admin” roles. Every account is a potential entry point—maintain only what you need.
Appeal a false phishing warning
Sometimes legitimate websites get wrongly flagged with the “this site has been marked as a phishing site” warning. This happens when automated systems misinterpret normal website features—like login forms, payment pages, or data collection—as phishing attempts. If your site is genuinely clean, you can appeal the decision through official channels.
Your phishing flag might be a mistake if:
- Reliable security scans show zero threats
- You collect sensitive information legitimately
- Your site has multiple login portals
- You recently launched similar-looking pages
- No actual malware exists
How to Appeal False Positive Flags?
Google provides a dedicated channel for reporting incorrectly flagged websites:
- Visit Google’s Safe Browsing False Positive Report Form
- Enter your website URL in the “Website” field
- Select “My website is incorrectly blocked” from the dropdown
- Describe your legitimate business purpose and why the flag is incorrect
- Include supporting evidence like clean security scans, business registration documents, or industry compliance certificates
- Submit the form and wait for Google’s response (typically 3-7 business days)
Different browsers use various safe browsing databases, so appeal to each major platform.
Final advice on phishing warnings
Being flagged with “this site has been marked as a phishing site” feels like a digital nightmare. But it’s a completely recoverable crisis with the right approach. Most phishing flags are entirely preventable with a security plugin like MalCare. It offers a lot of the preventive measures like automated scanning, limiting login attempts, safe updates, etc.
FAQs
Browsers or Google detected activity that resembles an attempt to steal visitor data. Malware commonly injects fake login pages, redirects, or form-capture code into a legitimate site.
Do not enter information or download files. If you submitted credentials, change the affected passwords immediately, enable two-factor authentication, scan the device, and monitor relevant accounts.
Scan the site with a security tool, remove infected files and database entries, eliminate backdoors and unauthorised users, and then request a review through Google Search Console.
A phishing site impersonates a trusted organisation to steal passwords, payment details, or other personal data. A legitimate site can be marked as phishing after hackers compromise it.
Keep WordPress and extensions updated, use strong passwords and two-factor authentication, install a firewall and security scanner, remove unused software, maintain backups, and audit user accounts.