How to edit a WooCommerce Checkout Page? (Beginner’s Guide)
by
7-layers of Security for Your WordPress Site
Your website needs the most comprehensive security to protect it from the constant attacks it faces everyday.

Last week, I tried to buy a shirt from an online store. Picked the design, size, and color I liked, and tried to clear the cart. The checkout page was enormous and it was split over multiple pages. Every time I thought I was done with the process, I needed to fill in more information. After 10 minutes of this, I got fed up and went to another site.
While this may not be your exact experience, you’ve probably experienced some inconvenience that deterred you from purchasing a product online. Rest assured, your customers will have too. This is why creating a great checkout experience is important for your sales. This article has everything you need to know on the WooCommerce checkout page customization to be faster, snappier, and better for your buyers.
TL;DR: Your entire WooCommerce page is easily customizable with page builder plugins like SeedProd or Elementor. But, before you make any changes to your site, we recommend you backup your WordPress site with BlogVault. BlogVault’s real-time backups are specifically designed to protect WooCommerce sites. It makes backup and restore easy, with just a few clicks, ensuring that no matter what happens your site is safe.
What does the default WooCommerce checkout page look like?
The default WooCommerce checkout page is not bad; it just isn’t great. It is designed to be a generic checkout page that works across a vast multitude of products. So while we are going to talk about how to customize the WooCommerce checkout page, we are certainly not going to trash the default one. It is a great starting point, and we recommend tweaking it based on your knowledge of your products, your customers, and their behavior.
Open your site in an incognito tab and add products to your cart. Proceed to checkout and let’s take a look at the default checkout page:

By default, the WooCommerce checkout page asks your customer for basic billing details like name, address, and phone number. It also has details about your order and payment method. This is the least you need but doesn’t create the best experience for your customers. This article will show you how to edit the WooCommerce checkout page in various different ways.
Note: Before you start editing the WooCommerce checkout page, have a few products in the cart. This is an excellent way to see the impact of your changes on your checkout page.
How to customize WooCommerce checkout page easily with a plugin
You can either edit the default WooCommerce checkout page or use an existing template. You can try the different templates by clicking Template in the sidebar. If you’d like to edit the default checkout page, this section is for you. The easiest and quickest way to spruce up your checkout page is to use a page builder. We’re looking at two in this section: SeedProd and Elementor
SeedProd
SeedProd is a popular drag and drop website builder that makes it easy to create custom WordPress themes, page layouts, and landing pages, no coding required. Plus, it seamlessly integrates with WooCommerce and comes with pre-built WooCommerce blocks for building custom checkout pages, cart pages, product pages, and more.

Keep in mind, to access WooCommerce support, you need the SeedProd Elite plan. To get started, follow the steps below:
1. Install and activate SeedProd: From your WordPress dashboard, go to Plugins, click on Add New, search for SeedProd, then install and activate the plugin.
2. Add license key: Click SeedProd on the WordPress dashboard menu. Click Settings, enter the license key, and click Verify Key to activate the SeedProd Elite plan.
3. Create a landing page: In the SeedProd menu, choose Landing Pages and then select Add New Landing Page.
4. Choose a template: SeedPod provides a variety of templates to start with. To create a custom checkout page, hover your mouse over the Blank Template option and click the Checkmark. Enter a name for your checkout page template and click Save and Start Editing the Page.
5. Customize checkout template: Using the SeedProd visual builder, you can begin customizing your WooCommerce checkout page. Simply drag the pre-made blocks from the left side and drop them into place on your page. You can add headlines, text, buttons, images, lists, columns, and more.
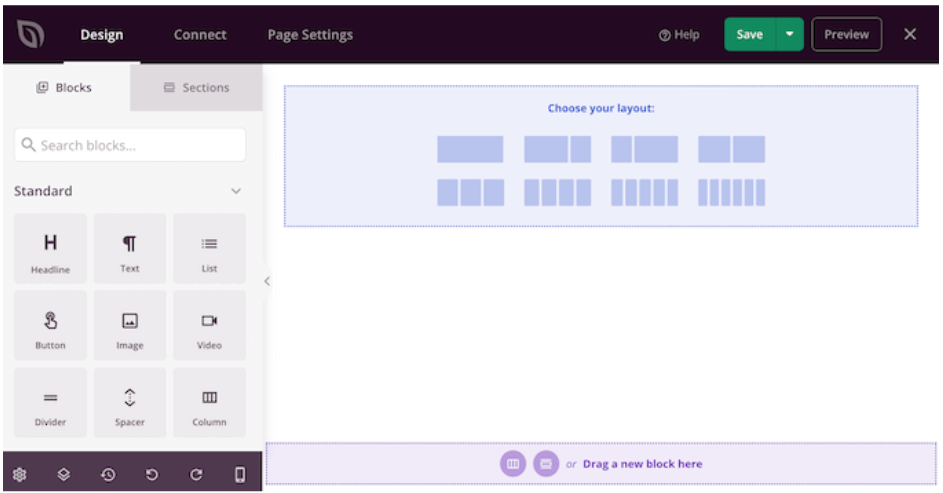
- Add the WooCommerce checkout block: Scroll down to the WooCommerce section the left-hand panel and drag the Checkout block onto your page. Then, click on the checkout form to edit the checkout fields, headers, buttons, colors, etc. You can also choose a checkout form style by clicking the Templates tab.
Customizing your checkout page with SeedProd can enhance your eCommerce conversion rate by improving user experience and streamlining the checkout process. Trialling and testing these changes can help you find a balance that works best for you and your customers.
Some tips to customise the checkout page
- Use Seedprod’s Blocks and Sections: Leverage the various pre-built blocks and sections available in Seedprod. These allow you to add elements such as testimonials, countdown timers, or FAQ sections to your checkout page to increase customer confidence and clarify the purchasing process.
- Focus on design: Uniformity in branding enhances customer trust. Use Seedprod’s customization features to align your checkout page’s colours, fonts, and designs with your overall brand. Also, ensure Mobile Optimization as it’s crucial in today’s online shopping trends.
Elementor
As an alternative, we’ll demonstrate with the popular Elementor as well.
To edit the checkout page, all you need is Elementor’s checkout widget. Replace the woocommerce_checkout shortcode with the widget, and this will leave you with a fully customizable checkout page. It works great alongside Elementor’s cart widget too, making the entire designing process easy. Bear in mind, this all-in-one solution comes with a price. You do need the Pro version of Elementor to use these widgets. If you’re down to invest in Elementor, here are the steps:
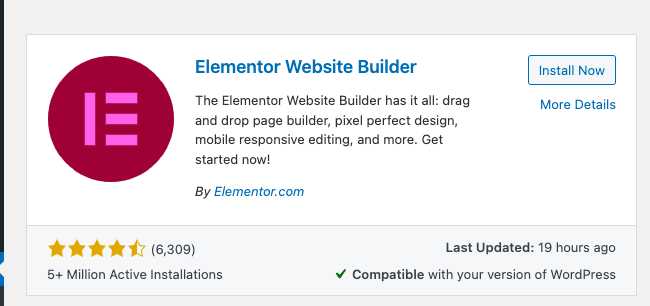
- Install and activate Elementor: On your WordPress dashboard, click Plugins and then Add New. Search for the Elementor. Click Install and Activate when prompted. This will install Elementor Pro.
- Add licence key: Click Elementor in the sidebar. Click Licence, add the licence key, and click Activate. The plugin is now ready to use.
- Open the checkout page in the Elementor editor: Hover over Pages and click All Pages. Hover over the Checkout Page and click Edit. At the top, click Edit with Elementor. Wait a second and this will open the page in the Elementor editor.
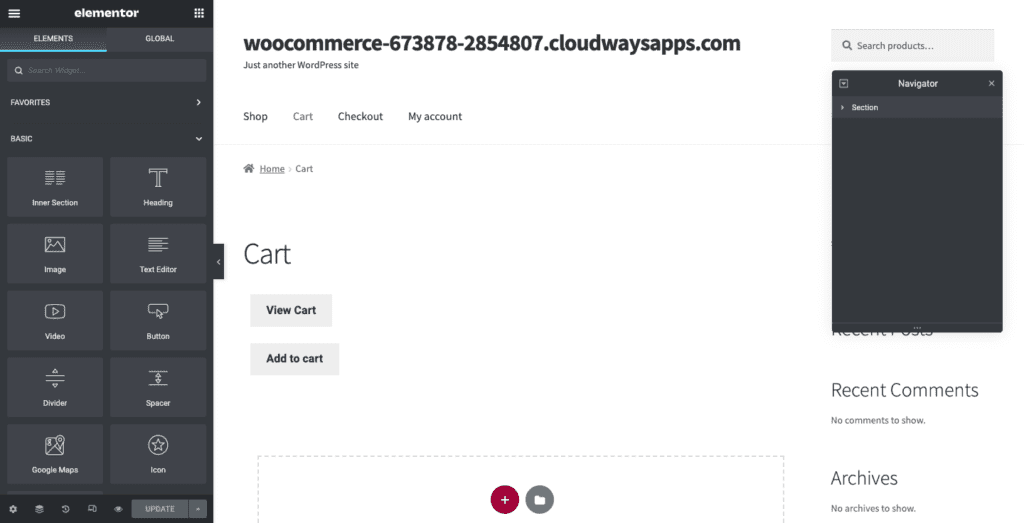
- Get familiar with editing with Elementor: Elementor works in horizontal sections that you can customise by choosing how many columns each section will have. Click + on the page editor to add a section and it prompts you to choose the number and layout of columns that you want in that section. Drag elements from the sidebar to add them to the columns. Customise each element from the sidebar. You will see the applicable settings when you select each individual element.
- Replace the checkout shortcode with the checkout widget: Delete the shortcode and add the checkout widget from the library on the left. This will give you a preview of what the Elementor checkout page looks like.
- Customise the checkout page: You can explore the many settings of the Elementor Checkout Widget in the sidebar.
Here are some settings you can change:
- General: Choose from one or two column layouts, and even make one column sticky.
- Changing billing or shipping forms: Edit the header for each of these forms, each placeholder, and each field.
- Additional information: Provide a special section for your customers to add instructions or information for their order.
- Coupon settings: Customise the alignment and typography of your coupons.
You can edit more things by clicking Style:
- Purchase button: You can change the colors, the text, spacingetc for the purchase button.
- Order summary: You can choose the typography and spacing of the list of products ordered.
- Typography: You can customise all the text except forms.
- Forms: Customise the typography and colour of your forms. Use the Rows Gap settings to increase spacing.
- Review the page in Mobile View: Responsive design is very important, and you can use Elementor built-in view to see how your pages look on different screen sizes.
Editing the checkout page merely scratches the surface. Page builders and WooCommerce are a powerful combination that you can use to make your store really stand out.
So, we’ve talked about how easy it is to customise your whole checkout page. But, what if you don’t want to use a plugin and would prefer to just use the in-built editor? Keep reading to see how you can do that.
How to customise the design of your checkout page with the in-built editor
In this section, we’ll talk about how to use the Gutenberg editor to make changes to the WooCommerce checkout page. To open the page in the editor, hover over Checkout Page and click Edit.
This will lead you to the Gutenberg Block Editor. The block editor works in horizontal blocks of different types of content. You can add text, images, or headings by adding a block from the library on the left. Each block can be customised separately. You’ll see the block library in the sidebar, by clicking the + on the top left. You can change the settings of each block by clicking the gear button on the top right of the block tab.
You’ll also see some text, the shortcode, on the actual page. The shortcode is WooCommerce’s way of including checkout fields to your page. It looks like this:
woocommerce_checkout
Do not delete this shortcode. You can add images or text below and above this shortcode. Later on in this article, we’ll talk about editing those fields. But, for now, let’s talk about how to make changes to the general design. Here are the steps to do so:
Add text
- Add the Paragraph widget: You can add text below and above your shortcode. You’ll see text that says “Type/choose a block”. You can either drag and drop the Paragraph widget or just start typing the text you want. Double-click to go to a different block.
- Customise the text: You can edit the typography and colours in the block tab on the right. Just select the text or the block.
To add a header, you can change add the Header widget and edit it just the same. There are varying sizes like H1, H2, etc that you can choose from as well.
Add images
- Add the Image widget: Click the + on the top left and type Image in the search bar. Select the type of Image widget you’d like and click, or drag and drop into a column.
- Choose an image: Choose an image from your media library by clicking Media library, or click Upload to select a file from your local computer. You can add a caption if you’d like.
Add buttons
- Add the Button widget: You can search for it in the search bar in the blocks library.
- Customise button: Change the label of the button, alignment, and typography of the label in the popup that appears. You can also change the colour, border, and size in the block settings.
- Hyperlink the button: Click the URL button in the pop-up and paste a URL of a page you’d like to link the button to.
Explore other widgets in the block editor to help you customise the entire page. We also recommend you preview the page by clicking Preview on the top right. Once you’re done, click Update.
While there is a lot you can do with just the Gutenberg editor, you can’t change specific things like the fields. The next section will cover how to make those changes.
How to customise checkout page fields
Changing the checkout page fields can be more impactful than you realise. It really defines the experience for your customer. There are two ways to go about it: with a field manager plugin or manually. We’ll talk about both in this section.
Customising page fields with an extension
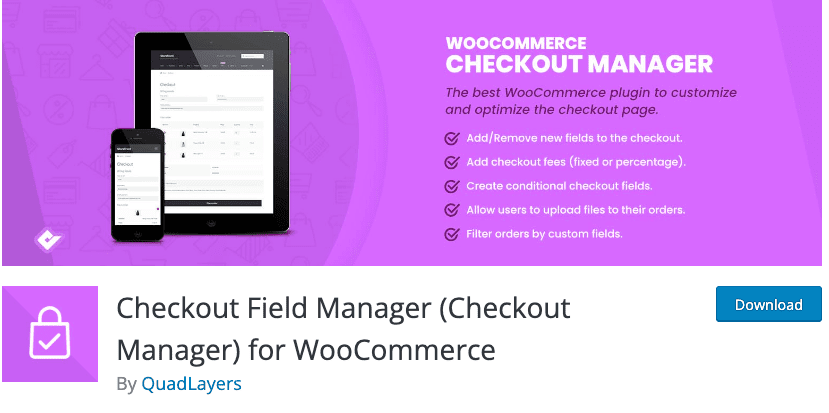
We’re using the Checkout Field Manager for WooCommerce plugin for this tutorial. You’ll have to buy the extension. Once you do, here are the steps to get started.
- Install and activate the plugin: On your wp-admin panel, hover over Plugins ve toband click Add New. Click Upload Plugin and Choose File and theme select the zip folder that you just downloaded. Click Install Now and Activate.
- Edit or add fields in WooCommerce Settings: Hover over WooCommerce and click Checkout. Click Billing, Shipping and Additional at the top and here you manage all your fields as follows:
- Disable fields: You can disable unnecessary ones, by toggling the Disabled column.
- Make some fields compulsory: You can toggle on Required and make some fields compulsory.
- Edit the look of the field: You can change the alignment of a field to be either left aligned, right aligned, or wide by choosing from the dropdown menu in the Positions column.
- Edit existing content: Click Edit at the end of the relevant field and a popup will appear. You can change the Name, Type, Label, Description, etc. Then, click Save.
- Add new fields: Click + Add New Field at the top left. You can fill in the details as you’d prefer. Click Save.
- Save the changes: Once you’re done, click Save at the bottom left corner.
Customise page fields with code
If you’re familiar with coding, you can add code to your theme’s function.php file. Generally speaking, when modifying a theme using code, create a child theme first and modify that. This will preserve your changes and customisations when the theme updates.
It’s important to note that Checkout Field Manager, the extension we mentioned in the previous section, overrides the changes made to the functions.php file. So, they can’t be used parallely.
Additionally, it’s important to understand how WooCommerce loads the page fields in the first place. WooCommerce puts fields through a filter. This allows you to add custom code to make changes to the fields. In the case of WooCommerce checkout pages, this filter is as follows:
$this->checkout_fields = apply_filters(‘woocommerce_checkout_fields’, $this->checkout_fields);
This means that hooking into woocommerce_checkout_fields can override any existing code. Hooks are essentially pieces of code that modify WordPress core files. Your site has a few hooks that it comes with:
- woocommerce_before_checkout_form
- woocommerce_checkout_before_customer_details
- woocommerce_checkout_billing
- woocommerce_checkout_shipping
- woocommerce_checkout_after_customer_details
- woocommerce_checkout_before_order_review
- woocommerce_checkout_order_review
- Woocommerce_checkout_after_order_review
- Woocommerce_after_checkout_form
Additionally, there’s a long list of hooks that WooCommerce offers that you can choose from. You can also check out this list of hooks on Business Bloomer that helps you visualise the hooks. Now, let’s talk about how to change the fields.
Change the placeholder in the order_comments field
// Hook in
add_filter( ‘woocommerce_checkout_fields’ , ‘custom_override_checkout_fields’ );
// Our hooked in function – $fields is passed via the filter
function custom_override_checkout_fields( $fields )
$fields[‘order’][‘order_comments’][‘placeholder’] = ‘My new placeholder’
return $fields
}
Change the label of the order_comments field
// Hook in
add_filter( ‘woocommerce_checkout_fields’ , ‘custom_override_checkout_fields’ );
// Our hooked in function – $fields is passed via the filter!
function custom_override_checkout_fields( $fields )
$fields[‘order’][‘order_comments’][‘placeholder’] = ‘My new placeholder’
$fields[‘order’][‘order_comments’][‘label’] = ‘My new label’
return $fields;
}
Remove a field
// Hook in
add_filter( ‘woocommerce_checkout_fields’ , ‘custom_override_checkout_fields’ );
// Our hooked in function – $fields is passed via the filter!
function custom_override_checkout_fields( $fields ) {
unset($fields[‘order’][‘order_comments’])
return $fields;
}
There’s a WooCommerce article on using code to help you customise your checkout fields.
Now, let’s talk about how to change the layout of your Checkout page.
How to change the checkout page layout
You can customise the layout of your WooCommerce page by adding action hooks. Here are some ways that you can change it:
Using a snippet management plugin
We’ll start with the easier method which is to add it using a snippet management plugin.
- Install and Activate Snippet Management Plugin: We’re using Code Snippets. You can find it in your plugins directory. Hover over Plugins and click Add New. Then search for Code Snippets and click Install and Activate.

- Copy the hook: Go to the WooCommerce library of hooks and copy the code or create a custom hook in a text editor and copy it. If, for example you want to add a Terms and Conditions section at the bottom, here’s what you would copy.
- Add the code: Hover over Code Snippets on the left and click Add New. Add a recognisable name for the hook. Select the functions tab. Paste the code at the bottom. Make sure the option to Run Snippet Everywhere is selected and click Save Changes and Activate. You’ve now successfully added a hook.
Adding the code manually
If you’d like to add it to your theme’s function.php file, here are the steps:
- Open theme file editor: Hover over Appearance on the sidebar and click Theme File Editor.
- Copy hook code: You can either copy it from the WooCommerce library or create a custom one on a text editor and copy it. Like we used in the previous section, if you’d like to add a T&C section, here’s the code you’d copy. There’s more in the WooCommerce hooks librar.
- Edit the functions.php file: On the right, scroll through the menu of files till you find functions.php. Paste the code you copied and click Update FIle. Congratulations. You’ve added a hook to your theme.
Additional plugins and extensions for your checkout page
Here are some additional extensions we recommend you install because it will definitely help you create an amazing checkout experience:
- WooCommerce Checkout Addons: This extension allows a customer to include addons in their order like gift wrapping, for example.
- WooCommerce One Page Checkout: This allows you to make any page a checkout page and makes the shopping process easier because the customer can now choose and buy a product on the same page.
- WooCommerce Social Login: This allows a customer to login with a social media account instead of their email or phone number.
- YITH WooCommerce Order Tracking: This helps manage shipping information easily. It allows your customers to track their purchases.
- YITH Advanced Refund System for WooCommerce: This helps you set up a refund system.
Why should you customise your WooCommerce checkout page?
The main goal of your checkout page is to encourage your customers to buy things from your site and here’s why a custom checkout page does just that:
- Faster for your customers: If you can remove unnecessary fields and make the process of buying faster for your customers, they’re less likely to ditch their cart. The longer the process, the less motivated a customer is to buy anything at all.
- Upsell more products: You can use the checkout page to sell other products that they might be interested in or related products. This is an opportunity for you to show your customers what they knew they needed but didn’t know you sold.
- Make the checkout process feel safe: You can add testimonials and this will help customers feel like they can trust you. You can also be transparent about why you’re asking for certain information.
Best ways to customise your WooCommerce checkout page
- Easily create an account: Make the process of creating an account painless for your customer. Make the time between adding a product to cart and paying for the product as quick as you can. Remove fields that are unnecessary like “Company”. If possible, make it optional.
- Add trust factors: This builds trust within the customer that their money is going to a safe place.
- Add social proof elements: This encourages customers to share their experience with your shop on their social media sites.
- Transparent charges: Don’t have additional charges unnecessarily. Make sure you’re clear about where their money is going. For instance, only add shipping charges in addition to the cost of the product.
- Offer enough checkout options: Strike a balance between adding too many and too few payment options. Use payment gateways that are popular amongst your target audience. We have articles on adding Stripe or PayPal to your WooCommerce page that you can check out.
Final thoughts
The default WooCommerce checkout is basic but customizable. Every aspect of the checkout page can be edited to create an amazing shopping experience for your customers. But, before you make any changes, it’s necessary to backup your site using BlogVault. This gives you insurance for when something goes wrong or if you’ve accidentally made the shopping experience worse. BlogVault not only takes real time backups but the restore process is an absolute piece of cake.
FAQ
What are action hooks?
Action hooks help you add a snippet of code to your core files that affects the way your site functions. WordPress has an overwhelmingly large library of hooks that you can use or you can create your own custom ones.
How do you edit text on WooCommerce Checkout Pages?
You can use your in-built WordPress editor or with a page builder plugin to edit and customise your fonts and text throughout your site. We recommend using a page builder like SeedProd. It’s easy to use and has both a free and paid version.
Where do you add hooks and filters?
You should add hooks and filters to your child theme’s function.php file. Child themes have the same look and feel of your parent theme but allows you to tweak and add code. You can identify your child theme by going to Appearance > Themes and looking for the theme without a feature image.= If you don’t have a child theme, checkout this article on creating one.
Category:
Share it:
You may also like

MalCare Ensures Unmatched Protection Against User Registration Privilege Escalation Vulnerability
Imagine discovering that your WordPress site, which should be secure and under strict control, has suddenly become accessible to unauthorized users who have the same administrative powers as you. This…
MalCare Ensures Proactive Protection Against WP-Members XSS Vulnerability
MalCare continues to protect its customer sites from all kinds of attacks, even the ones exploiting zero-day vulnerabilities. The recent stored cross-site scripting (XSS) vulnerability found in the WP-Members Membership…
Top 9 ManageWP Alternatives To Manage Multiple Sites Easily [Reviewed]
ManageWP is a popular name in the WordPress maintenance plugins market. People love how much you get for a free plan, how easy it is to set up, and how…
How can we help you?
If you’re worried that your website has been hacked, MalCare can help you quickly fix the issue and secure your site to prevent future hacks.

My site is hacked – Help me clean it
Clean your site with MalCare’s AntiVirus solution within minutes. It will remove all malware from your complete site. Guaranteed.

Secure my WordPress Site from hackers
MalCare’s 7-Layer Security Offers Complete Protection for Your Website. 300,000+ Websites Trust MalCare for Total Defence from Attacks.


